Cisco 7841 Manual - Halaman 3

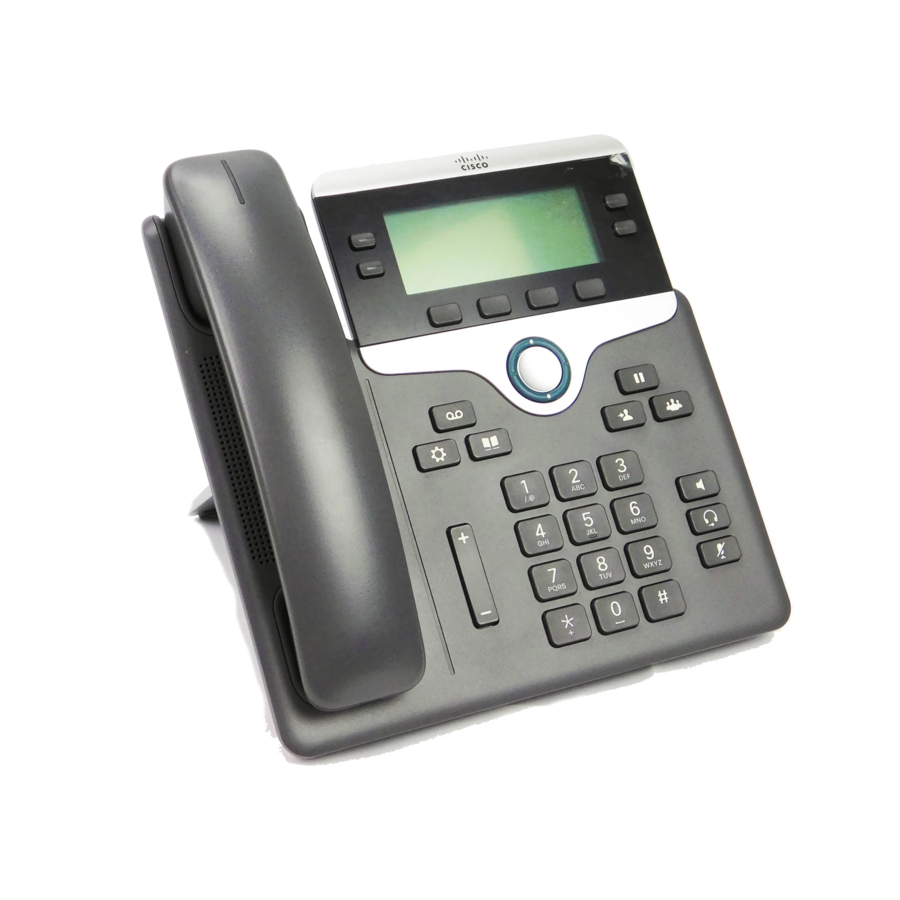
Jelajahi secara online atau unduh pdf Manual untuk Sistem Konferensi Cisco 7841. Cisco 7841 27 halaman. Classroom phone
Juga untuk Cisco 7841: Catatan Rilis (16 halaman), Panduan Memulai Cepat (2 halaman), Panduan Referensi Cepat (4 halaman), Referensi Cepat (4 halaman), Instalasi Cepat & Panduan Pengguna (12 halaman), Panduan Referensi (11 halaman), Panduan Referensi Cepat (7 halaman), Panduan Referensi Cepat (7 halaman), Panduan Pengguna (2 halaman), Panduan Referensi Cepat (2 halaman), Panduan Referensi Cepat (2 halaman), Manual (2 halaman), Panduan Utama Migrasi Firmware (31 halaman), Manual (43 halaman), Panduan Referensi Cepat (4 halaman), Panduan Memulai Cepat (2 halaman), Panduan Instalasi (39 halaman), Menggunakan (4 halaman), Panduan Pengguna Cepat (2 halaman), Manual (7 halaman), Manual (20 halaman), Panduan Fitur (4 halaman), Panduan Konfigurasi Ulang (2 halaman), Panduan Referensi Pengguna (5 halaman), Kartu Referensi Cepat (2 halaman), Panduan Instalasi Cepat (12 halaman), Panduan Memulai Cepat (2 halaman), Panduan Cepat (3 halaman), Kartu Referensi Cepat (2 halaman), Kartu Referensi Cepat (2 halaman), Panduan Memulai Cepat (2 halaman), Panduan Referensi Cepat (3 halaman)

Cisco 7841 Manual
Wall Mounts
Figure 3: Side View of ADA Non-Lockable Wall Mount Kit Installed on Phone

Install the Non-Lockable Wall Mount Kit for 7811

The wall mount kit can be mounted on most surfaces, including concrete, brick, and similar hard surfaces.
To mount the kit on concrete, brick, or similar hard surfaces, you must provide the appropriate screws and
anchors for your wall surface.
Before you begin
You need these tools to install the bracket:
• #1 and #2 Phillips-head screwdrivers
• Level
• Pencil
You must also install an Ethernet jack for the phone in the desired location if an Ethernet jack does not currently
exist. This jack must be wired appropriately for an Ethernet connection. You cannot use a regular phone jack.
Procedure
Step 1
Mount the wall bracket in the desired location. You can install the bracket over an Ethernet jack, or you can
run the Ethernet network cable to a nearby jack.
Note
a) Hold the bracket on the wall and place it so that the arrow on the back of the bracket points up.
b) Use the level to ensure that the bracket is level and use a pencil to mark the screw holes.
c) Using a #2 Phillips-head screwdriver, carefully center the anchor over the pencil mark and press the anchor
into the wall.
d) Screw the anchor clockwise into the wall until it is seated flush.
e) Use the included screws and a #2 Phillips-head screwdriver to attach the bracket to the wall.
If the jack is to be placed behind the phone, the Ethernet jack must be flush to the wall or recessed.
Install the Non-Lockable Wall Mount Kit for 7811
Wall Mounts
3