Cytron SHIELD-ESP-WIFI Panduan Pengguna - Halaman 10
Jelajahi secara online atau unduh pdf Panduan Pengguna untuk Peralatan Perekaman Cytron SHIELD-ESP-WIFI. Cytron SHIELD-ESP-WIFI 17 halaman.
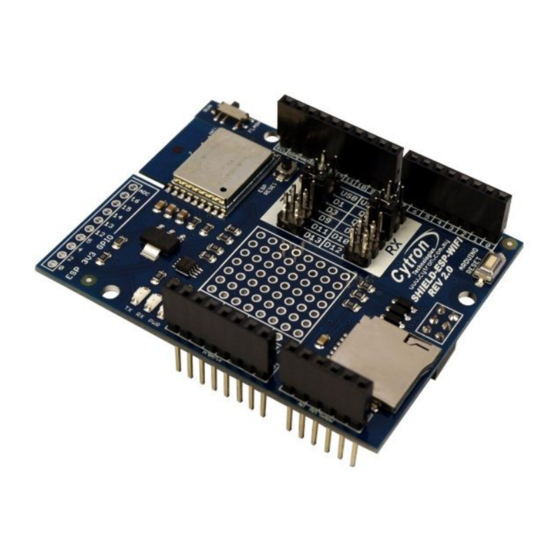
7.0 G ETTING S TARTED
This s ection w ill s how e xamples o f u sing E SPWiFi S hield t ogether w ith A rduino B oard t o
1) perform A T t est - b asic m odule t esting b y s ending A T c ommands
2) create a s imple W iFi s erver
7.1 A T T est
1. Stack ESPWiFi Shield onto compatible Arduino Board. For this example, Arduino
Uno i s u sed.
2. Select U SB for both RX and TX pins.
command.
3. Make s ure t he s lide s witch i s s witched t o R UN m ode.
**Note:
4.
F or AT Test, connect RST pin to GND using jumper wire. (Another
alternative, upload an empty sketch to Arduino main board before stacking
ESPWiFi S hield o nto A rduino b oard.)
5. Connect A rduino b oard t o P C u sing U SB c able.
6. Open A rduino I DE. D etermine w hich C OM p ort A rduino U no i s c onnected t o a nd
configure t he p ort s ettings u nder m enu T ools - > P ort.
7. Open a nd s et u p A rduino S erial M onitor w ith s ettings b elow.
● 9600 B aud
● Both N L & C R
8. Figure b elow s hows s ending " AT" u sing A rduino S erial M onitor. I f t he r esult r eturns
"OK", i t m eans y ou h ave s uccessfully c ommunicate w ith t he E SP8266 m odule o n
ESPWiFi S hield, A T t est i s s uccessful. U ser c an a lso t ry o ut o ther A T c ommands l ike
AT+GMR, e tc.
Created b y C ytron T echnologies S dn. B hd. – A ll R ight R eserved
Product U ser's M anual – E SPWiFi S hield R ev2.0
* *Note: This setting is only for entering AT
ROBOT . H EAD t o T OE
10