Dremel 8300 Manuale di istruzioni originale - Pagina 11
Sfoglia online o scarica il pdf Manuale di istruzioni originale per Utensile elettrico Dremel 8300. Dremel 8300 15.

Fast charging is only possible when the temperature range of
the battery pack is between 0°C and 45°C.
When needed, the internal fan of the charger will turn on to aid
the charging process and speed.
As soon as the battery pack reaches the correct temperature
range, the battery charger will automatically switch to fast
charging.
The battery pack may be used even though the light may still
be blinking. The light may require more time to stop blinking
depending on temperature.
The purpose of the green light is to indicate that the battery
pack is fast-charging. It does not indicate the exact point of full
charge. The light will stop blinking in less time if the battery
pack was not completely discharged.
If the green indicator light is "ON", the battery pack cannot
accept a charge.
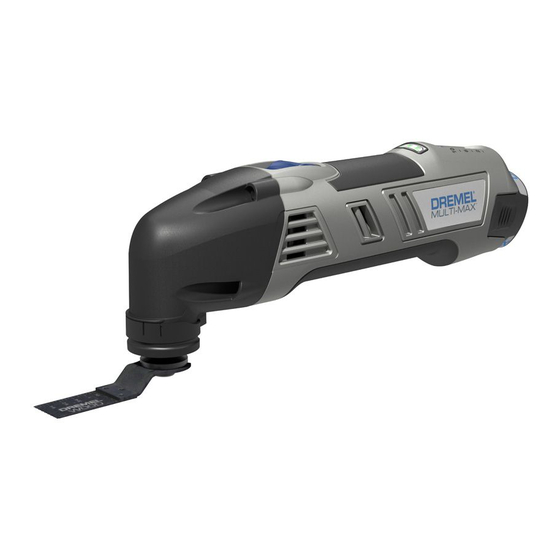
This Dremel Cordless Multi-Max Tool is intended for dry sanding
of surfaces, corners, edges, for scraping, for sawing soft metals,
wood and plastic components, and for grout removal using the
applicable tools and accessories recommended by Dremel.
PICTURE 1
A . On/Off switch
B . Battery level indicator
C . Variable speed slide switch
D . Battery pack
E . Battery release tabs
F . Ventilation openings
G . Clampin screw
H . Blade washer
I . Accessory holder
J . Accessory
INSTALLING AND REMOVING ACCESSORIES
NOTE: Be sure to read the instructions supplied with your Dremel
accessory for further information on its use.
Use only Dremel tested, high performance accessories.
Dremel cutting, scraper blades have a Quick-Fit slot which
allows for faster accessory removal compared with other
conventional oscillating tool systems.
1 . Loosen the clamping screw using the hex key provided
just enough so you can slide the accessory between the
accessory holder and the blade washer (Picture 2).
PICTURE 2
A . Accessory holder
B . Clamping screw
C . Hex key
D . Blade washer
E . Accessory
F . Accessory
G . Washer with bevel up
GENERAL
2 . Clean accessory holder, accessory and the clamping screw
with a clean cloth.
3 . Place the accessory onto the accessory holder making
sure the accessory engages all pins in the holder and the
accessory is flush against the accessory holder.
4 . Securely tighten the clamping screw with the hex provided
(Picture 3).
PICTURE 3
A . Clamping screw
B . Hex key
NOTE: Some accessories, such as scrapers or blades, may be
mounted either straight on the tool, or at an angle to enhance
usability (Picture 4).
PICTURE 4
INSTALLING AND REMOVING SANDING SHEETS
Your backing pad uses hook-and-loop backed accessories,
which firmly grip the backing pad when applied with moderate
pressure.
1 . Align the sanding sheet and press it onto the sanding plate
by hand.
2 . Firmly press the power tool with the sanding sheet against
a flat surface and briefly switch the power tool on. This will
promote good adhesion and helps to prevent premature
wear.
3 . To change, merely peel off the old sanding sheet, remove
dust from the backing pad if necessary, and press the new
sanding sheet in place.
After considerable service the backing pad surface will become
worn, and the backing pad must be replaced when it no longer
offers a firm grip. If you are experiencing premature wear out
of the backing pad facing, decrease the amount of pressure you
are applying during operation of the tool.
For maximum use of abrasive, rotate pad 120 degrees when tip
of abrasive becomes worn.
DUST ExTRACTION
Your tool can be equipped with a dust port with adaptor for dust
extraction (Picture 5). To use this feature, attach the dust port to
the tool (A) and attach vacuum cleaner to the adapter (B).
GETTING STARTED
The first step in learning to use the tool is to get the "feel" of it.
Hold it in your hand and feel its weight and balance (Picture 6).
Depending on the application, you will need to adjust your hand
position to achieve optimum comfort and control.
When holding the tool, do not cover the air vents with your hand.
Blocking the air vents could cause the motor to overheat.
PICTURE 6
11
USE
