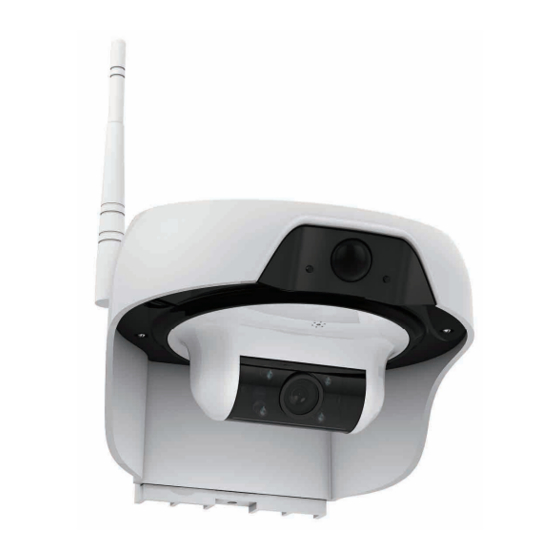
freecam C310 Manuale d'uso - Pagina 2
Sfoglia online o scarica il pdf Manuale d'uso per Telecamera di sicurezza freecam C310. freecam C310 2. Solar powered wifi camera
Anche per freecam C310: Manuale d'uso (2 pagine)
2 Device Installation Instructions
This equipment usually can be installed on the wall or pole (ensure there is
sunlight as much as possible). The mounting wall should have certain
thickness and can afford at least three times of the weight of the equipment.
Please select the mounting position as required.
2.1 Prior to installation of the product, first confirm steady WiFi signals (at
least two grids of signals) in installation position with mobile phone. When
the installation place cannot be covered by WiFi signals, it's allowed to add
WiFi repeater to realize extension. Please install the repeater in the place
between route and camera where there are at least two grids of signals
(Please refer to router and repeater installation and instructions).
2.2 Method of installation on the wall (see Fig. 2.2): tear down the
installation sticker, paste it in the selected position, dig a hole, knock the
expansion bolt into the blank space (please select a sunny place for
installation) .
Router
Repeater
Camera
Fig. 2.1
Fig. 2.2
8
PIR shield sheet Installation:
2.8.1 Paste the PIR shield sheet in the position of camera PIR device
according to Fig. 2.8.1.
2.8.2 Bend the shield sheet of five areas according to Fig. 2.8.2 so as to
shield the areas.
2.8.3 After an area is shielded, the moving objects in such area cannot
trigger and wake up the camera.
A
Camera
A
B
Detection range
C
B
C
D
D
E
Detection
E
Camera
range
Horizontal angle
Vertical angle
Note: The shaded area can change with an
appropriate amount according to the bending
angle of the shield sheet.
Fig. 2.8.1
Fig. 2.8.2
12
2.3 Align the mounting bracket with the installation sticker, and fix the
installation bracket in the position of hole with screw. If you install the
equipment into the wooden wall, the equipment can be fixed by directly
pushing in the screw. Then install the equipment on the bracket, and fix it
with screw (see Fig. 2.3).
2.4 Ribbon type installation method: Such method applies to installation of
the equipment on the pole. First bind the installation bracket onto the pole
with ribbon, and tighten the ribbon as much as possible. Then install the
equipment onto the bracket, and fix it with screw (see Fig. 2.4).
2.5 In selecting installation place, please note:
2.5.1 Please try to select a place with plentiful sunshine for installation.
2.5.2 Avoid installing the equipment in the place where the equipment is
disturbed by the object which moves frequently as much as possible.
180°Adjust
180°Adjust
Adjust 90° up and down
90°Adjust
Tighten the screw
Tighten the screw
Fig. 2.3
Fig. 2.4
9
4
Product Dimension
155
161
100
29.5
8
(Dimension:mm)
5
Accessories
①
②
③
④
Operation instruction of
Quality certificate
C310 product
⑤
⑥
⑦
⑧
Installation sticker × 1
② Mounting base bracket × 1
①
③ Screw set × 1
④ PIR shield sheet × 1
⑤ Charging cable × 1
⑥ Quality certificate×1
⑦ Operation instruction of C310 product× 1
⑧ Ribbon×2
13
2.6 Sunlight distribution of the world (see Fig. 2.6). Please confirm whether
the installation is appropriate according to the sunlight distribution of the
country or region where you are located (you might need to charge the
camera with charger regularly for the country or region where the average
peak sunshine duration is within 1.0-2.9).
Note: Peak sunshine means the maximum solar irradiance which can be
obtained in most places of the earth surface on sunny days – 1000 w/m2.
2.7 The operating time of this camera is related to charging time of
sunlight and the number of times of triggering and waking up. Fig. 2.7
describes and expresses the relation among these three factors. Please
refer to it when using this product.
Fig. 2.6
10
6
Technical Parameters
Item
Specification
Product model
C310 Solar Intelligent WiFi camera
Lens
3.6mm / M12/90 degrees
Video
H.264 encoding
Audio
Support
WiFi
Support IEE802.11b / g / n protocols(4GHz)
Infrared fill light
Support
PIR body induction
Induction distance ≈ 5 meters
If there is no operation within 30 seconds after trigger is
Cycle time
started, enter the sleep state
Network P2P traversal
Support
Battery power indicator
APP support
Maximum output current is [email protected], which will
Standard solar panel
change according to solar intensity and incident angle
Extensible storage space
Extensible storage space: Built-in 16GB Micro SD card
6800mAh, charged with solar energy 20 hours per
Battery and standby
month. Wake up or trigger startup for 10 to 20 times per
day, and can be used for a long time
Dimension
161 × 155 × 108 mm
Net weight
800 g
Waterproof level
IP55
14
The number of wake-up times
Average sunshine time (hour)
Black 0
Red
1
Blue
2
Green 3
80
Note: The shaded area means
40
charging the equipment
artificially according to
20
practical situation.
10
Continuuous working time
5
of camera (day)
30
60
90
120
Fig. 2.7
2.8 Notes:
PIR detection is a high-sensitivity detector which is used for infrared
detection of object motion. Therefore, motion detection can be triggered
by the change of sunshine when cloud layer moves fast outdoors, the
movement of automobile, and the floating of leaves caused by wind.
If user discovers false alarm frequently , please find
reasons and use "PIR shield sheet" to cover this
interference area. If the shield sheet still not work, you
can select "security" option in APP and turn off the
"motion detection" function in "Protection" option
Notice
until environment return to normal, you can open and
use this function again.
11
7
FreeCam's common problems and solutions
1 Equipment adding failure.
Several causes leading to equipment adding failure:
① Pending time-out error at App equipment adding
Solution: If the WiFi status indicator blinks red over one minute, please
press the reset button for 3-5 seconds till the WiFi status indicator blinks
blue, then confirm if the router signal is favorable and input correct router
password to re-add the equipment.
② A prompt message "Please input the default password, 11111111" on
some Android mobile phone;
Solution: The failure is caused by connection abnormity between mobile
phone and camera hot point; first of all, please access to WiFi setup
interface of mobile phone to connect to the camera (hot point name is
DOG-***) manually, and then return to app; if the failure still exists, please
turn off the mobile phone WiFi and turn it on again. Repeat the
above-mentioned connection method manually to add the equipment
smoothly.
2 Whether C310 solar intelligent WiFi camera can work all the time?
How to deal with power outage while using the equipment?
The equipment can be used for long-term in case of 4-5 days of sun
irradiation charging every month and 10-20 times of triggering actions. If it
displays as low battery:
① Reduce awakening arising from false alarm as far as possible; use PIR
shilding case or turn off motion detecting function to save electric quantity.
② Charge for the camera with a common USB charger indoor or with a
charger.
3 Whether the contents stored at the TF card of the camera can be
reviewed on a PC?
The videos stored in the camera can be reviewed with a mobile phone
with WiFi available or remove TF card to insert to a PC card reader. Use
FreeCam PC client-side to review the record.