C.T.M. HS-745 Libretto di istruzioni - Pagina 11
Sfoglia online o scarica il pdf Libretto di istruzioni per Scooter C.T.M. HS-745. C.T.M. HS-745 17.
- 1. Table of Contents
- 2. Introduction
- 3. Important Precautions
- 4. Electromagnetic Interference and Warnings
- 5. Safety Warning and Instruction Labels
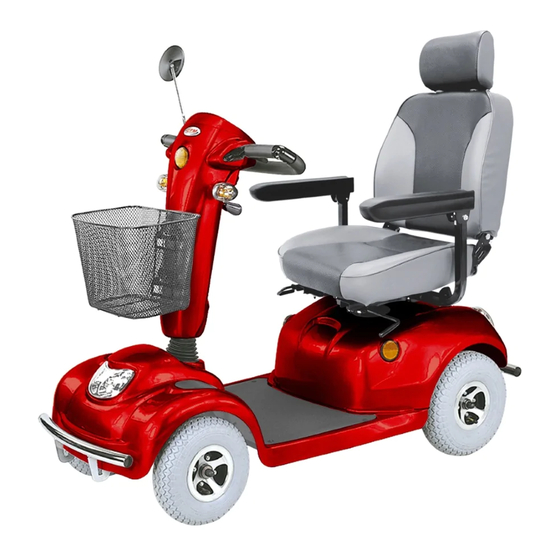
- 6. Identification of Parts
- 7. Operating Your Scooter
- 8. Disassembling Your Scooter
- 9. Assembling Your Scooter
- 10. Charging the Batteries
- 11. Care and Maintenance
- 12. Trouble Shooting
- 13. Other Information
- 14. Technical Specifications
7-Series
DISASSEMBLING YOUR SCOOTER
No tools are necessary to disassemble scooter. You can disassemble scooter for
transportation.
Seat (A) is removable by releasing the Seat Adjusting Lever (B) and then lift off. (See Fig. 4)
Rear Shroud (C) is removable by lifting the Rear Shroud toward the direction as the shaft
showed in the picture (See Fig. 5). And unplug (D) connections inside (See Fig. 6).
(A)
(B)
Figure 4
Unplug Wire Connect (E) of the front and rear nits. *Please make sure the main wires are
tied and placed safely on the frame structure to avoid any hazard. (See Fig. 7)
Remove Battery Fixing Velcro (F). (See Fig. 8)
Batteries are removable by detaching the Battery Power Plugs (G). (See Fig. 9)
Figure 7
Batteries are heavy please beware when removing. * Please do not touch the positive
plate and the negative plate of the batteries with any metallicity. (See Fig. 10)
Release two Locking Pins (H) to separate front and rear units. (See Fig. 11)
With one hand on rear frame (I) and other on seat piller (J) as hand hold, detach front and
rear sections. (See Fig. 12)
By removing the front basket
(K) and adjusting the tiller
down by using the tiller angle
adjustment (L) you should be
able to place all parts in the
trunk and part of the rear seat
(See Fig. 13).
Figure 5
(E)
(F)
Figure 8
Figure 10
(I)
Figure 12
C
Figure 6
Figure 9
(K)
(J)
Figure 13
9
Instruction Booklet
(D)
(G)
(H)
Figure 11
(L)