- ページ 5
試験装置 Amprobe GROUND PROBE GP-1のPDF ユーザーマニュアルをオンラインで閲覧またはダウンロードできます。Amprobe GROUND PROBE GP-1 20 ページ。

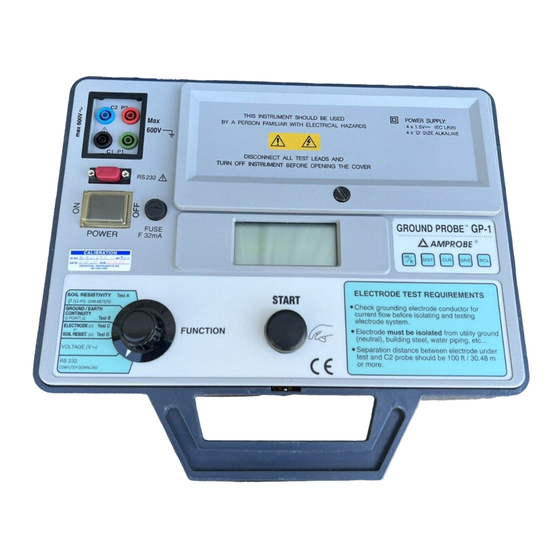
Memory Storage Control
METER/
FEET
SELECTOR
button
DISTANCE
SELECTOR
button
SAVE all test results, excluding voltage, can be saved into memory by pressing the
SAVE button. Each time the SAVE button is pressed, the next consecutive memory
location is displayed and the information is saved to that location.
The RECALL button works in conjunction with the function switch. When the RCL
button is pressed, "mem" and the last memory location will be displayed, followed
by the value, in that location for the test designated by the function switch.
Continuing to press the RCL button will allow the prior measurements and locations
to be displayed.
The CLEAR button has three functions:
1) To clear past memory location (before any other button was pressed or
function changed after saving). After the SAVE button has been pressed, press
the CLEAR button to clear the last memory location. After pressing the CLEAR
button, the cleared memory location will be displayed followed by clr.
2) To CLEAR all memory locations. With the function switch in Test A, B, C,
or D, press the CLEAR button to clear all memory locations. After the CLEAR
button is pressed, clr will flash and "mem" will be displayed. Press the CLEAR
button a second time to conclude memory clearing function. clr will be
displayed for approximately 5 seconds, followed by the three dashes.
3) To clear all memory locations and reset two point calibration. With unit
OFF, press and hold the CLEAR button, then turn the unit ON. ES will be
displayed followed by the three dashes. All memory locations will be cleared.
If a two point (Test B) is to be performed, the unit must be calibrated (nulled)
prior to the test.
To verify that all memory locations have been cleared, switch the function
switch to Test A, then press the RCL button. no mem will be displayed followed
by three dashes. Repeat for Test B, C and D.
CLEAR
button
SAVE
button
View of Control Panel
RECALL
button
Page 5
