- ページ 8
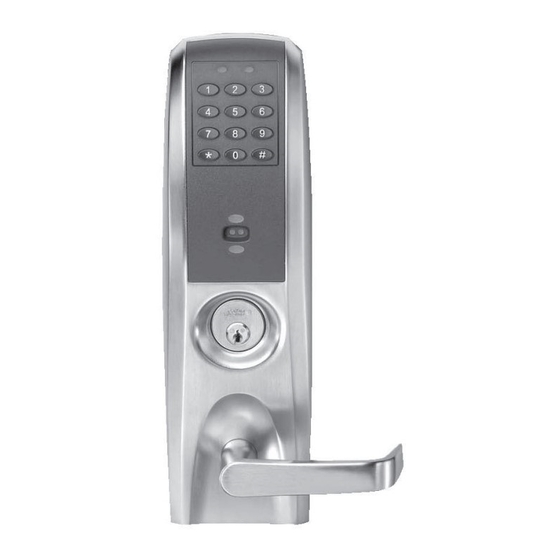
ロックス Corbin Russwin Access 800のPDF 取付説明書をオンラインで閲覧またはダウンロードできます。Corbin Russwin Access 800 16 ページ。 Cl33800 tcac2 series cylindrical lockset
Corbin Russwin Access 800 にも: 取付説明書 (17 ページ), プログラミング指導 (16 ページ)
8
Inside Escutcheon installation and Electrical connections
1. Remove black battery cover from the escutcheon with High Security T20 Torx bit provided.
2. Connect ground wire to terminal, connect keypad ribbon cable to controller, and connect lock
body motor harness to motor connector.
3. Feed all excess wire through inside door hole and/into outside escutcheon cavity, being carefu l
not to pinch wires.
NOTE: Connectors go on only one way, do not offset connector and be sure they are
completely seated.
4. Insert 2 #10 x 24 screws through top and bottom of inside escutcheon (use painted screw on top)
and thread into outside escutcheon. Straighten escutcheons and tighten securely, being careful
to avoid pinching wires.
5. Slide the Inside Lever onto the tube.
NOTE: For RF Technology versions refer to Section 5 to install through-bolt screws.
C A U T I O N
DOOR MUST REMAIN OPEN
DURING INSTALLATION.
USE DOOR STOP.
Locate (2) oval head screws
and insert through the
Escutcheon into the outside
Escutcheon. Tighten firmly.
*Use screw with painted
white head in top Hole.
Failure to do this will
result in damage to
electronics.
# 10 x 24 oval
head screw
# 10 x 24 oval
head screw
Installation Instructions
Motor connector
Lockbody harness
Gasket
(optional)
7
Keypad ribbon
cable
Remote Power
Connector
(M35 Remote Power
Wiring Harness also
available as part
No. 793F069)
1
Ground Terminal
Red & Black wires
Keypad ribbon
cable
Ground wire
Lockbody harness
Inside
of door