- ページ 4
コントロールユニット GARAN EWS-102のPDF システム設定をオンラインで閲覧またはダウンロードできます。GARAN EWS-102 4 ページ。
GARAN EWS-102 にも: システム設定 (4 ページ), キャリブレーションとセットアップ (8 ページ), 補足情報 (2 ページ), システム設定 (4 ページ)
3 EWS-102 Setup and Calibration Garan4.pdf 1 17/05/2016 14:17:36
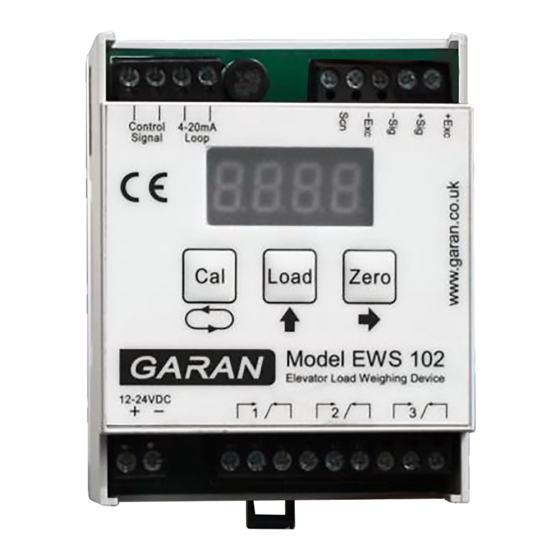
EWS-102 CONTROL UNIT
Selectt he first menu item.
C
M
Y
CM
MY
CY
CMY
K
Rev 2.1 subject to alteration
TEST & ANALOG OUTPUT FINE TUNE
To begin the test and loop calibration procedure, press the
button (unit beeps), hold itf or about a second and then release it
(unit beeps again).
All LCD segments are displayed so you can check thatt hey are functioning.
Relay 3 is turned on
Relay 2 is turned on
Relay 1 is turned on
Relay 1 is turned off
Relay 2 is turned off
Relay 3 is turned off
This is shown on the Loop model only. The Standard model exits test mode att his point.
This is used to fine tune the current loop output, which is proportional to the elevator
load including any attached chain. The factory settings are sufficiently accurate for most
applications buti t may be necessary to fine tune them by connecting a power supply and
multimeter in series with the 4-20mA output terminals and adjusting the 4mA (empty) and
20mA output (capacity) values. Iti sn't necessary to monitor the sensor for this operation.
The values shown on the EWS 102 display during fine tuning are for guidance only.
After 1 second, the display will show '4' representing the 4mA output. At this point,
the meter should measure 4mA exactly. If necessary, press to enable fine tuning
or press to move to the 20mA setting. To adjust the 4mA output, use the
buttons to edit the displayed 3-digit value. Once adjusted, save it by pressing
The meter should now measure 20mA exactly. If necessary, press to enable fine
tuning or press to exit test mode. To adjust the 20mA output, use the
buttons to edit the displayed 4-digit value. Once adjusted, save it by pressing
NOTE: If you wish to fine tune the 4-20mA
output, you need to have a suitable
multimeter at hand.
and
.
and
.
www.garan.co.uk