- ページ 7
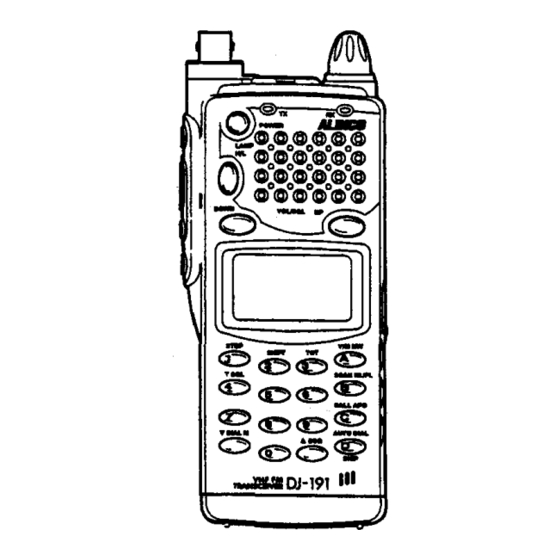
トランシーバー Alinco DJ-191のPDF 取扱説明書をオンラインで閲覧またはダウンロードできます。Alinco DJ-191 18 ページ。 Cert communications team procedures
Alinco DJ-191 にも: 取扱説明書 (18 ページ), クイック・リファレンス (3 ページ), クイック・リファレンス (4 ページ)

III
,
M
I
,usnn
'""1
,fJfJ
CALL CHANNEL
r
L
,usnn
,...,
,fJU
8
6-3
Programming
MEMORY MODE
I
I
Pressthe
~keyto
display the "M" icon
above the frequency
segment of the LCD.
Pressing the same
key again will bring back the VFO mode
(the "M" icon disappears).
MEMORY SCROLL
Enter the MEMORY MODE, rotate the
Main Tuning Dial.
MEMORY WRITE
1. Enter the MEMORY MODE.
2. Rotate the Main Tuning Dial to select
the desired memory channel to
program.
3. Enter the VFO MODE. Set the fre-
quency, tone and shift accordingly.
4. Press and hold the
II
key, then press
the
~
key to store the information
into the memory channel. (Stored
information: Frequency, Offset, Shift
direction, CTCSS setting, CTCSS
frequency, Power H/L, DSQ setting,
DSQ code, Skip, Battery Save setting.)
5. A high tone beep will sound indicating
that the programming is completed
successfully.
6. Memorized items in a channel may
be temporarily changed while you stay
on that channel, but the written infor-
mation remains as originally program-
med. The original items will be called
if you change the memory elsewhere
(or to VFO) then come back to the mem-
ory channel, unless re-programmed
with
II
and
~
keys.
MEMORY ERASE
1. Enter the MEMORY MODE.
2. Rotate the Main Tuning Dial to select
the memory channel to erase.
3. Press and hold the
II
key, then press
the
~
key to erase the program in-
formation on the memory channel.
4. A high tone beep will sound and the
flashing "M" icon will appear on the
LCD indicating that the memory con-
tent has been erased.
MEMORY SKIP
1. Enter the MEMORY MODE. Rotate
the Main Tuning Dial to the channel
you desire to skip during scanning
operation.
2. Press and hold the
II
key, then press
the @5\ey.
3. The 'i;equency decimal point will
disappear indicating that the mem-
ory channel will be skipped when
scanning.
4. To cancel the MEMORY SKIP, repeat
these steps.
MEMORY CHANNEL DISPLAY MODE
Instead of displaying a frequency, in
memory mode, the corresponding
memory channel number only may be
displayed. In this mode you cannot
entre VFO and you cannot program or re-
program a memory channel unless you
first exit the Memory Channel Display
Mode. To entre this mode, first program
FL or KL (see Section 8-4 Other Func-
tions), and input through keypad
#
631 .
The display turns to Channel Number.
(At least one channel has to be already
programmed when you do this, orelse
.. c h -
E
r "
will appear.) Then cancel
the FL or KL. Where "skip" channels
have been set, the hyphen between'
"c
h "
and the channel number is not displayed.
Repeat the same steps to exit this mode
and get back the frequency display.
Press the
@5
key.
The"
C"
icon will ap-
pear on the top right
of the LCD. Press
~ to come back to
the previous channel.
CALL CHANNEL WRITE
1. Enter the MEMORY MODE.
2. Rotate the Main Tuning Dial to select
the call channel.
3. Enter the VFO MODE. Set the fre-
quency, tone and shift accordingly.
4. Press and hold the
II
key, then press
the
~
key to store the information
into the call channel.
5. A high tone beep will sound indicating
that the programming is completed
successfully.
Note: SCAN,
C€5,
<E:)
keys, and the
Main Tuning Dial are not operata-
ble in the CALL CHANNEL mode.
6-4 Scanning
Transceiver has the timer scan function.
In this operation, scan stops at a busy
channel and resumes after 5 seconds.
VFO(BAND) SCAN
Enter the VFO MODE. Press the
@3"
key, and the frequency decimal point will
start blinking to indicate the scanning
mode.
MEMORY SCAN
Enter the MEMORY MODE, and press
the
@3R
key. (Will not start scanning if
the call channel is indicated.)
SCAN DIRECTION
In the SCAN MODE, rotate the Main
Tuning Dial counter-elockwise to scan
downward and clockwise to scan upward.
STOP SCAN
Press the
@3"
key again, or press the
PTT key.
Note: For those memories programmed
with SKIP (see following section),
they will be passed without receiv-
ing while scanning.
SCAN SKIP
Press and hold the
II
key and press the
@5'
key. Decimal point disappears from
th~
frequency display, and the channel
will be skipped when scanning.
9
