- ページ 2
制御システム Crestron 3 SeriesのPDF クイック・スタート・マニュアルをオンラインで閲覧またはダウンロードできます。Crestron 3 Series 6 ページ。 Automated processors
Crestron 3 Series にも: クイック・スタート・マニュアル (2 ページ), クイックスタート (2 ページ), マニュアルより (2 ページ), マニュアルより (2 ページ), クイックマニュアル (2 ページ), クイック・スタート・マニュアル (2 ページ), クイック・スタート・マニュアル (8 ページ), 操作マニュアル (20 ページ)
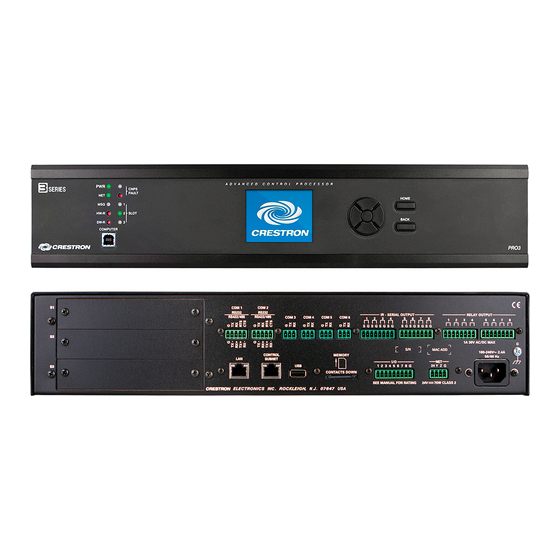
RMC3
3-Series® Room Media Controller
5. (Optional) Secure the extender to the bracket using the two included
6-32 3/8 in. screws as shown in the following illustration.
DIN Rail Mounting
1. Detach the RMC3 from the mounting bracket by pulling the left and
right flanges of the bracket outward to release the tabs that hold the
RMC3 in place.
2. Pull the DIN rail release tab downward using a flat-head screwdriver.
3. Position the DIN rail mounting tabs (located on the rear of the
bracket) over the top edge of the DIN rail.
4. Push the DIN rail release tab upward to lock the mounting bracket
onto the rail.
5. Align the slots on the bottom of the RMC3 with the tabs on the
mounting bracket.
6. Press the RMC3 into the bracket until it snaps into place.
NOTE: Do not use the included screws to secure the bracket to the
bottom of the RMC3 when mounting into a DIN rail, as it will then not
be possible to remove the RMC3 from the DIN rail.
Quick Start
2