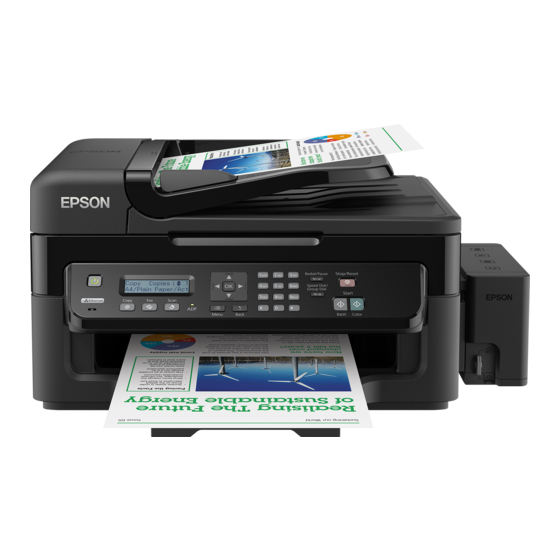
オール・イン・ワン・プリンター Epson L550のPDF ここからスタートをオンラインで閲覧またはダウンロードできます。Epson L550 2 ページ。
Epson L550 にも: ここからスタート (4 ページ), マニュアル (2 ページ)

Start Here
EN
TC
เริ ่ ม ต้ น ที ่ น ี ่
TH
© 2012 Seiko Epson Corporation. All rights reserved.
Printed in XXXXXX
Read This First/
/
อ่ า นตรงนี ้ ก ่ อ น
This product requires careful handling of ink. Ink may splatter when the ink tanks are filled or refilled with ink. If ink gets on your clothes or belongings, it may not
come off. Do not open the initial setup ink bottle package or the refill ink bottle package until you are ready to fill the ink tank. The ink bottle is vacuum packed to
maintain its reliability.
ผลิ ต ภั ณ ฑ์ น ี ้ ต ้ อ งใช้ ค วามระมั ด ระวั ง ในการจั ด การหมึ ก เนื ่ อ งจากหมึ ก อาจกระเด็ น ขณะใส่ ต ลั บ หมึ ก หรื อ เติ ม หมึ ก หมึ ก จะไม่ ส ามารถล้ า งออกได้ หากเลอะบนสิ ่ ง ของหรื อ เสื ้ อ ผ้ า อย่ า เปิ ด
ห่ อ ขวดหมึ ก สำหรั บ การตั ้ ง ค่ า เริ ่ ม ต้ น หรื อ ห่ อ ขวดหมึ ก สำหรั บ เติ ม จนกว่ า ท่ า นพร้ อ มที ่ จ ะติ ด ตั ้ ง ลงในตลั บ หมึ ก ขวดหมึ ก จะถู ก บรรจุ อ ยู ่ ใ นห่ อ สู ญ ญากาศเพื ่ อ รั ก ษาสภาพ
A�
Filling Ink and Turning
On
การเติ ม หมึ ก และการเปิ ด
เครื ่ อ ง
1
Remove all protective materials.
แกะวั ส ดุ ก ั น กระเทื อ นออกทั ้ ง หมด
c
Important; must be observed to avoid damage to your equipment.
ข้ อ มู ล สำคั ญ ; ต้ อ งระวั ง เพื ่ อ หลี ก เลี ่ ย งความเสี ย หายต่ อ อุ ป กรณ์
For initial setup
For refilling
สำหรั บ การตั ้ ง ค่ า เริ ่ ม ต้ น
สำหรั บ การเติ ม หมึ ก
B�
C�
Check position.
Unhook.
ตรวจสอบตำแหน่ ง
ปลดออกจากที ่ ย ึ ด
D�
Q
Do not pull the tubes.
อย่ า ดึ ง ท่ อ
Open and remove.
เปิ ด และดึ ง ออก
c
Epson cannot guarantee the quality or reliability of non-genuine ink. The
use of non-genuine ink may cause damage that is not covered by Epson's
warranties.
Epson ไม่ ข อรั บ ประกั น คุ ณ ภาพของหมึ ก ที ่ ไ ม่ ใ ช่ ข องแท้ การใช้ ห มึ ก ที ่ ไ ม่ ใ ช่ ข องแท้ อ าจ
ทำให้ เ ครื ่ อ งเสี ย หาย ซึ ่ ง ไม่ ค รอบคลุ ม อยู ่ ใ นการรั บ ประกั น ของ Epson
F�
Q
Install.
ติ ด ตั ้ ง
Match the ink color with the tank, and then fill with
all of the
ink.
ใส่ ห มึ ก สี ใ ห้ ต รงกั บ ตลั บ แล้ ว เติ ม
หมึ ก ทั ้ ง หมด
I�
J�
Close.
Hook onto.
ปิ ด
ยึ ด กลั บ เข้ า ที ่
c
O
Use the ink bottles that came with your product.
Even if some ink bottles are dented, the quality and quantity of ink are
O
guaranteed, and they can be used safely.
O
O
ใช้ ข วดหมึ ก ที ่ ม าพร้ อ มกั บ เครื ่ อ งนี ้
O
แม้ ว ่ า ขวดหมึ ก บางขวดจะมี ร อยบุ บ แต่ ร ั บ ประกั น ถึ ง คุ ณ ภาพและปริ ม าณของหมึ ก
O
และสามารถใช้ ง านได้ อ ย่ า งปลอดภั ย
E�
c
Install the ink bottle cap tightly;
otherwise ink may leak.
ติ ด ตั ้ ง ฝาปิ ด ของขวดหมึ ก
ให้ แ น่ น สนิ ท
มิ ฉ ะนั ้ น หมึ ก อาจรั ่ ว ได้
Snap off, remove, and then install.
หั ก ออก ถอด แล้ ว ติ ด ตั ้ ง
G�
H�
Install securely.
Repeat steps D to G for each ink
bottle.
ติ ด ตั ้ ง ให้ เ ข้ า ที ่
ทำซ้ ำ ขั ้ น ตอนที ่
ถึ ง
สำหรั บ ขวดหมึ ก
D
G
แต่ ล ะขวด
c
Before printing, be sure to hook the ink tank unit onto the product. Do not lay
the ink tank unit down, or position the unit higher or lower than the product.
ก่ อ นพิ ม พ์ ควรแน่ ใ จว่ า ได้ ย ึ ด ชุ ด ตลั บ หมึ ก กลั บ เข้ า ที ่ ผ ลิ ต ภั ณ ฑ์ แ ล้ ว อย่ า วางตลั บ หมึ ก
นอนลง หรื อ อย่ า ให้ ต ำแหน่ ง ของชุ ด ตลั บ หมึ ก สู ง หรื อ ต่ ำ กว่ า ตั ว ผลิ ต ภั ณ ฑ์
