Aktobis WDH-930EEW 운영 매뉴얼 - 페이지 10
{카테고리_이름} Aktobis WDH-930EEW에 대한 운영 매뉴얼을 온라인으로 검색하거나 PDF를 다운로드하세요. Aktobis WDH-930EEW 16 페이지. Building dryer

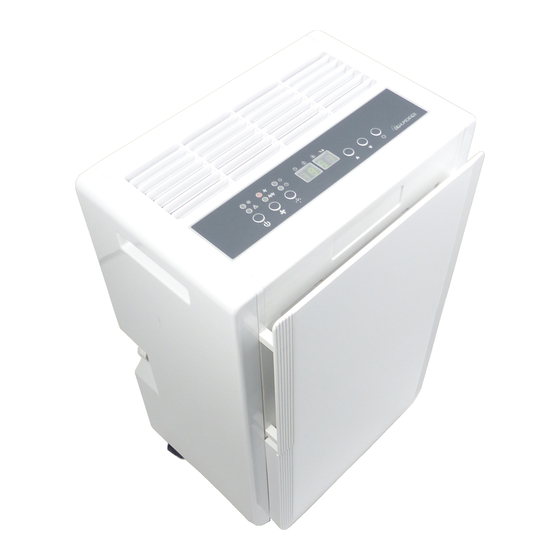
Functional description:
2.)
1.)
1.) On/Off switch
2.) "Tank full" signal light
3.) "Defrost" signal light (unit in defrost mode)
4.) "Air circulation strength" signal lights
5.) "WLAN function" signal light
6.) "Timer activated" signal light
7.) Display field for A) temperature and B) timer (flashing)
Instructions for use:
1. Commissioning
1.1. Mounting the castors:
Remove the four (4) supplied and unassembled castors from the condensation tank.
Then lay the construction dryer on the floor so that the castors can be attached to the
bottom of the unit. Now push the castors into the device in the direction of the arrow
until they lock into place. Now put the construction dryer back in place and wait approx.
30 minutes so that the internal coolant can settle again.
1.2. Insert the mains plug properly into the socket.
1.3. Check that the condensation tank is properly seated in the building dryer. (When using
the dryer for the first time, the "condensation tank full" light may come on. Simply pull the
condensation tank out briefly and then push it back in again and you are ready to go).
1.4. Switch on the unit with the "On/Off switch". Now press the setting button for "Value down".
Now you can set your target humidity with the arrow keys (▼▲) as desired. The target
value of 30% humidity actually corresponds to continuous operation !!!
1.5. Use the air circulation selection button to choose between weak
air circulation.
1.6. Optionally, you can select an automatic operating time between 1-24 hours with the timer key. Press the timer
button and then the setting button (▼▲) repeatedly until you have selected the desired number of hours. After
this timer time has elapsed, the building dryer switches off automatically! If you want to stop the timer before
the set time has elapsed, set it to zero again!
5.)
3.)
4.)
9.)
10.)
Aktobis AG, Borsigstr. 20, D-63110 Rodgau / Germany
6.)
8.)
7.)
8.) Display panel for A) Humidity
and B) Target humidity value (flashing)
9.) Button for selecting the air circulation
10.) Timer button (1-24 hours)
11.) Setting button for "value up" (▲)
12.) Setting button for "value down" (▼)
www.AKTOBIS.de
Email: [email protected]
11.)
12.)
and strong
(strong/weak)
