ASTRO-PHYSICS RAPAS 사용 설명서 - 페이지 6
{카테고리_이름} ASTRO-PHYSICS RAPAS에 대한 사용 설명서을 온라인으로 검색하거나 PDF를 다운로드하세요. ASTRO-PHYSICS RAPAS 6 페이지. Right-angle polar alignment scope

It is not necessary to be super precise (round seconds to nearest minute). The LST can be obtained from your GTO
Keypad. Go to the Main Menu screen and press button "4". The LST appears at the bottom of the screen. Use that LST
time and subtract 2h 48m 54s (Polaris JNOW R.A.) and position Polaris on the RAPAS reticle at the hour angle that is your
answer.
Example: 5h 53m 54s (LST) – 2h 48m 54s (Polaris R.A.) = 3h 5m 0s (Polaris on reticle H.A.)
Practice performing the calculation while you are at home with your computer or smart device and then check your answer
to ensure that you understand the process.
Focusing Procedure
The RAPAS is pre focused before it is shipped. However, it may need to be tweaked when set up for use, depending on
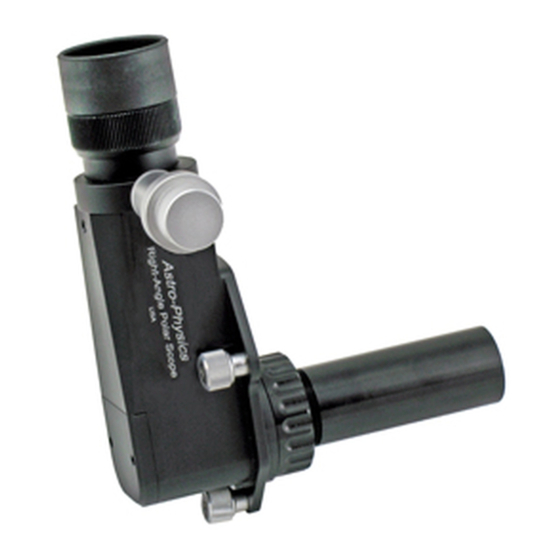
the individual's eye. The following instructions will make focusing an easy and quick process. Reference the illustration
below.
1. Rotate the focusable eyepiece until the reticle lines look sharp to your eye. This step can best be done during daylight
or while looking at an artificial light source. This must be done first before proceeding.
2. Install the RAPAS and look at Polaris or firmly rest the RAPAS on a steady support and look at any bright star to deter-
mine if the star appears to be in sharp focus. If it appears to be sharp, then you are done; if not, please proceed to the
next step.
3. If the star does not appear to be sharp after adjusting the focus in step 1, then you can tweak the infinite focus by ad-
justing the front optical tube that inserts into the mount. Loosen the knurled ring that holds the front optical tube, then
turn the tube, screwing it in or out to focus. Retighten the knurled ring and you are done.
Realigning the Reticle's North-South Orientation
The Right-Angle Polar Alignment Scope is sent to you pre-aligned. However, due to shipping or other eventualities, there
may be times when it loses its alignment. Do not fret, as it is a simple procedure to reposition it.
In the illustration to the right please notice the screw at the back of the scope
ominously labeled "Do Not Loosen Screw". This will be your chance to strike out
against the establishment and defy the rules! Loosening this screw allows the
entire lens/reticle assembly to rotate. Note: some models may have a second
screw in the front.
1. The procedure is simple, but needs to be done at night when you are able to
see Polaris in the reticle.
2. Be sure that your mount is level east-west.
3. Use your azimuth adjuster to move Polaris to the center of the reticle.
4. Slightly loosen the forbidden "Do Not Loosen" screw(s) so that the assembly
can be rotated to orient the reticle.
5. Using your altitude adjuster knob, raise and lower the mount so that Polaris moves up and down. The idea is that when
Polaris travels up and down along the line by changing the altitude adjuster only, then the line is oriented exactly north-
south.
6. The "Do Not Loosen" screw(s) can now be tightened and all will be as it once was.
Changing the Illuminator Batteries:
The illuminator ships with two GPA76 button-style batteries pre-installed.
These are 1.5 volt alkaline batteries that can be found under different
manufacturer product numbers through cross reference charts. When
the need arises the batteries can be easily changed by unscrewing the
two halves of the illuminator where the tapered section joins the slender
section. Please see photo at right. The batteries are both inserted into
the narrow section with the negative (-) side towards the eyepiece and the
positive (+) side towards the tapered On/Off switch.
6
Eyepiece - focusable
with reticle
Illuminator - adjustable
brightness
Attachment Thumb
Screws (3)
Optical Tube with
25 mm f/8 lens
12-13-17
