AmpliVox Mity-Vox SW212 사용자 설명서 - 페이지 5
{카테고리_이름} AmpliVox Mity-Vox SW212에 대한 사용자 설명서을 온라인으로 검색하거나 PDF를 다운로드하세요. AmpliVox Mity-Vox SW212 7 페이지. Wireless pa

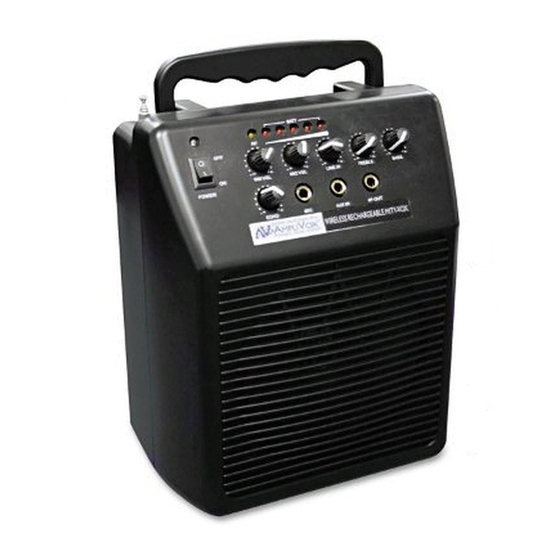
SW212 FEATURES
FRONT PANEL
①
Power Switch with Indicator.
②
Wireless Antenna - For best performance extend to full
length.
③
Wireless Volume Control with Indicator– Adjust output
loudness of wireless microphone. RF indicator will light
when wireless signal is received from microphone.
④
Battery Strength Indicator– Visual indication of SLA
rechargeable battery strength.
⑤
Treble / Bass Control - increases or decreases the lower
frequencies and higher frequencies of your audio inde-
pendently.
⑥
1/4" Output
Jack- Outputs the audio to external devices
like a recorder or speaker.
⑦
Line / Aux In Jack and Volume Control - Plug-in exter-
nal device like a CD player and control the audio level
with the "LINE IN" Control.
⑧
Wired Microphone Jack and Volume Control - Connect
a wired microphone with a
dio level with the MIC VOL control.
⑨
Echo Control - Adds audio effect (reverberation) to the
microphone output.
OPERATING INSTRUCTIONS
The SW212 is unique in the fact that it designed to operate using either the built-in SLA rechargeable battery or the 8 "D"
cell batteries.
Please note that when the 8 "D" cell batteries are installed, the unit will operate off the "D" cell batteries and not
the SLA rechargeable battery.
Before switching the unit on, adjust the MASTER VOLUME, TREBLE, BASS, and ECHO control to minimum, then
turn unit on. Adjust levels accordingly.
If feedback occurs, turn down the TREBLE tone control. If feedback still exists, turn MASTER VOLUME down.
If volume is getting lower, receiving distance is shortened or sound is not normal, change/charge the batteries.
The WIRELESS MICROPHONE and WIRED MICROPHONE can be used together.
AUX IN can be used to connect a portable radio, CD player, MP3 or any other audio source.
AF-OUT can connect with a recorder, or plug into a house system.
When not using the system, remember to turn off the power on the microphone and switch off the amplifier to avoid
wasting power.
Do not mix old and new batteries together. Always change all of the 8 batteries at the same time.
Remove the 8 - "D" cell batteries when the amplifier will not be used for long periods of time. They can leak and dam-
age the unit. Our warranty does not cover damage caused by leaking batteries.
NOTE: The orange sticker with a number that is attached to the; SW212, Wireless Handheld Microphone and the Wire-
less Transmitter Bodypack refers to the wireless frequency. All three stickers must have the same number for the wireless
to operate correctly.
1/4" plug and control the au-
BACK PANEL
⑩
Battery Compartment - Insert 8 "D" cell size batteries
into the compartment. Follow symbols in compartment.
Flat side of battery always goes against spring.
⑪
Charge Indicators - "Charge 1" will light when a 9V
battery is in the charging compartment "Charge 2" will
light when main SLA battery is being charged.
⑫
DC Input - The voltage should be 12V-15V
⑬
AC Input - Insert supplied AC cord into jack marked
"AC IN".
⑭
FUSE - If the unit does not turn on and the SLA battery
is fully charged, you may have a blown fuse. Unscrew
fuse cap and check. If blown, replace with 5A fuse.
⑮
Extension Speaker RCA Output Jack - Connect an
external speaker using a RCA cable.
⑮
9V Rechargeable Battery Compartment - Remove 9V
battery from handheld wireless microphone / bodypack
wireless transmitter and recharge in this compartment.
Follow the + - sign in the battery compartment.
⑮
SLA Rechargeable Battery - Charge 24 hrs before
using.
5
