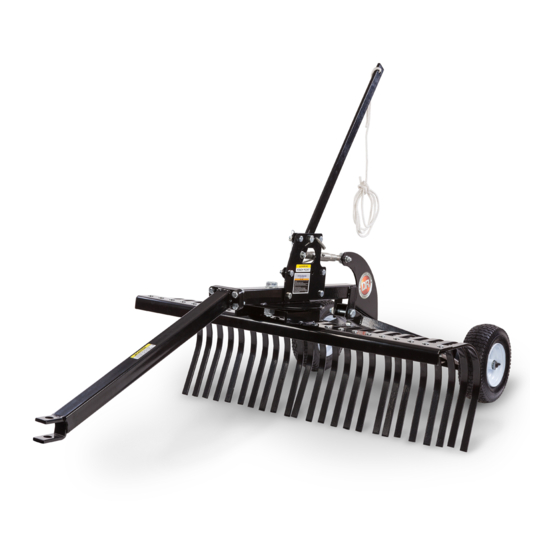
DR 48" LANDSCAPE RAKE 안전 및 작동 지침 매뉴얼 - 페이지 7
{카테고리_이름} DR 48" LANDSCAPE RAKE에 대한 안전 및 작동 지침 매뉴얼을 온라인으로 검색하거나 PDF를 다운로드하세요. DR 48" LANDSCAPE RAKE 16 페이지.

5.
Attach the Lift Handle Support to the left side of Frame using two M12 X
70 Bolts and Locknuts (Figure 5). Tighten the Hardware using two 19mm
Wrenches.
6.
Insert the Lift Handle between the plates on the Lift Handle Support. Insert
a M16 X 45 Bolt through the Lift Handle Support and the Top Hole of the
Lift Handle and secure with a M16 Locknut. Use two 24mm Wrenches to
tighten the hardware. Do not over tighten; the Lift Handle should be able
to rotate freely.
Note: The Hardware for the next step is loosely installed on the Height Adjust Link.
7.
Attach one side of the Height Adjust link to the Lift Handle and attach the
other side to the Height Adjustment Plate using the two Hex Bolts, two
Bushings, two Small Washers, and two Hex Lock Nuts (Figure 6). Tighten
the Hardware using an 18mm Wrench on the bolt and a 19mm Wrench on
the Locknut.
8.
Attach the twenty-four Tines to the bottom of the Tine Frame using the
four Tine Pressure Plates, twenty-four Carriage Bolts and twenty-four M10
Locknuts (Figure 7). Ensure that the Tine Pressure Plates are installed so
that they prevent the tines from rotating when tightened. Tighten the
Hardware using a 17mm Wrench.
Note: If the Tines can rotate after tightening, the Tine Pressure Plates are installed
upside down.
9.
Connect the Tine Assembly to the Frame Assembly using the M24 X 100
Bolt, Washers, and Locknut (Figure 8). Tighten the Hardware using two
36mm Wrenches. Do not over tighten; the Tine Assembly should be able to
rotate freely.
10.
Attach the Nylon Rope to the Lift Handle.
11.
Insert one Hitch Pin in the Lift handle support to lock the Lift Handle in the
Transport position. Insert the other Hitch Pin down through the Frame and
into the Tine Assembly to lock it in place. Secure both Hitch Pins with the
Retaining Pins.
Checking the Tire Pressure
Tools and Supplies Needed:
Tire Pressure Gauge
Air Compressor
1.
Remove the Valve Stem Protective Cap and check the tire pressure with a
Tire Pressure Gauge.
2.
Check what the manufacturers recommended pressure is that is stamped
on the side of the Tire.
3.
If the pressure is too low, add air through the Valve Stem with an air hose.
4.
Replace the Valve Stem Protective Cap when finished.
5.
Repeat for both Wheels.
Do not over inflate the tires. Inflate to the manufacturers recommended
pressure found on the tires.
M16 x 45
Bolt and
Locknut
M12 x 70
Bolts and
Locknuts
Figure 5
Height
Height
Adjust Plate
Adjust Link
Bolts,
Bushings,
Washers
and Locknuts
Figure 6
Tines
Carriage
Bolts and
Locknuts
Figure 7
Nylon
Rope
Tine
Assembly
Frame
Assembly
Figure 8
CONTACT US AT www.DRpower.com
Lift Handle
Lift Handle
Support
Frame
Lift Handle
Tine
Frame
Tines
Pressure
Plates
Hitch Pin and
Retaining Pin
M24 Bolt,
Washers, and
Locknut
7
