ATI Technologies QC-210 매뉴얼 - 페이지 12
{카테고리_이름} ATI Technologies QC-210에 대한 매뉴얼을 온라인으로 검색하거나 PDF를 다운로드하세요. ATI Technologies QC-210 17 페이지. Tool changer

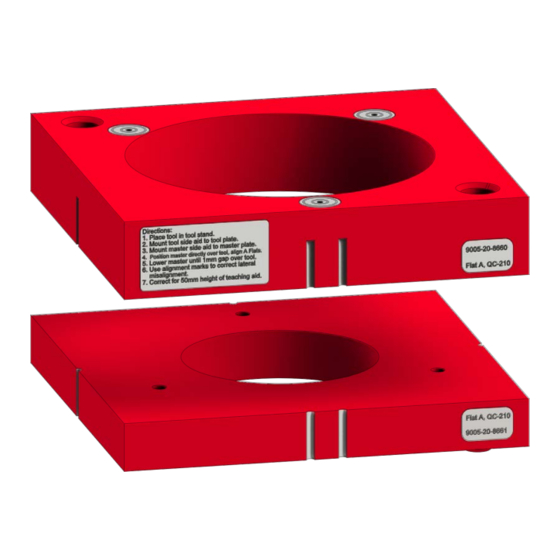
Manual, Robotic Tool Changer Third Generation Teaching Aids
Document #9610-20-3370-02
4. Maintenance
WARNING: Do not perform maintenance or repair(s) on the Tool Changer or modules unless
the Tool is safely supported or placed in the tool stand, all energized circuits (e.g. electrical,
air, water, etc.) are turned off, pressurized connections are purged and power is discharged
from circuits in accordance with the customer's safety practices and policies. Injury or
equipment damage can occur with the Tool not placed and energized circuits on. Place the
Tool in the tool stand, turn off and discharge all energized circuits, purge all pressurized
connections, and verify all circuits are de-energized before performing maintenance or
repair(s) on the Tool Changer or modules.
If the Tool Changer is used in environments susceptible to contamination; for example, welding or deburring
applications, you can minimize exposure by covering idle Tool assemblies. Also limit the Tool Changer Master
plate exposure. ATI offers a full range of dust covers for a variety of applications. To learn more, consult the ATI
website.
Under normal conditions, no special maintenance is necessary. If needed, use a clean rag to thoroughly remove
lubricant and debris from surfaces of the Teaching Aid plates.
5. Troubleshooting and Service Procedures
The following section provides troubleshooting and service information to help diagnose conditions with the
Teaching Aid plates.
WARNING: Do not perform maintenance or repair(s) on the Tool Changer or modules unless
the Tool is safely supported or placed in the tool stand, all energized circuits (e.g. electrical,
air, water, etc.) are turned off, pressurized connections are purged and power is discharged
from circuits in accordance with the customer's safety practices and policies. Injury or
equipment damage can occur with the Tool not placed and energized circuits on. Place the
Tool in the tool stand, turn off and discharge all energized circuits, purge all pressurized
connections, and verify all circuits are de-energized before performing maintenance or
repair(s) on the Tool Changer or modules.
5.1 Troubleshooting Procedures
Refer to
Table 5.1
Symptom
Cause
The surfaces of the
Teaching Aid plate have
The Teaching Aid
debris.
plate is not secure
The fasteners that attach
to the Tool Changer
the magnets to the
plate.
Teaching Aid plate are
loose.
Pinnacle Park • 1031 Goodworth Drive • Apex, NC 27539 USA • Tel: 919.772.0115 • Fax: 919.772.8259 •
for troubleshooting information.
Table 5.1—Troubleshooting
Resolution
Use a clean rag to remove debris and lubrication
from the Teaching Aid plate surfaces (especially the
magnets).
Tighten fasteners with thread locker. Refer to
Section 5.2.1—Replacing Magnets
www.ati-ia.com
12
step 5.
• Email:
