Andonstar A1 사용 설명서 - 페이지 7
{카테고리_이름} Andonstar A1에 대한 사용 설명서을 온라인으로 검색하거나 PDF를 다운로드하세요. Andonstar A1 11 페이지. Usb digital microscope
Andonstar A1에 대해서도 마찬가지입니다: 사용자 소개 매뉴얼 (9 페이지)
A1:
See the Pictureabove for bracket installation.
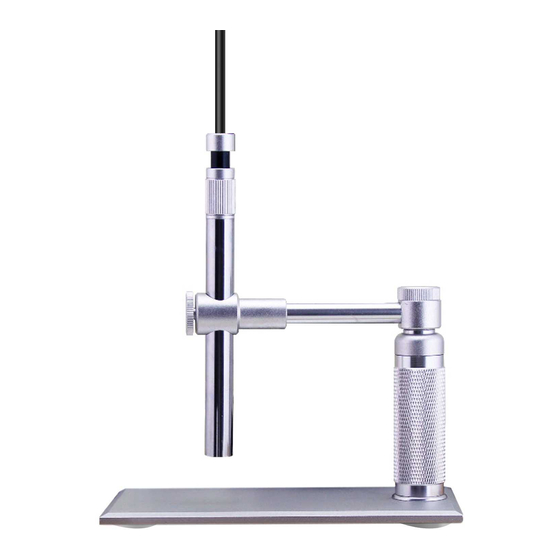
V160:
Install the standing pillar to the screw hole at the corner of the bottom plate. After installing it in place, you can turn
the "vertical scope arm fixing knob" (see Picture1-V160) to adjust different angles according to your needs.
Object distance adjustment:
loosen the scope arm fixing knob, adjust the standing pillar "lifting knob" (see Picture1-V160) to obtain different
object distances, and tighten the "scope arm fixing knob".
A1 Hose:
Take out the screw at the bottom of the hose, install the hose to the bottom plate, and then fix it with a screwdriver.
5. Product configuration instructions
1. 1 digital microscope host
2. 1 each for casing, white earmuffs, sleeve, black earmuffs, and side lens
① Casing: It protects the body when inspecting the bottom of the slit, deep in the pipe, and when the microscope needs
to be placed in other objects.(This accessory is not waterproof)
Black earmuffs: Used to check holes with a diameter smaller than the body diameter (12mm).
Black can block the external stray light, making the center of the picture brighter.
- 6 -