Datavideo RMC-180 사용 설명서 - 페이지 7
{카테고리_이름} Datavideo RMC-180에 대한 사용 설명서을 온라인으로 검색하거나 PDF를 다운로드하세요. Datavideo RMC-180 16 페이지. Ptz camera control unit
Datavideo RMC-180에 대해서도 마찬가지입니다: 사용 설명서 (13 페이지), 사용 설명서 (16 페이지), 사용 설명서 (19 페이지)

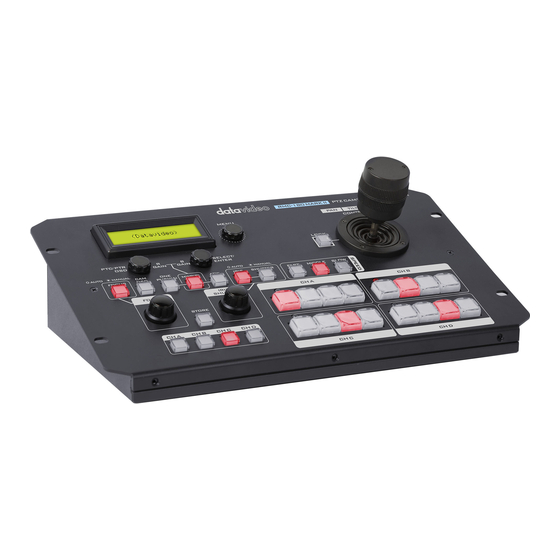
IRIS
To manually control Iris adjustment first press the AUTO/MANUAL
button so it is illuminated or ON.
The IRIS dial can then be turned to achieve the desired exposure.
If the AUTO/MANUAL button is not illuminated or OFF, then the camera
will use its own Auto Iris feature, if it has this function.
Channel A, B, C, D buttons
To control or set up a connected camera first select it using these
buttons. The selected camera button will be illuminated or ON.
PTZ Joystick Control
Before attempting to use the joystick to PAN, TILT or ZOOM a selected
camera first unlock the joystick by pressing the LOCK button.
PAN – Move the joystick horizontally to the left or right to pan the
selected PTZ camera head from left to right or vice versa.
TILT – Move the joystick up or down to tilt the selected camera head
up or down.
ZOOM – Twist the joystick clockwise (to the right) or anti-clockwise (to
the left) to have the selected camera zoom in or out.
Speed
The speed at which the selected camera moves can be chosen by
pressing one of three speed buttons.
STR
Pressing this button enters RMC-180 into STORE MODE. When active
this allows the current camera position to be stored within a chosen
Channel Memory Button.
Channel Memory Buttons
These buttons may be used to store up to four camera positions for
each camera. Each button relates to only one camera and one stored
position. The active button for each camera is illuminated.
Tally Indicator LEDs
Above each set of four memory buttons is a Tally Indicator LED. This
LED feature becomes active when the RMC-180 is connected to the
tally output of a compatible Datavideo Switcher such as the HS-2000 or
HS-2200.
When the HS-2000 or HS-2200 Switcher is sending camera A's video
to the program output then CH A's tally LED will be illuminated on the
RMC-180. Additional equipment and cabling are required.
7
