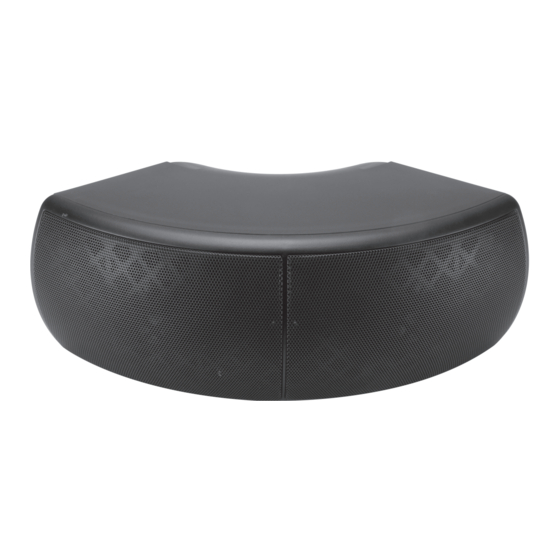
DaytonAudio QS204-4 사용자 설명서 - 페이지 2
{카테고리_이름} DaytonAudio QS204-4에 대한 사용자 설명서을 온라인으로 검색하거나 PDF를 다운로드하세요. DaytonAudio QS204-4 5 페이지. 70v commercial speaker pair

Congratulations on the purchase of your Dayton Audio
quality audio in commercial environments and professional installations while withstanding outdoor environments. They feature a modular "Quadrant-style" design,
weather-resistant ABS construction, high-quality components, and exclusive acoustic design and tuning by Dayton Audio for outstanding performance and value.
Dual 4" polypropylene cone woofers with rubber surround
l
1" Treated silk dome tweeter
l
Versatile multi-angle mounting bracket
l
Integral 70V transformer with selectable taps
l
Suitable for indoor or outdoor installation
l
Please read these instructions completely before you begin your installation.
1)
Choose Speaker Location
Because of their well-behaved off-axis response and excellent dispersion, your new Dayton Audio speakers are less critical to position than most
commercial loudspeakers. Simply place them 5-8 feet apart wherever you desire music for the best possible performance. If you will be installing
your speakers outdoors, select locations facing your listening area that are protected from rain, snow, and out of direct sunlight for extended product
life. Because these speakers feature an open bass-reflex port, avoid mounting them facing upward in an area exposed to weather to prevent collect-
ing standing water.
2)
Choose Speaker Installation
Once you have selected the location for your speakers, you are ready to install them.
CAUTION: Be certain that there are no electrical wires, water pipes, or heating ducts in the planned installation area before you begin drill-
ing. If there is an electrical outlet nearby, turn off the circuit breaker to avoid possible injury.
Note: Your Dayton Audio QS204-4 speakers are compact, but substantial in weight. They should be mounted into solid structure, not drywall. If drywall
mounting is required, use high-strength anchors designed for heavy loads such as light fixtures. To avoid personal injury, please make sure the location
you choose for mounting your speakers can safely support their weight.
Installation Options: Please see the below images for installation examples.
(A) Horizontal Wall Mount
(E) Pendant Mount – Four Speakers Array (Requires Array Bracket Sold Separately)
To mark the proper locations for drilling, place the multi-angle bracket against the mounting surface and choose the holes you want to use for mount-
ing. Then use a pencil to mark the hole locations on the mounting surface prior to drilling. Remove the bracket before drilling the holes, in order to avoid
damage to the bracket. After drilling the mounting holes, install the large half of the bracket firmly to the mounting surface in the desired orientation using
appropriate mounting hardware.
3)
Speaker Connection
Note: Make sure to use the appropriate type of two-conductor speaker cable for your
application. Note that most municipalities require the use of CL2-rated speaker cable for
cable runs through walls and ceilings.
Speaker Wiring: Remove about 8" of the cable jacket to expose the inner conductors. Strip 1/4" of
insulation from each conductor and connect to the speaker terminals. When connecting the wires to
the speakers, be sure to observe proper polarity for the best sound. Most CL2 rated speaker cable
has red and black conductors within the jacket, so connect the red wire to the red speaker terminal and
the black wire to the black speaker terminal. The red (+) terminal on the back of the speaker should
correspond to the red (+) terminal on the amplifier, and same for the black terminal. The speaker
terminals are of the push-type, so push in on each terminal to allow the wire to be inserted. Torquing
the terminal in any way is not necessary and may cause damage
70V Configuration: If you are installing a distributed 70-volt (70V) system, use the selector switch
on the front of the speaker to choose the transformer tap that provides the desired acoustic output.
To access the selector switch, remove the speaker grille by pulling the grille frame directly outward.
When this speaker is used with a 70V system, do not select the "4-Ohm" setting. If you have a stereo
receiver or amplifier, use the 4-ohm setting. Most receivers and amplifiers marked "8 Ohms Minimum"
also support 4-ohm operation at reduced volumes.
CAUTION: When this speaker is used with a 70V system, do not select the "4-Ohm" setting. Selecting the 4-ohm setting may cause damage to
the speaker or amplifier due to the high line voltage and low impedance.
QS204-4 Commercial Speakers. These rugged, all-purpose speakers are designed to deliver reliable, high-
®
(B) Vertical Wall Mount
(C) Horizontal Wall Mount – Two Speakers Array
(2)
(D) Corner Wall Mount – Three Speakers Array
