ALIBI ALI-NS4012R 빠른 설치 매뉴얼
{카테고리_이름} ALIBI ALI-NS4012R에 대한 빠른 설치 매뉴얼을 온라인으로 검색하거나 PDF를 다운로드하세요. ALIBI ALI-NS4012R 5 페이지. 2 mp ip 100 ft ir bullet camera
ALIBI ALI-NS4012R에 대해서도 마찬가지입니다: 빠른 설치 매뉴얼 (4 페이지)
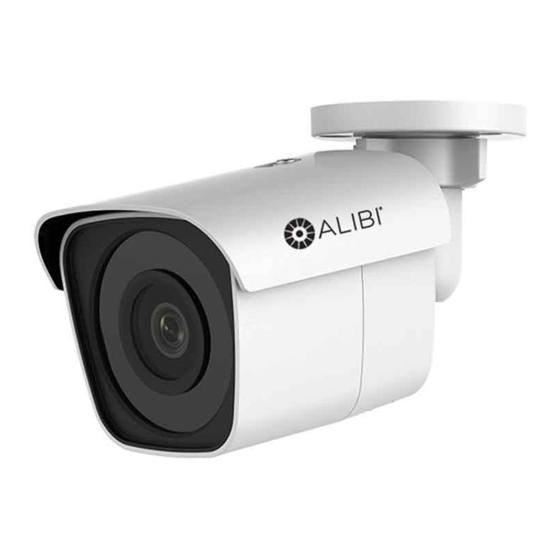
ALI-NS4012R 2 MP IP 100 ft IR
Bullet Camera
Quick Installation Guide
This document guides you through the basic steps to install and configure the ALI-NS4012R IP bullet
camera. This camera features:
1/2.8" 1920 × 1080 pixel @ 30 fps Progressive Scan CMOS sensor
•
2.8 mm lens with 108° horizontal field of view
•
Color: 0.005 Lux @ (F1.2, AGC ON), 0 Lux with IR,
•
Color: 0.009 Lux @ (F1.6, AGC ON), 0 Lux with IR minimum illumination
H.265+ / H.265 / H.264+ / H.264 compression
•
120 dB Wide Dynamic Range
•
3D DNR Digital Noise Reduction
•
100 ft Full Frame IR
•
Supports onboard microSD/SDHC/SDXC card storage up to 128GB (card not included)
•
IP67 rated, −22 °F ~ 140 °F temperature range
•
For more information, refer to these documents - available from your equipment vendor:
ALIBI™ Tools Utility Installation software and User Manual
•
ALIBI™ Witness App for Android Quick Start Guide
•
ALIBI™ IP Camera Firmware Version 5.4 User Manual (or later) provided at:
•
AlibiSecurity.com/resources
Lock nut
Articulated
mounting
bracket
Camera body
Access to microSD slot and Reset button*
Camera drop cables
What's in the box
Your camera includes:
This document
•
Drill template
•
Security L-wrench
•
Waterproof Ethernet fitting
•
Mounting hardware - screws and wall
•
inserts
Step 1.
Install a microSD card (optional)
The camera includes hardware to install it directly to a ceiling (horizontal surface) or wall (vertical
surface). To install the camera:
1.
Remove the maintenance panel cover on the underside of the camera.
2.
Insert a microSD card (see Specifications section for card types) into the card slot. The card
should slide in smoothly. Push the card all the way in until it latches in place.
1
www.observint.com
Mounting base
12 Vdc Power connector with plug
Ethernet connector - PoE capable
Weatherproof
Ethernet Fitting
Mounting hardware
* To restore the camera with its default configuration (including user name, password, IP address, etc.) press and hold the Reset
button for 10 s when the camera is power on or rebooting.
The microSD card may need to be initialized before it can be used to record data. Refer to the ALIBI™
NOTE
IP Camera Firmware User Manual provided at AlibiSecurity.com/resources for instructions to
initialize the card.
3.
Reinstall the cover.
Step 2.
Mount the camera onto a wall or ceiling
For this mounting option, the drop cables can be routed through the mounting surface, or through the
cable channel in the mounting base.
Cable
channel
Mounting
screws (3)
Lens
1.
Determine the best fasteners for securing the camera mounting base to mounting surface. The
mounting hardware provided may be suitable for some surfaces.
2.
Using the template provided or the camera mounting base as a template, mark the locations of
the holes for the mounting screws. Also mark the location of a hole for the camera drop cables
if needed.
3.
Drill holes into the mounting surface as needed.
4.
Route extension cables from the power source and LAN switch (or LAN with PoE) to the
mounting location.
5.
Connect the network LAN and power extension cables to the camera drop cables:
a.
Connect the Ethernet LAN cable to the camera LAN drop cable. Protect the connection
from moisture and other contamination, if necessary. A Weatherproof Ethernet Fitting is
provided. Installation instructions for the fitting are included later in this document.
Network drop cable
from camera
!
WARNING
Underside of camera body
Maintenance panel cover
Not used
microSD card slot
Camera maintenance panel
Weatherproof Ethernet Fitting installed
Failure of the power or Ethernet connector due to moisture or another
contaminant is considered an installation error, which voids the warranty. If
installing this camera in a location such as an overhang, shop, garage, kitchen,
etc. where high humidity or dust is present, seal these connections adequately.
Reset* button
Ground
terminal
Network cable from
router or switch
ALI-NS4012R_CQ
190708