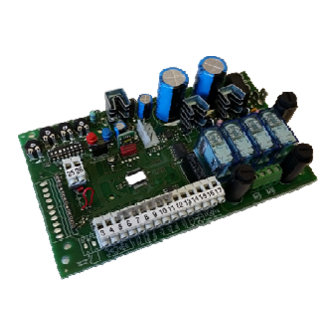
Allmatic AS24 설치 매뉴얼 - 페이지 7
{카테고리_이름} Allmatic AS24에 대한 설치 매뉴얼을 온라인으로 검색하거나 PDF를 다운로드하세요. Allmatic AS24 10 페이지. Control unit for 1-2 motors 24vdc

12. Personalization of pedestrian opening
This procedure must ONLY be carried out by the installer and ONLY during the put in function of the system. For a correct programming, before
carrying out any modification, bring always back the door to the totally close position. If not personalized, pedestrian opening corresponds to the
total opening of first wing. In order to personalize the pedestrian opening proceed as follows:
Dipswitch position
1
Press and release the 1° memorized key or
2
press the RED key (P1)
When the wing gets the desired position, press
and release again on the 1° memorized key or
3
the RED key (P1).
Once the wing is closed, the flashing light
4
emits 4 blinking.
Dipswitch position
5
13. Personalization of the slowing down phase
This procedure must ONLY be carried out by the installer and ONLY during the put in function of the system. For a correct programming, before
carrying out any modification, bring always back the door to the totally closed position. During the learning phase, it is possible to decide where the
wing must begin the slowing down phase. In case of different slowing down between the 2 wings, make sure that the delay of the second wing is
enough to grant the correct functioning of the automation.
Dipswitch position
1
Press and release the 1° memorized
2
key or press the RED key (P1)
If you are using 1 wing gate, pass to the point 4
Once the wing 1 reaches the desired phase shit, press the 2°
3
memorized key or the BLUE key (P2)
Once the wing 1 reaches the starting position of slowing
4
down, press and release again the 1° memorized key or the
RED key (P1).
Once the wing 2 reaches the starting position of slowing
5
down, press and release again the 2° memorized key or the
BLUE key (P2).
Once the gate reaches the position of completely open it re –
6
closes automatically.
Once the wing 2 reaches the starting position of slowing
down, press and release again the 2° memorized key or the
7
BLUE key (P2).
Once the wing 1 reaches the starting position of slowing
8
down, press and release again the 1° memorized key or the
RED key (P1).
PLEASE NOTE: if no slowing down zone are defined, the control unit will load the factory settings
Once the gate reaches the position of completely closed the
9
flashing light emits 4 blinking
Dipswitch position
10
PLEASE NOTE : it is indispensable to carry out a new programming of the torques , after having set the desired torque on slowing
6-1622372
rev.5 04/02/2016
The flashing light starts
to blink lightly
The learning has ended
The control unit is ready to work regularly
The flashing light starts
to blink lightly
The wing 1 begins
to open.
The learning is ended.
The control unit is ready to work regularly.
down, in case the slowing down phase is personalized.
ITA
ENG
FRA
ESP
The wing 1 starts to open.
The wing stops and after a few seconds
the wing automatically closes.
The programming has had a successful conclusion.
The wing 2 begins
to open.
The wing 1 pass to the slowing down in opening.
The wing 2 pass to the slowing down in opening.
The gate re – closes.
The wing 2 pass to the slowing down in closing.
The wing 1 pass to the slowing down in closing.
The learning has had a successful conclusion.
DEU
POR
Pag 7 di 10
