Axis T93F10 다시 칠하기 지침 - 페이지 4
{카테고리_이름} Axis T93F10에 대한 다시 칠하기 지침을 온라인으로 검색하거나 PDF를 다운로드하세요. Axis T93F10 8 페이지. T93f series outdoor housing
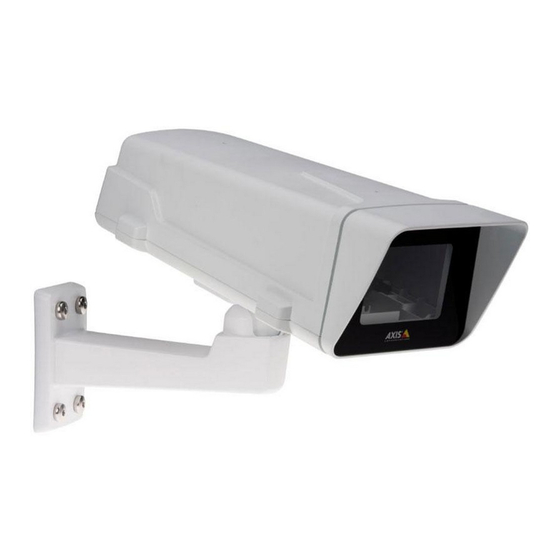
AXIS T93F Housing Series
How to repaint the product
1
Screw
2
Arm
3
Socket
4
Square nut
5
Screw (4x)
6
Ball joint
Preparations
•
If applicable, the equipment must be disassembled according to the instructions in this document.
•
Each part should be stripped from components and crucial parts masked to ensure successful reassembly.
•
All parts to be repainted should be stripped of gaskets, screws, electrical components, connectors and plugs, windows
and domes.
•
All parts to be repainted must be thoroughly cleaned to remove grease, dust or oil.
•
To ensure reassembly and functionality of the product, openings for screws, LED indicators, or microphones must
be masked before painting.
Pretreatment of parts
Depending on the part material and type of paint applied at factory, different pretreatments should be done for the new paint to
adhere as well as possible. For all variants though, proper cleaning to remove oil, grease and dust is strongly recommended.
For more information on the materials used in the product, see its datasheet at www.axis.com
Powder coated parts - Using fine sandpaper, remove the original powder coating down to the stainless steel surface and clean the
parts before painting, or use a primer.
Anodised and chromated parts - Use a primer.
Uncoated stainless steel - No special pretreatment is needed, but make sure that the surface is clean before painting.
Plastic - Use a primer.
4