Olympus IX70 작동 지침
{카테고리_이름} Olympus IX70에 대한 작동 지침을 온라인으로 검색하거나 PDF를 다운로드하세요. Olympus IX70 5 페이지. Inverted fluorescent microscope
Olympus IX70에 대해서도 마찬가지입니다: 운영 매뉴얼 (32 페이지)
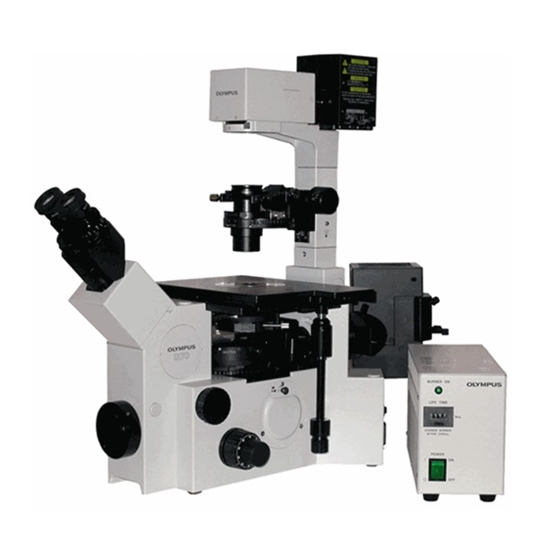
INVERTED FLUORESCENT MICROSCOPE: Olympus IX70
Operation Instructions:
1. Turn on PC:
a.
Press power switch on PC (if not already on)
b. Login with user= smic; pswd = BIOlogy
2. Turn on the microscope:
a.
Switch on the back right corner to turn on transmitted light.
3. For fluorescence: turn on the Mercury lamp.
a. The power supply is located on the shelf to the right of the microscope.
Allow the bulb to warm up for approx. 2 min before beginning imaging.
**Note: it is helpful to first find and focus your specimen using transmitted light,
then switch to fluorescence. Use this method (see below) until you are proficient
with using fluorescence.
4. Load your slide, Petri dish, or other specimen holder onto the stage:
a. Place the area you want to image directly over the hole where the objective
lens is.
5. Select the desired objective lens (usually start with a lower objective 4, 10,
or iOx):
a. Rotate the objective, turret by turning the wheel on the lower LEFT (see Fig.
1).
**Note: it is under the stage!
6. Remove any filters/shutters:
a.
Rotate the black 'wheel' under the shutter on the lower right until it says 0
(see Fig. 2).
b. Make sure slider is in the 'eye and SP' position (see Fig. 3).
7. Find and focus your specimen:
a. Look through the ocular lenses, adjust the interpapillary distance of the
eyepieces, light intensity, and find your specimen using XY stage control wand
on the right hand side.
b. Focus your specimen using the coarse focus knob first, then the fine focus
knob.
c. Go up to a higher magnification (20 or 40x) if necessary.
8. For 60x objective:
a. Make sure you don't ram the objective lens into the bottom of your specimen
(slide, petri dish, etc.). Lower the Objective turret with the coarse focus knob if
you think it's going to touch the sample.
9. Capturing an image:
a. Once you have located a desired area of your slide, you can either take an
image (see Imaging Instructions below) or switch to fluorescence.