Creda 550C 핸드북 - 페이지 2
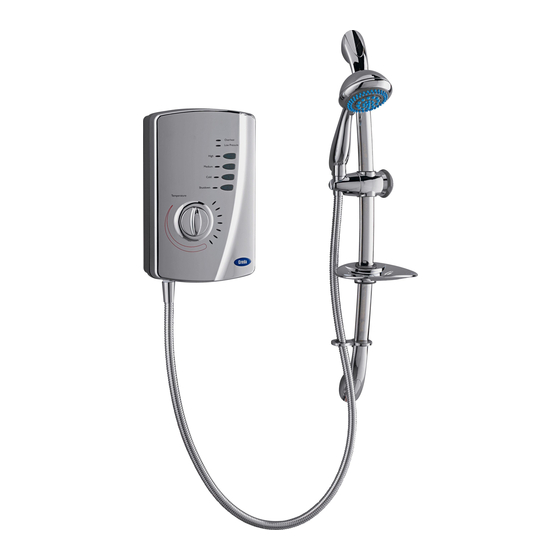
{카테고리_이름} Creda 550C에 대한 핸드북을 온라인으로 검색하거나 PDF를 다운로드하세요. Creda 550C 4 페이지. Shower
Thank you for choosing a quality Creda product manufactured in Peterborough, England
Contents
Information for the user
Page
How to use your Creda Shower . . . . . . . . . . . . . 2
How your Creda Shower Works . . . . . . . . . . . . . 3
What to do if things go wrong . . . . . . . . . . . . . . 4
How to maintain your Creda Shower . . . . . . . .
Additional Accessories . . . . . . . . . . . . . . . . . . .
Information for the installer
Fixing the Shower to the wall . . . . . . . . . . . . . .
Plumbing . . . . . . . . . . . . . . . . . . . . . . . . . . . . . . 6
Electrical . . . . . . . . . . . . . . . . . . . . . . . . . . . . . . 6
Guarantee . . . . . . . . . .. . . . . . . . . . . . . . . . . . . . 8
How to use your Creda Shower
1.
Ensure the electricity and water are turned on to the unit.
2.
Function of buttons: -
Button "A" – Starts shower on "HIGH" giving maximum power.
Button "B" – Starts shower on "MEDIUM" giving an economy setting.
Button "C" – Starts shower on "COLD" giving water with no heating.
Button "D" – "SHUTDOWN" switches the shower off and cools the water automatically.
Your shower has 3 power settings selected by pushing the corresponding button on the front cover.
It can be started by pressing "A", "B" or "C" buttons.
Once pressed, a light will illuminate next to the button confirming that power selection has been made.
3.
Once either "A" (HIGH) or "B" (MEDIUM) button have been pressed, you will need to adjust the temperature of the
water. This is done by rotating knob "E". Turn the knob until 3 lights illuminate on the arc. Allow 20 seconds for the
temperature to settle. If it is too low then turn the knob anti -clockwise, allow another 20 seconds.
Repeat this procedure until the temperature i s to your liking.
4.
If the temperature is too high then turn knob "E" clockwise allowing 20 seconds between adjustments.
The final adjustment can be anywhere on the scale. Summarising:
Clockwise
Lowers temperature (less lights)
Anti-Clockwise
Raises temperature (more lights)
The more lights that are illuminated, the hotter the water coming out of the handset.
The radial lights indicate the position of the flow knob in it's travel
i.e. all lights on – valve fully anti-clockwise (minimum flow). All light off – valve fully clockwise (maximum flow).
See diagram 3 for relationship of flow to temperature.
Once a temperature setting to your liking has been achieved, knob "E" will rarely need adjusting, eg: adjust for
variations of incoming mains water temperature between summer and winter.
5.
When you have finished showering, push button "D" only. The electricity to the elements is then disco nnected and
the adjacent lights will flash. Water will continue to flow for approximately 5 seconds before switching off.
This reduces the temperature of the water in the tank for the next user.
Switch off the electricity at the ceiling switch or local isolator, where fitted.
6.
Your shower is designed to stabilize temperature changes caused by water pressure fluctuations. These can
result from toilets being flushed or taps being turned on and off. When this happens your showering temperature will
be held within a controlled band, provided that the minimum pressure required by the shower is maintained.
7.
Your shower requires a minimum operating pressure of 69kPa (0.7 bar, 10 psi). At pressures above 69kPa
(0.7 bar, 10 psi) it will minimizes temperature fluctuations as detailed above in note 6. If the water pressure falls
below 69kPa (0.7 bar, 10 psi) it is likely that the pressure switc h will turn off the power to the heating elements,
resulting in a cold shower.
The "low pressure" light will illuminate and the "overheat" light may come on to indicate this has happened.
8.
During normal operation if an overheated water temperature is sensed by the shower then the thermal cut -out will
switch off the heating elements. The "overheat" light will illuminate to provide a visual indication that this has taken
place. Water will continue to flow and as the water temperature falls the heating elements will be turned back on.
If the "overheat" light continues to cycle then increase the water flow rate by turning knob "E" clockwise and check
that the handset does not require de-scaling. If the "overheat" light still continues to cycle, then press button "B" to
the "MEDIUM" power setting (knob "E" will need adjusting).
9.
Note that knob "E" IS NOT A TAP and does not turn the water off.
WARNING: DO NOT SWITCH THE SHOWER ON IF YOU SUSPECT IT OF BEING FROZEN.
WAIT UNTIL YOU ARE SURE IT HAS THAWED OUT
4
7
5
2
5.
Fit the front cover back into position making sure that the control knob is
aligned correctly with the flow valve (see diagram 10).
If control knob drive is removed the mask mechanism needs re -aligning.
Turn flow valve fully clockwise, position mask to cover all the lights a nd
then replace drive in position shown in diagram 10.
Check that when the flow valve is turned fully anti -clockwise that all
lights are visible.
When re-fitting the cover, start by locating the outlet "tang" around the
recess for the outlet pipe, and then "roll" the front cover over the control
knob and onto the top of the backplate.
Secure with top and bottom fastening screws.
6.
Operate the shower first without the handset to flush out particles, fit the
handset and then operate the shower as on page 2 and check:
a. That the water gets to a satisfactory temperature.
b. Water flow can be adjusted by knob "E".
c. Power selection does give a change in water temperature and
power lights illuminate.
d. Check again for leaks
e. That the holes in the spray plate are not blocked
7.
DEMONSTRATE OPERATION TO USER
Additional Accessories
White 2 metre Shower Hose
WRAS listed Water Isolating Valve
Curtain and Rail Pack
Curtain and Rail Pack with Non-Slip Mat
Spares
Front Cover Assembly
Handset
PCB / Bracket Assembly
Solenoid
Spare 1.25m long Chrome Shower Hose
Spare parts/accessories can be supplied against any Credit or Debit cards from
Creda Sales Hotline 0844 372 7750.
This appliance is not intended for use by persons (including children and the infirm) with reduced physical,
sensory or mental capabilities, or lack of experience and knowledge, unless they have been given
supervision or instruction concerning use of the appliance by a person responsible for their safety.
Children should be supervised to ensure that they do not play with the appliance.
Catalogue No. 83-593529
Catalogue No. 93-792452
Catalogue No. 83-792802
Catalogue No. 83-792801
Catalogue No. 93-593572
Catalogue No. 93-593571
Catalogue No. 93-590770
Catalogue No. 93-590722
Catalogue No. 93-797641
7