AER AG 82 사용자 설명서 - 페이지 6
{카테고리_이름} AER AG 82에 대한 사용자 설명서을 온라인으로 검색하거나 PDF를 다운로드하세요. AER AG 82 9 페이지. Active monitor

4. Starting up
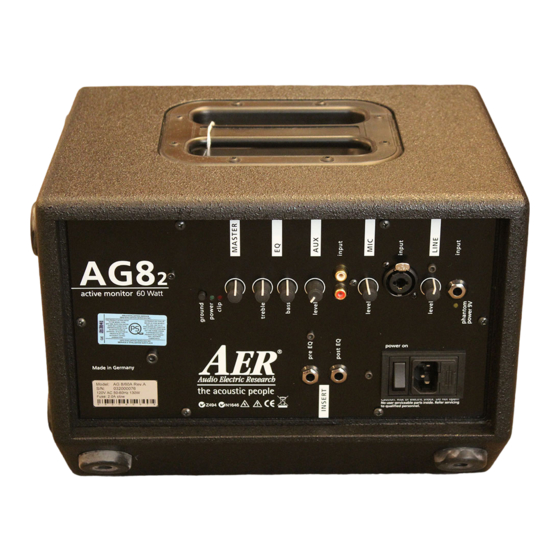
4.1 Cabling and switching on
Before connecting to mains, please ensure that your
local mains voltage is suitable for the voltage of the
Volume and level controls should be in zero
position (over to far left), bass and treble control in
centre position, the ground lift should be switched
off = not pressed.
Connect all cables according to your application
and switch the AG 8
2
power control LED indicates operational readiness.
4.2 Level adjustmen
First ensure that the volume level control is in zero
position (over to far left), so that when you are
setting the sound level, the signal passes through
the electronics only and does not reach the
loudspeaker. Turn the level control of each input
with incoming signal up to a short flicker of the
clip indicator. Thus you make sure that your signal
source (e.g. instrument) provides the input-stage of
the amplifier with the necessary input.
The clip-LED indicates an overload. A short flicker
is of no danger to AER devices. During operation a
short flicker can be accepted, to be on the safe side
you should reduce the level slightly to achieve an
optimal and distortion-free performance.
Finally set the desired overall volume level with the
volume level control.
6
device (e.g. 120V in the
USA, 230V in Europe).
The relevant specs
and safety symbols are
printed on the rear side
of the unit.
active monitor on. The green
t
Note: Level adjustment
By setting the level correctly we mean the signal
level in one or several devices in a signal chain is
neither too high nor too low. This applies equally
to all circuits in a complete circuit design (EQs,
preamps etc.)
Consequently, care must be taken that no part of
the circuit is overloaded or that distortion is unin-
tentionally added to the signal.
We have carefully designed the circuit to achieve
this objective whilst also providing controls for
„manual" intervention.
