Yamaha AX-390 소유자 매뉴얼 - 페이지 9
{카테고리_이름} Yamaha AX-390에 대한 소유자 매뉴얼을 온라인으로 검색하거나 PDF를 다운로드하세요. Yamaha AX-390 14 페이지. Natural sound stereo integrated amplifier
Yamaha AX-390에 대해서도 마찬가지입니다: 서비스 매뉴얼 (37 페이지)
TO RECORD A SOURCE TO TAPE
1
Select the source to be recorded.
AUX
PHONO
* To dub from tape to tape, refer to the "Notes" shown at
right.
* When you select AUX, PHONO, TUNER or CD, make
sure that neither TAPE 1 nor TAPE 2 is also selected.
2
Play the source and then turn the VOLUME control up
to confirm the input source.
3
Begin recording on the tape deck.
4
To monitor the audio signals being recorded, press the
input selector button for the tape deck being used to
make the recording.
TAPE 2
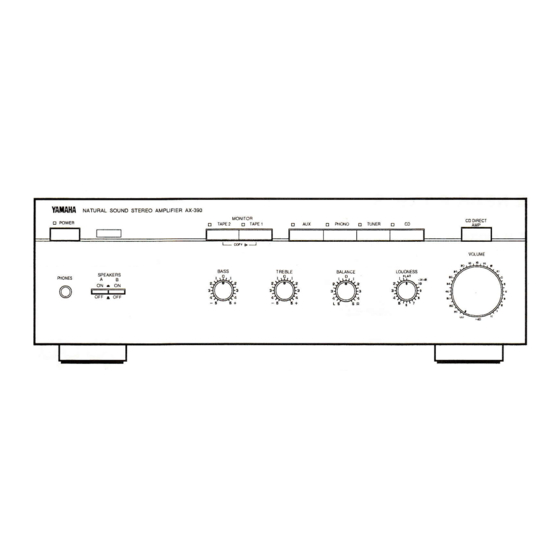
NATURAL SOUND STEREO AMPLIFIER AX-390
POWER
PHONES
SPEAKERS
A
B
ON
ON
OFF
OFF
TUNER
CD
MONITOR
TAPE 1
COPY
1, 4
MONITOR
CD DIRECT
TAPE 2
TAPE 1
AUX
PHONO
TUNER
CD
AMP
COPY
VOLUME
BASS
TREBLE
BALANCE
LOUDNESS
Notes
VOLUME, BASS, TREBLE, BALANCE, LOUDNESS
controls and CD DIRECT AMP switch settings have no
effect on the material being recorded.
To dub from tape to tape, select TAPE 2 by pressing it.
Only the following method of dubbing can be made by using
this unit.
SOURCE
Tape deck connected to
the TAPE 2 terminals.
2
RECORDER
Tape deck connected to
the TAPE 1 terminals.
9