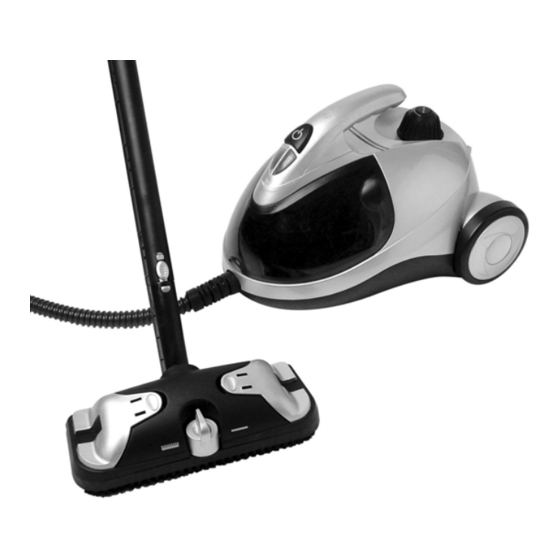
Euro-Pro S3325H Owner's Manual - Page 7
Browse online or download pdf Owner's Manual for Steam Cleaner Euro-Pro S3325H. Euro-Pro S3325H 8 pages. Canister steam cleaner 120v., 60hz., 1500 watts

OPERATING INSTRUCTIONS
CAUTION: This appliance must be
unplugged from the electrical outlet
and allowed to cool down for 15
minutes before attaching or removing any
accessory on the unit.
Using the Nylon Detail Brush
The nylon detail brush attaches to the
accessory adapter and is best for
cleaning the grout between tiles, ceramic
or marble surfaces. Clean porcelain
sinks, tubs, small spots, blinds, small
appliances.
Using the Brass Detail Brush
The large brass brush attaches to the
accessory adaptor and is best for
cleaning ovens, stainless steel sinks and
hard metal surfaces such as cast iron
BBQ's.
Using the Angle Concentrator
The angle concentrator attaches to the
accessory adaptor and is best for
cleaning in tight areas such as around
bathroom fixtures, door tracks or under
toilet bowl rims.
Using the Steam Diffuser
Attach the steam diffuser to the
accessory adaptor. You can use this
attachment with or without the window
squeegee.
Use the steam diffuser with the bonnet for
cleaning upholstery. Use fast, light
strokes, avoid getting the fabric wet. Be
patient with stubborn spots; work on a
spot gently for no more than a minute at a
time, then wait five minutes for the area to
dry and repeat. Use circular movements
or back-and-forth and side-to-side
movements to get all sides of surface
fibers. Finish with a brushing in one
direction that will give the fabric a uniform
appearance. (Fig. 12)
Fig. 12
Caution: Always determine the
color-fastness of any fabric -
especially with reds or blues -
by taking a clean, moist, warm
towel and gently rubbing a small area
as far down on the back or other out
of the way place on the furniture as
possible. If color comes off on the
towel, you may need to have the piece
dry cleaned.
Using the Window Squeegee
To attach the window squeegee to the
steam diffuser,place the two hinges at
the back of the window squeegee (see
illustration) into the two open tabs that
are at the back of the steam diffuser.
Swing the window squeegee up against
the bottom of the steam diffuser until the
locking tab engages. (Fig. 13)
Fig. 13
CAUTION: When cleaning
windows, always avoid any sudden
changes in temperature to prevent
glass breakage or cracks.
To use the window squeegee, work with
the vapor jet down using the top to
bottom movements. To do this without
leaving streaks, use lateral movements
from the top to the bottom of the
surface.
The window squeegee is also perfect
for cleaning mirrors, ceramic tiles and
shower doors.
Using the Parking Position
Please note that your steam cleaner can
be conveniently placed in a space saving
parking position.
When you are finished using the steam
cleaner, slide the hook that is on the rear
of the floor brush into the slot that is
located on the rear of the steam cleaner.
(Fig. 14)
Fig. 14
8
OPERATING INSTRUCTIONS
Filling your Canister Steam Cleaner
with Water
IMPORTANT:
Always insure that the
unit is "UNPLUGGED" from the wall
receptacle and all switches are in the "Off"
position prior to initial filling or re-filling the
water tank. Never attempt to fill this unit
under a water tap, always use the filling
flask and funnel provided. Failure to
follow these steps will cause the water
tank to overfill and may pose an electrical
safety hazard.
RECOMMENDATION
: The use of
distilled/demineralized water is
recommended particularly in areas with
hard water in order to prevent the build-up
of limescale.
Step 1: Make sure that the canister
steam cleaner is NOT plugged
into an electrical wall outlet.
Step 2: Press the safety cap down and
turn counter clockwise until
removed.
Step 3: Add 47 fl. oz (1400 ml) of
water using the filling flask and
funnel provided. (Fig. 1) Do
not overfill. Replace Safety
Cap by turning clockwise -
press down firmly to tighten.
Heating time is approximately
10-12 minutes. Filling the boiler
with hot water will shorten heat
up time.
Step 4: Connect the desired accessory
onto the steam hose.
Step 5: Plug the unit into a standard
120 volt wall receptacle. Press
the On/Off switch. The Heating
light (Red) will light up.
Step 6: Allow approximately 10-12
minutes for water vapor to
reach its working temperature.
When unit is ready for use the
steam ready light will light up.
Step 7: Upon initial use, some water
will come out from the hose
nozzle. This is residual water
that is left over in the hose from
the last use and is normal.
CAUTION: Always point the
nozzle outlet in a safe
direction. Never point in the
direction of yourself, other
people or pets.
Fig. 1
NOTE:
When the steam cleaner has
run out of water, steam output will
cease.
WARNING: Always allow the
unit to cool for 15 minutes
before re-filling. When re-
filling the steam cleaner
while it is still hot, the first
drops of water might bubble
up. Use caution when
opening the safety cap as
cap may become hot during
use and escaping steam can
cause scalding.
Refilling Unit With Water
Step 1: Press the On/Off button on
the unit to the "Off" position.
Step 2: Press the On/Off steam
switch to the "On" position
and wait until no more steam
comes out of the hose.
Step 3: Remove the plug from the
electrical outlet and allow the
unit to cool for approximately
15 minutes before refilling
with water.
Step 4: After the unit has cooled for
15 minutes, carefully press
down on the safety cap and
turn counter clockwise to
loosen. Any residual steam
will be released below the
safety cap if the tank has not
been completely vented.
When the hissing stops and
the last steam has been
released, remove the safety
cap.
5
