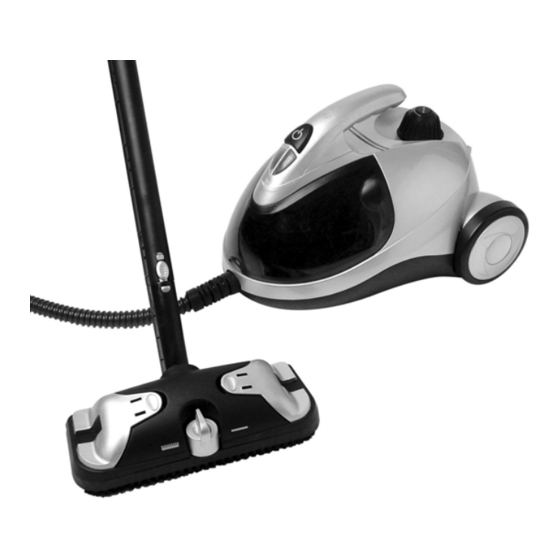
Euro-Pro S3325H Owner's Manual - Page 8
Browse online or download pdf Owner's Manual for Steam Cleaner Euro-Pro S3325H. Euro-Pro S3325H 8 pages. Canister steam cleaner 120v., 60hz., 1500 watts

OPERATING INSTRUCTIONS
Step 5: Slowly pour water using the
filling flask and funnel
provided into the boiler. DO
NOT Fill Under a faucet,
use the filling flask
provided. DO NOT
OVERFILL. Never put more
than 47 ounces (1400 ml)
of water in the unit at one
time.
Step 6: Screw safety cap back on to
the unit by turning clockwise
and press down to tighten
securely. Plug appliance
back into wall outlet. Steam
will start to be produced as
before.
Using Your Steam Cleaner with
Floor Brush
Step 1: Attach the two extension tubes to
each other by pushing
one onto the other
making sure that
they lock into
place.
(Fig. 2)
Fig. 2
Step 2: To attach the floor brush angle
adapter to the floor brush, hold
the floor brush with its bristles
down in your left hand. With the
floor brush angle adapter
pointing downward, insert it into
the hole in the back of the floor
brush, then turn the floor brush
angle adapter 180° counter
clockwise. (Fig. 3)
Fig. 3
:
Step 3
Attach the floor brush with
the angle adapter on to the
extension tubes.
Step 4: Attach the assembled
extension tubes to the nozzle
on the hose hand grip. Make
sure that the locking button
snaps in place.
Step 5: Insert the electrical power
cord into the wall outlet.
Press the On/Off button on
the unit to the "On" position.
The steam cleaner will now
begin to produce steam.
Heating time is approx. 10-
15 minutes with cold water.
Filling the steam generator
with hot water will shorten
the heat up time. When the
steam is ready, the steam
ready light will light up.
Floor Brush
The floor brush is equipped with a
carpet/floor selector. Turn the
carpet/floor selector button to the right
to raise the brush core to steam bare
floors or walls with towel in place.
Turn the carpet/floor selector button to
the left to release the brush core to
steam clean carpets or hard to clean
stains by using the bristles. (Fig. 4)
Fig. 4
Note: The floor brush may be used
with or without the towel.
6
OPERATING INSTRUCTIONS
Attaching a Towel to the Floor
Brush
100% white terry cloth towel can be fitted
on this brush, so as to absorb the dirt and
protect delicate surfaces.
Important:
Please note that bristles may
break through thin towels. To cut and make
your own towels, we recommend that you
use one (1) towel 8" x 17" folded in half or
two (2) towels 4" x 17" laid one on top of
the other be used. This will ensure that the
brush bristles do not break through and
that the towels will be sufficiently absorbent
and retain as much dirt as possible.
Very Important
: When installing the
towels to the floor brush, ensure that the
towels do not cover the front and the back
of the brush. (See Fig. 7)
In order to improve cleaning the floors
with the steam cleaner and leave the floor
drier, observe the following instructions:
1. Lay the towel flat on the floor.
2. Place the floor brush, centered on the
towel. (Fig. 5)
3. Fold the ends of the towel and clamp
ends under the towel clamps on the
floor brush. The above is easily
accomplished if the floor brush is
removed from the extension tubes.
(Fig. 6)
4. Clip the other side of the towel under
the other towel clamp as shown in
Fig. 7. When attaching the towel,
leave some slack. Do not pull tightly
around the brush.
5. Place the floor attachment on the
floor. Wait until the towel is hot, then
push slowly forward to clean the floor.
Most of the floor cleaning should be
done with the slow, forward
movement of the floor attachment.
Fig. 5
Fig. 6
Fig. 7
Important Note:
After using the towel
for some time the towel may become very
HOT. Care should be taken when
changing the towel. Wait until the towel
has cooled before changing it. Squeeze
the towel to take out the accumulated
water. Rinse in warm water or change the
towel completely.
Washing Instructions
Machine wash in warm, soapy water
using a mild detergent. If heavily soiled,
you may want to use bleach in the
washing machine.
Air dry ONLY. Do NOT dry in dryer.
Attaching the Accessory Adapter
To, attach the accessory adapter to the
connection nozzle on the hose hand grip,
push it in as far as it will go until you hear
it click in place. To remove the accessory
adapter, press on the locking button to
release it. (Fig. 8)
Locking Button
Fig. 8
Attaching the Concentrator Nozzle
To, attach the concentrator nozzle to the
accessory adapter, push it in as far as it
will go and turn it to the left to lock in
place. (Fig. 9)
The accessories (brushes, steam diffuser
with or without window squeegee) can
now be attached onto the concentrator
nozzle or it can be used alone. (Fig. 10,
Fig. 11)
Fig. 9
Fig. 10
Fig. 11
7
