AGS TST40 Assembly Instructions Manual - Page 5
Browse online or download pdf Assembly Instructions Manual for Door Opening System AGS TST40. AGS TST40 16 pages.
Also for AGS TST40: Assembly Instructions Manual (12 pages)

Montageanleitung TST40/45 Mauerwerk
Istruzioni d'assemblaggio TST40/45 per strutture massicce
Assembly instruction TST40/45 for solid construction
Manuel d'assemblage TST40/45 pour maçonnerie
Türzarge horizontal und vertikal ausrichten und an allen Befestigungsbügeln verschrauben. Zuerst
DE
wandseitig befestigen danach leibungsseitig hinterfüttern und fixieren (Detail F)
6
Regolare e spessorare il telaio a piombo ed avvitarlo alle
IT
staffe di fissaggio. (dettaglio F)
Adjust the frame horizontally and vertically.
EN
Screw it together with the wall fixing
brackets. At first install it at wall
side and then fix and backfill it at
the reveal side (detail F)
Positionner le châssis
FR
horizontalement et
verticalement.
Fixer avec les étriers de
fixation. D'abord l'installer
du coté de mur et puis fixer
et recouvre dans
l'embrasure (détail F)
Nach Befestigung die Zarge vollvolumig
DE
mit handelsüblichen PU-Montagekleber
hinterfüllen
Dopo il fissaggio riempire gli spazi
IT
rimanenti con una colla poliuretanica
After fixation of the frame backfill it
EN
completely with a commercial
PU-mounting adhesive
7
Surmoussage le cadre avec une colle
FR
de montage PU commerciale après
l'assemblage
Dübel/Tassello/Dowel/Cheville
AGS-systems GmbH/srl • I-39025 Naturns/Naturno BZ • Staben/Stava 47B • Tel./Ph. +39 0473 666376 • Fax +39 0473 420390
St.Nr. MwSt./Cod.Fisc P.IVA/VAT No. IT02509250219 • [email protected] • www. ags-systems.com
Nach Befestigung und
DE
9
Hinterfüllung der Zarge
die Distanzschiene
entfernen
Rimuovere il distanziale
IT
dopo aver fissato e
riempito gli spazi vuoti del
telaio
After fixing and backfilling
EN
of the frame remove the
bottom spreader bar
Retirer le rail
FR
d'écartement après
l'assemblage et la
soumoussage
Detail/Détail/Dettaglio F
Schrauben/Viti/Screws/Clés
Rahmenschrauben/Viti per telai/Frame screws/Clés de cadre
Plastiksteg beim Putznetz
DE
oben an der Zargengehrung
10 cm entfernen, Putznetz
einklicken (Detail G) und an
den Ecken überlappen
(Detail H)
Rimuovere 10 cm del profilo di
IT
plastica della rete d'armatura
ed incastrarla nel telaio.
(dettaglio G) Sovvraporre la rete
negli angoli (dettaglio H)
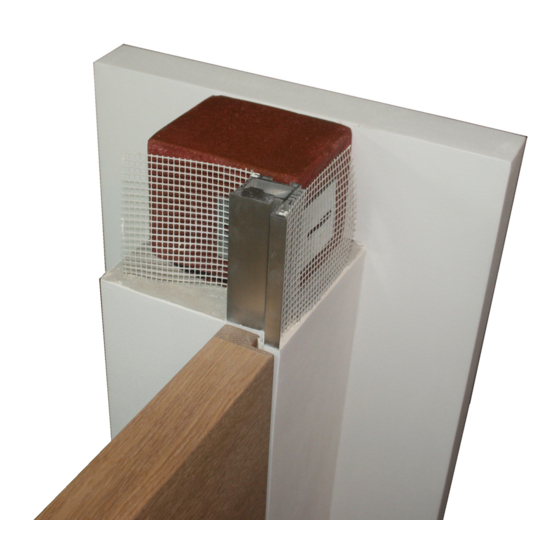
Cut 10 cm of the plastic profile
EN
of the mesh at the mitre spot
and click it in (detail G) and
overlap the mesh on the angles
(detail H)
Détacher 10 cm de profil en
FR
plastique du filet support
8
d'enduit et encliqueter (détail G)
et veiller à ce que le filet se
chevauce dans le coins (détail H)
10
Aufsteckprofil mit mitgelieferten
DE
Kleber auf Zarge aufkleben und
bis zur Weiterverarbeitung mind.
12 Stunden trocknen lassen
(Detail I)
Incollare il profilo aggiuntivo con
IT
l'apposita colla sul telaio e lasciarlo
asciugare per almeno 12 ore
(dettaglio I)
Stick the detachable profile on
EN
the frame using the delivered
mounting adhesive and let them
dry at least 12 hours before
processing the works (detail I)
Coller le profil supplémentaire
FR
sur le châssis avec la colle de
montage ilvrée (détail I)
Page 4 of 11
