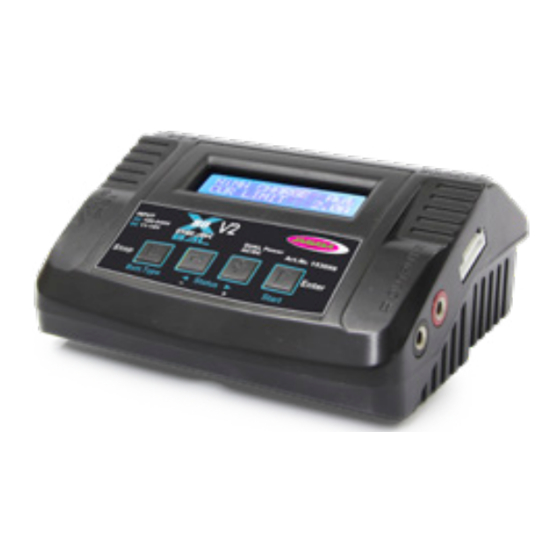
Jamara 153059 Instruction - Page 5
Browse online or download pdf Instruction for Battery Charger Jamara 153059. Jamara 153059 12 pages.
Also for Jamara 153059: Instruction (12 pages), Instruction (12 pages), Instruction (12 pages)
FR - Calcul du chrono Safety
Lors de la charge d'un accu NiCd ou NiMH vous divisez la valeur de la capacité par le courant
de charge, ensuite vous divisez le résultat par le facteur 11,9.
Beispiel
• 1.000 mAh capacité / 1,2 A courant de charge / facteur 11,9 donne 70 min.
comme valeur à régler
• 2.000 mAh capacité / 2,0 A courant de charge / facteur 11,9 donne 84 min.
comme valeur à régler
• 3.300 mAh capacité / 3,3 A courant de charge / facteur 11,9 donne 92 min.
comme valeur à régler
Charge directe des éléments Lithium
Après avoir sélectionné avec la touche 'Batt-Type/ Stop' le programme pour
accus LiXX vous passez en phase de programmation. L'affichage pour un accu
LiPo sera de la manière montré sur l'illustration. A gauche de la première ligne
est indiqué le type d'élément à charger. Dans la deuxième ligne vous trouvez
le courant de charge pouvant aller de 0,1 à 5,0 A ainsi que la tension de l'accu
-
+
et le nombre d'éléments (1 à 6), ces réglages sont à effectuer avec les touches
-
+
Status
Status
'Status '.
Stop / Bat.Type
Start/ Enter > 3 sec.
Lorsque toutes les données auront été correctement renseignées ou si
vous utilisez le même accu que la dernière fois, il suffi t d'appuyer sur la
touche 'Start/Enter' pendant au moins 3 secondes. L'affi chage indiquera
donc les informations que vous trouvez sur l'illustration ci-contre.
Start/
Enter
Après le démarrage du processus, les indications de travail s'affi cheront.
Ce sont les informations les plus importantes comme (1) type et nombre
d'éléments, (2) temps de charge, (3) courant de charge, (4) tension actu-
elle de l'accu et (5) capacité chargée.
Afin d'arrêter un processus de charge, appuyez sur la touche 'Batt-Type/
4
1
Stop'. Néanmoins, l'accu ne sera pas complètement chargé.
2
5
3
Charge d'un accu Lithium avec l'équilibreur
Lors de la charge ou la décharge d'éléments Lithium il est vivement conseillé
d'utiliser un équilibreur. Avec votre chargeur l'équilibreur est déjà intégré, il
suffit de le relier à la prise d'équilibrage de votre accu.
L'affichage est constitué comme indiqué ci-contre. Le processus de program-
mation est identique à la description cidessus. Avec les touches 'Status '
vous pouvez régler le courant de charge et le nombre d'éléments.
-
+
-
+
Status
Status
Stop /
Start/
> 3 sec.
Bat.Type
Enter
Lorsque toutes les données auront été correctement renseignées ou si vous
utilisez le même accu que la dernière fois, il suffit d'appuyer sur la touche
'Start/Enter' pendant au moins 3 secondes.
Start/
L'affichage indiquera donc les informations que vous trouvez sur l'illustration
Enter
ci-contre.
Après le démarrage du processus, les indications de travail s'afficheront.
Ce sont les informations les plus importantes comme (1) type et nombre
d'éléments, (2) temps de charge, (3) courant de charge, (4) tension actuelle de
4
1
l'accu et (5) capacité chargée.
2
5
Afin d'arrêter un processus de charge, appuyez sur la touche 'Batt-Type/Stop'.
3
Néanmoins, l'accu ne sera pas complètement chargé.
GB - Safety Timer Calculations
When charging NiCd or NiMH batteries, divide the battery's rated capacity (mAh) by the
charge current (A). And divide the result by 11.9.
For example:
• 1.000 mAh Capacity / 1,2 A Current / Safety timer setting, divided by 11,9 = 70 minutes
• 2.000 mAh Capacity / 2,0 A Current / Safety timer setting, divided by 11,9 = 84 minutes
• 3.300 mAh Capacity / 3,3 A Current / Safety timer setting, divided by 11,9 = 92 minutes
Charging of lithium battery
The left side of the first line shows the type of battery you choose. The value
on the left of the second line of the charger is current user set. After setting the
current and voltage, press START/ENTER key for more than 3 seconds to start
the process.(charge current: 0.1-5.0A,voltage:1-5V).
This displays the number of cells you set up and the processsor detects. „R"
shows the number of cells detected by the charger and "S" is the number of
cells set by you at the previous screen. If both numbers are identical you can
start charging by press START/ENTER button. If not,press BATT TYPE/STOP
button to go back to previous screen to carefully check the number of cells of
the battery pack before going ahead.
This screen shows the real-time status during charge process.
Press BATT TYPE/STOP key once to stop the charge process.
1
2
3
4
5
GB - Charging Lithium battery in the Balance mode
This function is for balancing the voltage of Lithium-polymer battery cells while
charging. In the balance mode, the battery needs to have a balance lead to
connect to the individual port at the right side of the charger. And you need to
connect the battery's output plug to the output of charger.
Charging in this mode is different from the normal modes, because the built-in
processor monitors voltage of individual cell and control input current fed into
each cell to normalize the voltage.
The value on the left side of the second lines sets the charge current. The
value on the right side of the second lines sets the battery pack's voltage.After
setting current and voltage, press START/ENTER for more than 3 seconds to
start the process.
This displays the number of cells you set up and the processor detects. "R"
shows the number of cells detected by the charger and "S" is the number of
cells set by you at the previous screen. If both numbers are identical you can
start charging by press START/ENTER button. If not, press BATT TYPE/STOP
button to go back to previous screen to carefully
check the number of cells of the battery pack before going ahead.
This screen shows the real-time status during charge process. Press BATT
TYPE/STOP key once to stop the charge process.
1
2
3
4
5
Schéma de branchement
L'illustration ci-contre vous indique la configuration du
branchement de l'équilibreur. Votre chargeur X-Peak 80
BAL est équipé d'un port d'équilibrage avec prise de type
Jamara (XH). Si votre accu ne devait pas être équipé de
ce genre de connecteur, essayez de trouver l'adaptateur
correspondant dans notre gamme de produits.
Number of cell
Charging time
Charging current
Battery voltage
Charged capacity
Number of cell
Charging time
Charging current
Supplied capacity
Current voltage battery
Individual cell connection diagram
The illustration opposite shows the configuration of the
balancer connector. The charger is provided with a balan-
cer port after Jamara connector system (XH). Your battery
should be provided with a different norm, use suitable ad-
apters from our range.
5