Sharp FO-IS115N Quick Setup Manual
Browse online or download pdf Quick Setup Manual for All in One Printer Sharp FO-IS115N. Sharp FO-IS115N 6 pages. Workgroup document communication system
Also for Sharp FO-IS115N: Specifications (2 pages)
FO-IS115N QUICK SETUP GUIDE
For detailed instructions
on setting up and using the FO-IS115N, see the
online guide on the CD-ROM.
To open the guide, insert the CD-ROM in your CD-
ROM drive and click "Browse CD Contents" in the
screen that appears. Double-click the Manual
folder and then the English folder on the CD-ROM,
and then double-click FO-IS115N Online
Manual.pdf.
(Note: Adobe Reader is required to view the
manual. To install Adobe Reader, double-click the
Adobe Reader folder on the CD-ROM and then
double-click AdbeRdrxxx_en_US.exe.)
All company names and product names appearing in this
setup guide are the trademarks of their respective owners.
3
Attach the trays.
6
Install the toner cartridge and drum cartridge.
1. Open the top cover of the machine.
4. Remove the drum cartridge from its
packaging. Insert the cartridge into
the print compartment, sliding it along
the guides.
➊
7. Close the side cover
, the front cover
➋
➌
, and the top cover
.
1
1
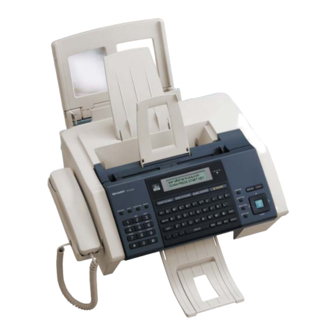
Make sure you have the following items.
If any are missing, contact your dealer.
Handset
Document
exit tray
Insert trays at an
angle and rotate back
Caution!
Do not touch the
inside of the print
compartment after
the machine has
been in operation.
Parts of the print
compartment may
become very hot.
Grasp this
handle to
push the
cartridge in
Caution!
Do not expose the drum to light
for more than several minutes.
Do not touch the green cylinder.
3
Display:
TONER EXCHANGED?
1=NEW, 2=OLD
2
Handset
Paper tray
cord
Phone
Toner
Drum
line cord
cartridge
cartridge
Quick Setup
CD-ROM
Guide (3)
4
Plug the power cord into a
220 - 230 V, grounded AC
outlet.
➊
2. Press the release
and
➋
open the front cover
.
2
1
5. Remove the toner cartridge from its
packaging. Shake the cartridge side
to side four or five times as shown.
8. Press
"NEW" and
to select
START
then press
(This resets the
.
toner cartridge counter.)
2
Received
Document
document
feeder tray
tray
Rapid Key
labels
5
Connect the phone line cord
to the TEL. LINE socket and
a wall socket.
3. Open the side cover.
6. Insert the toner cartridge into the
print compartment, sliding it along
the guides until it clicks into place.
9. Reset the drum cartridge counter:
a. Press
, then
INFO
in the display.
b. Press
, then
COUNTER] appears.
START
c. Press
.
PRINTED IN THAILAND (TCADH4013XHZZ)
English
Connect the handset.
Grasp this handle to
insert the cartridge
until [LIFE] appears
until [CLEAR DRUM