Cisco Cisco 7960 User Manual - Page 14

Browse online or download pdf User Manual for IP Phone Cisco Cisco 7960. Cisco Cisco 7960 14 pages. Ip phone & unity voicemail
Also for Cisco Cisco 7960: User Manual (19 pages), User Manual (12 pages), Customized User Manual (2 pages), Manual (35 pages), User Manual (15 pages), Installation And Configuration Manual (10 pages), User Manual (23 pages), Reference Manual (2 pages), Quick Reference Manual (2 pages), User Manual (28 pages), User Manual (16 pages), Quick User Manual (2 pages), User Manual (9 pages), Reference Manual (4 pages), Quick Start Manual (12 pages), Manual (8 pages), Quick Reference Manual (12 pages), User Manual (20 pages), User Manual (14 pages), Quick Reference Manual (12 pages), Administrator's Manual (10 pages), User Manual (6 pages), Quick User Manual (2 pages), Reference Manual (17 pages), Quick Manual (2 pages), User Manual (3 pages), Quick User Manual (2 pages), Quick Installation Manual (1 pages), Manual (21 pages), User Manual (3 pages), Getting Started (50 pages), Quick Start Manual (6 pages), Quick Start Manual (2 pages), Quick Reference Manual (2 pages), Quick Start Manual (2 pages), Getting Started Manual (27 pages), Reference Manual (3 pages), User Manual (12 pages), User Manual (12 pages)
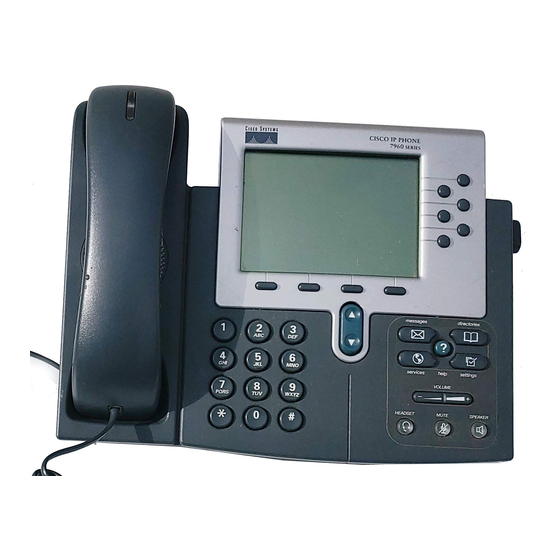
Cisco Cisco 7960 User Manual
Configuring Call Preferences
Press the Back softkey to display the main LCD screen.

Step 9

Configuring Speed Dial Lines

You can configure your phone to automatically dial a number when you press a button by using the Speed
Dial Lines feature.
Perform the following steps to configure the Speed Dial Lines feature.
Press the settings button.
Step 1
Step 2
Press the Scroll key to highlight Call Preferences.
Step 3
Press the Select softkey.
Step 4
Press the Scroll key to highlight Speed Dial Lines from the Call Preferences menu.
Step 5
Press the Select softkey.
Press the Scroll key to highlight Line 3, Line 4, Line 5, or Line 6.
Step 6
Note
Step 7
Press the Edit softkey.
Enter a brief description for the selected speed dial line for New Label.
Step 8
Depending on the letter, you might need to press the number button on the dialing pad one or more times
to scroll through the list of displayed characters until you highlight the correct character. You can press
the <-- softkey to move the cursor one character to the left deleting the last character each time the
softkey is pressed. Pressing the 1, *, or 0 keypad keys allows you to enter some special characters.
Press the Scroll key down arrow to select the New Number line.
Step 9
Press the Number softkey and enter a number for the selected speed dial line.
Step 10
When the New Label and New Number are correct, press the Accept softkey.
Step 11
Note
Repeat
Step 12
Press the Back softkey to display the Call Preferences menu.
Step 13
Press the Back softkey repeatedly to display another menu or until the main LCD screen is displayed.
Step 14
Cisco SIP IP Phone Model 7940/7960 User Guide
3-14
There are four possible speed dial numbers that can be configured on the Cisco IP 7960G and
one possible speed dial number on the Cisco IP 7940G.
The message: Input too long may be displayed if you entered too many characters for a label or
for a number.
Step 6
through
Step 11
if you want to set speed dial for another line.
Chapter 3
Using the Cisco IP Phone 7940/7960
OL-1365-01