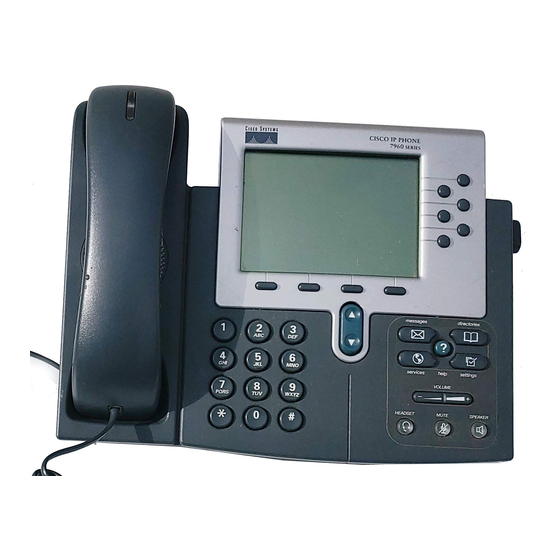
Cisco Cisco 7960 User Manual - Page 10

Browse online or download pdf User Manual for IP Phone Cisco Cisco 7960. Cisco Cisco 7960 16 pages. Ip phone & unity voicemail
Also for Cisco Cisco 7960: User Manual (19 pages), User Manual (12 pages), Customized User Manual (2 pages), Manual (35 pages), User Manual (15 pages), Installation And Configuration Manual (10 pages), User Manual (23 pages), User Manual (14 pages), Reference Manual (2 pages), Quick Reference Manual (2 pages), User Manual (28 pages), Quick User Manual (2 pages), User Manual (9 pages), Reference Manual (4 pages), Quick Start Manual (12 pages), Manual (8 pages), Quick Reference Manual (12 pages), User Manual (20 pages), User Manual (14 pages), Quick Reference Manual (12 pages), Administrator's Manual (10 pages), User Manual (6 pages), Quick User Manual (2 pages), Reference Manual (17 pages), Quick Manual (2 pages), User Manual (3 pages), Quick User Manual (2 pages), Quick Installation Manual (1 pages), Manual (21 pages), User Manual (3 pages), Getting Started (50 pages), Quick Start Manual (6 pages), Quick Start Manual (2 pages), Quick Reference Manual (2 pages), Quick Start Manual (2 pages), Getting Started Manual (27 pages), Reference Manual (3 pages), User Manual (12 pages), User Manual (12 pages)

Cisco Cisco 7960 User Manual

Direct Extension Assignment

Direct Extension Assignment lets you
temporarily reassign a telephone with your
own telephone number and profile.
To Temporarily Assign Your Number
and Profile to a Phone:
From the temporary phone, Dial 588
Enter your complete telephone number +
#. If your phone is configured as an
extension-only (i.e., non-DID) line, enter
your company's complete main
telephone number + * + your extension
number + #.
Enter your phone password followed by
the # key
To Reassign the Original Telephone
Number to the Temporary Phone:
Follow the steps above using the original
telephone number and password that
were assigned to the phone.
To Reassign Your Own Number and
Profile back to Your Own Phone:
Pick up the handset of your phone
After the voice prompt, enter your
complete telephone number followed by
the # key
After the voice prompt, enter your phone
password followed by the # key
Hang up
NOTE: Direct Extension Assignment requires
that the temporary phone is the same model
as your own.

Intercom

Intercom lets you make an announcement
through another person's phone, allowing
them to respond instantly in hands-free mode
using their speakerphone.
To Make an Intercom Call
Press the More softkey
Press the Intcom softkey
Dial the extension of the other party
Their phone will beep and their
speakerphone will be enabled
NOTE: If the other party has Do Not Disturb
enabled, or if they are on the phone, you will
get a busy signal.

Night Mode

Companies often have different call
treatments for daytime versus after-hours
callers. The Night capability can be assigned
to a user's phone to override the standard
day-of-week/time-of-day logic.
The Night feature has three modes:
FeatureTel Cisco 7940/7960 IP Phone User Guide
Normal Night Mode
Calls will be handled using the standard day-
of-week/time-of-day logic. No action is
required by the user when operating in Normal
mode.
Temporary Night Mode
Temporarily overrides the normal day-of-
week/time-of-day logic. It toggles between
day-mode and night-mode. At the change in
the day-of-week/time-of-day schedule, the
system will revert back to Normal operation
To enable Temporary Mode, press the
Night softkey once.
Permanent Night Mode
Overrides the normal day-of-week/time-of day
logic until the user manually changes the state
back to Normal
To enable Permanent Mode, press the
Night softkey twice
To disable Permanent Mode, press the
Night softkey twice again

Adjusting the Phone

To Adjust Display Contrast
Press the Settings button
Press 1 to select Contrast
To Adjust the Contrast Using the Up/
Down Softkeys
Press the OK softkey
Press the Exit softkey
To Adjust Ring Volume
With the handset in the cradle and
speakerphone off, use the Volume
Up/Down buttons.
To Adjust Handset Volume
Remove the handset from the cradle and
use the Volume Up/Down buttons.
Replace the handset.
To Adjust Speakerphone Volume
Press the Speaker button and use the
Volume Up/Down buttons.
Press Speaker button again
To Adjust Ring Type
Press the Settings button
Press 2 to select Ring Type
Highlight the desired ring with the Scroll
Up/Down buttons
Press the Select softkey to select the ring
Press the OK softkey to exit the menu
Page 8