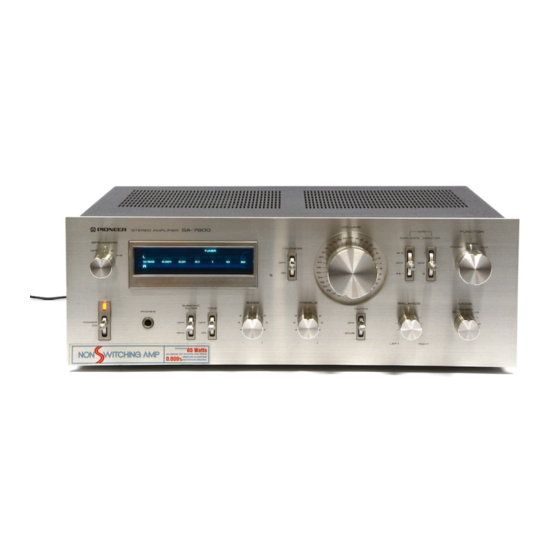
Pioneer SA-7800 Operating Instructions Manual
Browse online or download pdf Operating Instructions Manual for Amplifier Pioneer SA-7800. Pioneer SA-7800 12 pages.
Also for Pioneer SA-7800: Service Manual (30 pages)

STEREO AMPLIFIER
W) PIONEER'
A=7800
_
=:
OPERATING
INSTRUCTIONS
These operating instructions are based on the model HG,
and they can be used for the S, S/G models. The differences
between the models are given below.
Power requirements
SA-7800/HG:
220V/240V
(switchable), 50Hz, 60Hz
SA-7800/S, S/G:
110V/120V/220V/240V
(switchable),
50Hz, 60Hz
NOTE:
Read
through
the section on the LINE
VOLTAGE
SE-
LECTOR
SWITCH on page 4 before using your amplifier
and check that the voltage selector switch is set correctly
for use in your area.
Power cords
SA-7800/HG:
This is configured as an AC inlet type.
Use a separate power cord in order to
connect the power supply.
SA-7800/S, S/G:
The
power
cord
is mounted
at the
rear.
Cabinet
SA-7800/HG, S:
Black cabinet
.
SA-7800/S/G:
Walnut grained finished cabinet.
Others
SA-7800/HG:
The DIN-type recording/playback
socket
is provided on the rear panel.
SA-7800/S, S/G:
The
AC
outlets
are provided
on the
rear panel.
IMPORTANT
To prevent electric shock, do not remove cover. No user
FOR USE IN UNITED KINGDOM
AND
serviceable parts inside, refer servicing to qualified serv-
AUSTRALIA
ice personnel,
;
:
A
Always
disconnect
all the equipment
from
the mains
CAUTION
240V:
ue
ee
is facto-
ry adjusted
a
'
supply when
disconnecting
the signal leads. The power
cord
should
be connected
last, make
sure
that
the power
FOR
USE
IN
UNITED
KINGDOM
switch is off. First, insert the female appliance connector
Th
Z
i n
thi
' n s
lead
]
di
d
of the
mains
cord
into
the AC
INLET,
then plug
the
aes
a
~ ae
Oe
cGy
ween
Henao
eae
cord to the wall socket, Be sure that the appliance con-
ile
ese peri oe ee Yellow:
Earth
nector is fully inserted into the AC INLET.
ae
Pee
ee ae
Unplug the set from
the wall socket when it is not to be
Bes
pm
d
tended
iod
ime,
Aah
F
:
;
WARNING
identifying
the terminals
in your plug proceed as fol-
lows.
THIS
APPARATUS
MUST
BE EARTHED.
The
wire
which
is coloured green-and-yellow
must
be
connected
to the terminal which
is marked with the let-
ter E or with the safety earth symbol -& or coloured
x OR
YOUR
SAFETY
green or green-and-yellow.
1. Insert this plug only into effectively earthed three-pin
The
wire
which
is coloured
blue must
be connected
to
plug-socket outlet.
the terminal which is marked with the letter N or colour-
2. If any doubt exists regarding the earthing, consult a
ed black,
qualified electrician.
The wire which is coloured brown must be connected to
3, Extension cords, if used, must be three-core correctly
the terminal which is marked with the letter L or colour-
wired.
ed red.
