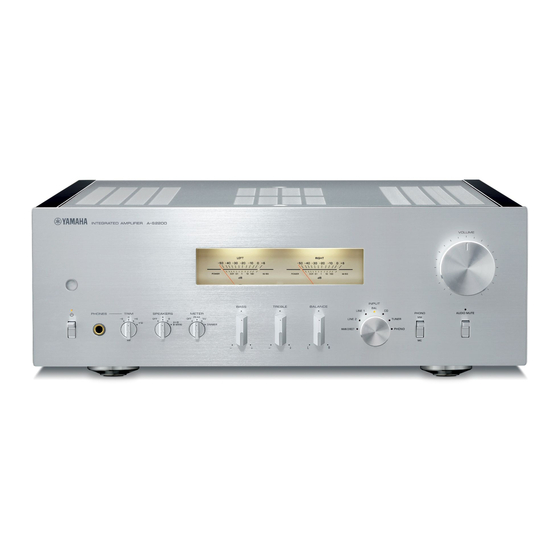
Yamaha A-S3200 Owner's Manual - Page 7
Browse online or download pdf Owner's Manual for Amplifier Yamaha A-S3200. Yamaha A-S3200 32 pages.

2
Remote control sensor
Receives signals from the remote control. (➔ page 14)
3
PHONES jack
Connect your headphones here.
Note
• Connecting the headphones here will result in the
following:
- No sound will be heard from the connected speakers.
- Audio signals will not be output at the PRE OUT jacks.
- You will be unable to select MAIN DIRECT as the input
source.
• If MAIN DIRECT is selected as the input source, audio
signals will not be output at the PHONES jack.
4
TRIM selector
Switches the headphone amp gain.
Select the gain setting that is appropriate for your
headphones.
Available gain:
−6 dB, 0 dB, +6 dB, +12 dB
5
SPEAKERS selector
Switches sets of speakers connected to the
SPEAKERS L/R CH A and B terminals on the rear
panel as follows:
OFF: No audio signals will be output from the
speakers.
A: Audio signals will be output from the set of
speakers connected to the A terminals.
B: Audio signals will be output from the set of
speakers connected to the B terminals.
A+B BI-WIRING: Audio signals will be output from
the sets of speakers connected to the A and B
terminals. Select this position when you plan to
make a bi-wired connection. (➔ page 19)
NOTICE
[Model for Asia]
If you connect two sets of speakers (A+B), use the
speakers with an impedance of 12Ω or higher.
[Other models]
If you connect two sets of speakers (A+B), use the
speakers with an impedance of 8Ω or higher.
6
METER selector
Switches the meter function as follows:
OFF: Turns off meter operation and display
illumination.
PEAK: Switches the meter display type to a peak
level meter. The peak level meter shows the
highest instantaneous level of an audio output
signal.
VU: Switches the meter display type to a VU (Volume
Unit) level meter. The VU level meter shows an
effective audio output value that represents the
way sound is perceived by human ears.
DIMMER: When selected, the DIMMER
automatically changes the brightness of the meter
display in steps. When you see the brightness level
you desire, switch to another setting parameter to
lock in the new brightness setting.
7
Meter (LEFT/RIGHT)
Indicates the audio output level of the left (LEFT) and
right (RIGHT) channels.
7
