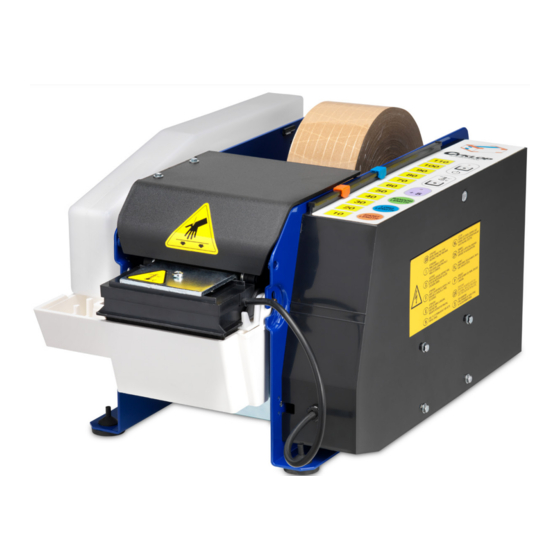
CYKLOP C25 User Manual - Page 8
Browse online or download pdf User Manual for Dispenser CYKLOP C25. CYKLOP C25 8 pages. Electronic gummed paper dispenser
Also for CYKLOP C25: Operating Instructions Manual (13 pages)

cover the filling hole with a finger to avoid
outlet of water.
- Adjust the moistening of tape according to
the quality of glue and paper.
- To increase or decrease the water quantity in
the tank, and therefore on paper, adjust the level
on minimum, medium, maximum, (3 levels).
Do not exceed in wetting the tape. Usually
the medium level is enough.
LOADING OF TAPE ROLL (Fig. 5 to 8)
- Adjust roll guide plates (S in picture 5) to
width of tape and place in their seats.
- Insert the tape in the guide plates so that
the paper comes out turned towards the
front part (blades) with gummed side
down.
- Verify that the roller is correctly placed in
its seat (R fig.5 for gummed out rolls and T
for gummed in rolls) and that it rotates
freely.
- When mounting the paper roll follow the
tape path as shown in picture 6 for
gummed out rolls and picture 7 for
gummed in rolls.
- Insert moving plate (O in picture 8) with
rear wing turned up, place it near plate P in
picture 8.
- Insert gummed tape under the moving
plate (O) and push it all the way. Make sure
that the moving plate presses on the tape.
OPERATING INSTRUCTIONS
- After inserting the tape and having
followed the above
instructions, the
machine is ready to work.
- Plug in and switch on as explained on
page 5.
- Push the button corresponding to the
desired length of tape F.
- To obtain middle lengths of tape push +5
button to add 5 cm. G.
- In case you want a 'free
1
length of tape
push the green button E. It will dispense
tape until released.
Setting Program Keys.
- Electronic dispenser Mod. C-25 allows to
memorize one or two different tape lengths (a
short one and a long one) with pushbuttons H.
NOTE - The following procedure is to be
executed every time the dispenser is
switched on.
- Press 'SHORT LENGTH' pushbutton
and, keeping it pressed, press the button
corresponding to the desired length.
- Release both buttons. The length is
now
set.
- Repeat the same operation to set a
second length, longer than the first one
pressing 'LONG LENGTH' pushbutton.
- The two memorized lengths can be
signaled by the two colored indexes Q
placed beside the pushbuttons F.
- By activating '+5' pushbutton G (light on)
before carrying out the above described ope-
rations, it is possibe to set on the pushbuttons
'SHORT LENGTH' and/or 'LONG LENGTH'
intermediate sizes of tape (15, 25, 35,....cm.)
Top Heater.
- By pressing I pushbutton the top heater is
activated (light on). Top heater use is
adviced in cold environments and with par-
ticular types of gummed paper. It is possi-
ble to exclude the use of the top heater by
pressing the same pushbutton (light off).
Regulating the weight on the top heater.
- In general, for light types of paper take off
the weight fixed with a screw on the top
heater; for heavier types of tape unscrew
and rotate the weight placing the bent part
on the front part of top heater.
- Paper jamming often happens when the
weight has not been removed.
- After having used the machine, always
turn the main switch C off and unplug
MAINTENANCE AND CARE
- Our tools are safe. Repairs have to be
made either at our assistance centres
or by adequately
trained
personnel.
Improper repairs could cause accidents to
the user. Use exclusively original parts.
ATTENTION!! For dispenser
cleaning
never use water. Use only compressed air
or dry cloth and/or brushes.
ATTENTION!! Before every operation of
cleaning, maintenance or repair, the
machine MUST be unplugged.
ATTENTION!! Before any maintenance
work check that the top heater has a
temperature lower than 40°C.
Danger of burning.
- Maintenance should be carried out only
by adequately trained personnel.
PERIODICAL MAINTENANCE AND CARE
ONCE A WEEK
- Wash the brush with warm water and
soap and rinse it thoroughly.
- Clean machine with compressed air to
remove dirt and residues.
ATTENTION!! Danger of burning with
top heater. It can reach a temperature of
100°C.
ONCE A MONTH
- Grease with an oilcan (just a drop) the
cutting blades.
- Do not grease or oil the rubber wheel:
clean it with water or alcohol.
The wheel can be reached by taking off the
moving plate (Fig. 8 O).
- When removing the bottle, cover the
filling hole with a finger to avoid water outlet.
- Clean the water trough, after its removal,
with warm water and soap.
ATTENTION!! Danger of burning with top
heater. It can reach a temperature of 100°C.
HEATER CLEANING:
- Make sure the top heater has reached a
temperature lower than 40°C.
- Disconnect machine from mains.
Never use water or liquids.
- Clean, once a month, only the outside
surface of the heater close to the brush
with a cloth dipped in decalcifying product.
In case of calcium deposit, remove it with a
very fine abrasive cloth or with a thin blade
without
scratching
or damaging
the
surface. In case of many crustings, replace
the heater. We advise replacement of top
heater after 3500 hours of working.
