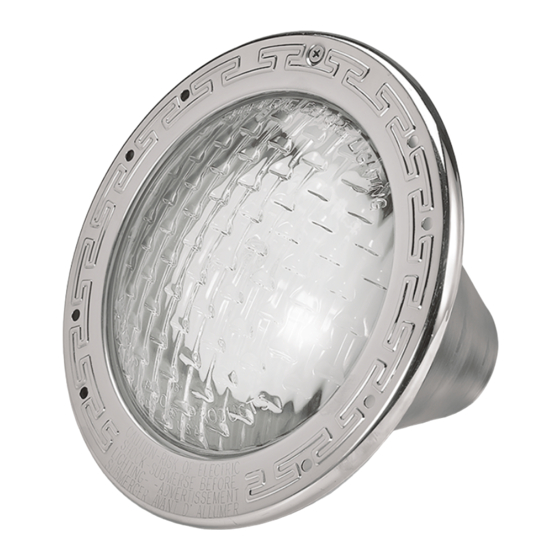
Cantar Pool Products Full Moon Gebruikershandleiding en installatie-instructies
Blader online of download pdf Gebruikershandleiding en installatie-instructies voor {categorie_naam} Cantar Pool Products Full Moon. Cantar Pool Products Full Moon 4 pagina's. Multi-color l.e.d. pool light

OWNER'S MANUAL
& INSTALLATION INSTRUCTIONS
WARNING! READ BEFORE INSTALLING
!
Install and locate this light in accordance with the installation in-
!
structions.
!
This light is potentially hazardous if not properly installed.
This light must be installed in conformance with Article 680 of the
!
National Electric Code and all local code requirements.
To reduce the risk of electric shock, a Class A ground fault circuit
!
interrupter (GFCI) shall be installed in the branch circuit by a li-
censed electrician, and all devices in the system must be properly
grounded. DO NOT use extension cord sets.
The total electrical system must be installed, tested, and approved by
!
a licensed electrician before it is placed in operation.
This light is not intended for installation in pool or spa floors. It must
!
be installed in a vertically oriented wall. Failure to install the fixture
properly could result in personal injury and/or property damage.
Never operate this light for more than ten seconds without completely
!
submerging it in water. Total submersion is required for cooling.
Except when the light is installed in an area of the swimming pool
!
that is not used for swimming and the lens is adequately guarded
to keep any person from contacting it, the fixture shall be installed
in or on a wall of the pool, with the top of the lens opening not less
than 18 inches below the normal water level of the pool.
Transformer used to supply power for 12V lights shall be an iso-
!
lated winding type with a metal barrier between the primary and
secondary windings. Output rating: 12V, 300 Watts lamp max.
Full Moon
pool lighting fixtures are designed to meet the National Electric
TM
Code - Article 680, and the Canadian Electrical Code requirements. The NEC
requires that fixtures be installed so that the top of the fixture lens is at least 18"
below normal water level. The junction box shall be located not less than 8" above
the pool water level and not less than 4" above the pool deck or ground, whichever
is higher. The junction box shall be located not less than 4 feet from the perimeter
of the pool, unless separated from the pool by a fence, wall or other permanent
barrier. Junction boxes mounted above grade in the walkway around a pool shall
be afforded additional protection by locating them in such places as under a diving
board, adjacent to fixed structures, etc. Check codes to assure compliance.
LIGHT INSTALLATION
SEE FIGURE 1
Warning: Disconnect all power sources to the pool
!
equipment before installing this light assembly.
1. Verify that your newly purchased Full Moon
voltage and cord length requirements.
2. Place the light assembly on the deck. Run the end of the cord down into
the pool and into the niche opening. Push the cord into the conduit until it
appears at your wiring junction box. Pull the excess cord through the conduit,
but leave sufficient slack to raise light to deck level as shown.
3. Bonding: The National Electric Code - Article 680-22, and the Canadian
Electrical Code require that the light be electrically bonded to the pool/spa
structure by a solid copper conductor no smaller than No. 8 AWG.
4. Grounding: The light must be permanently grounded in accordance with
the National Electric Code - Article 250 or the Canadian Electrical Code, and
applicable local codes before connecting to the electrical power service.
5. Wiring connections at the junction box shall comply with local codes, the
National Electrical Code, or the Canadian Electrical Code.
6. Wrap the excess cord around the light housing as it is lowered into the niche.
This excess cord will be necessary to accommodate future bulb replacement
when the light must be raised to deck level.
11/05
R
light matches your wattage,
™
Light Assembly
7. Insert the light assembly into the niche with the "face-ring locking screw"
(see figure 2) positioned at 12 o'clock. Be certain the hook at the bottom of the
face-ring (at 6 o'clock position) is securely attached to the notch on the bottom
rim of the light niche.
8. Secure the light assembly to the niche using the locking screw at the top of
the face-ring.
9. (Re)-connect power supply to light.
Figure 1
Fixture
removed
Normal
Water
level
18" min.
BULB REPLACEMENT
SEE FIGURE 2
Warning: Disconnect all power sources to the pool
!
equipment before servicing this light assembly.
1. Remove the "face-ring locking screw" at the top of the face ring.
2. Remove the light assembly from the niche and raise to deck level.
3. Remove the stainless steel LensLok
end of the LensLok
TM
towards the center of the lens with a flathead screw-
driver.
4. Place the head of your screwdriver into the lens removal slot on the light
body and twist to remove the lens.
Note: If lens is not easily removable, loosen the vacuum relief
screw on the side of the light housing until vacuum is relieved. Do
not completely remove the screw. Now remove the lens and imme-
diately re-tighten vacuum relief screw.
5. Replace the bulb with an equivalent wattage and voltage from your pool dealer.
6. Carefully clean all sealing surfaces on the light housing and lens using a
4 ft. min.
Junction box
TM
retaining ring by pulling the notched
221666072005B
8" min.
