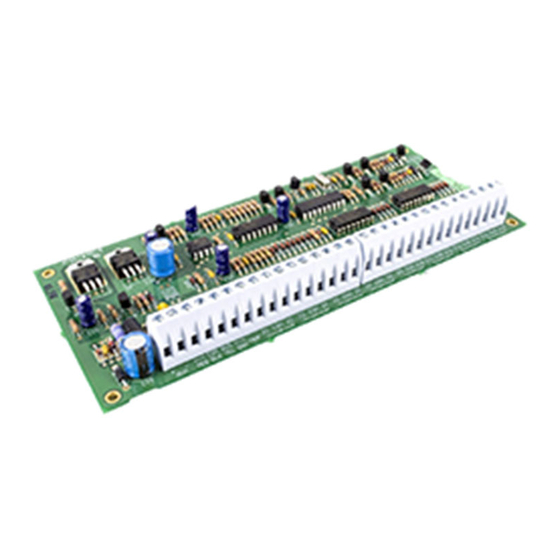
DSC Maxsys PC4116 Installatie-instructies
Blader online of download pdf Installatie-instructies voor {categorie_naam} DSC Maxsys PC4116. DSC Maxsys PC4116 2 pagina's. Zone input module

1.
Introduction
The PC4116 is a zone input module that adds up to 16
fully programmable zones to the Maxsys security system.
2.
Specifications
• Connects to control panel via 4-wire Combus
• Current Draw: 30 mA(from Combus)
• Supports no end-of-line, single end-of-line and
double end-of-line zone loops (5600 ohm resistors)
• AUX+ output: 12V
Combus)
• Tamper contact input
Compatible Cabinets
• PC4051C/CR*
• PC4001C
• PC4054C
*CR cabinet for North American customers only
3.
Installing the PC4116
3.1 Unpacking
The PC4116 package includes the following parts:
• One PC4116 circuit board
• 32 end-of-line resistors (5600 ohms)
• Five plastic stand-offs
3.2 Mounting
The PC4116 should be located inside a compatible cabinet,
mounted in a dry, secure location. Preferably, it should be
placed at a convenient distance from the connected devices.
Perform the following steps to mount the unit:
1. Press the five plastic stand-offs through the mounting
holes at back of the cabinet.
2. Secure the cabinet to the wall in the desired location.
Use appropriate wall anchors when securing the
cabinet to drywall, plaster, concrete, brick or other
surfaces.
3. Press the circuit board into the five plastic stand-offs
to secure the unit to the cabinet.
Once the unit is mounted, wiring may be completed.
3.3 Installation and Wiring
Before beginning to wire the unit, ensure that all power
(AC transformer and battery) is disconnected from the
control panel.
Perform the following steps to complete wiring:
1. Connect the four Combus wires to the PC4116.
Connect the red, black, yellow and green Combus
wires to the RED, BLK, YEL and GRN terminals,
respectively.
2. Complete all zone wiring to the zone input terminals
(Z1-Z16). See the control panel Installation Manual
for details on zone wiring configurations.
Please refer to the System Installation Manual for information on limitations regarding product
use and function and information on the limitations as to liability of the manufacturer.
, 250mA max. (drawn from
DC
PC4116 Zone Input Module
3. Connect the external tamper switch, if used.
Consult the wiring diagram above for further information.
3.4 Applying Power
After all wiring is completed, apply power to the control
panel. Connect the battery leads to the battery, then connect
the AC transformer. For more information on control panel
power specifications, see the control panel Installation
Manual.
NOTE: Do not connect the power until all wiring is
complete.
4.
Enrolling the Module
Once all wiring is complete, the module must be enrolled
on the system. To enroll the module, perform the
following:
1. Enter installer's programming by pressing [*] [8]
[Installer's Code].
2. Scroll to "Module Hardware" and press the [*] key.
3. Scroll to "Enroll Module" and press the [*] key.
4. Scroll through the different modules until "PC41XX"
is displayed. Press the [*] key.
5. The message "Create Tamper on Desired Unit" will
be displayed. To create the required tamper, secure
the tamper zone on the module and then open it. The
transition from secure to violated enrolls the module.
After this is done, the keypad will display the module
number and will confirm enrollment (e.g. "PC4116
Mod 01 Enrolled").
Zones 1-8 (PC4010)/1-16 (PC4020) are located on the main
control panel. Additional zones are added in sequence. For
example, if two PC4116 zone expanders are enrolled, the
first one enrolled will be assigned zones 17 to 32 and the
second will be assigned zones 33 to 48. To confirm which
zones are assigned to which expander, press the arrow key
when the enrollment confirmation message is displayed.
For more information regarding module enrollment, see
the control panel Installation Manual.
5.
Programming the Module
To access PC4010/4020 programming, enter [*][8] followed
by the Installer's code. The zones connected to the module
must be added to a partition and programmed for
operation. The programming worksheet located on this
sheet indicates which sections must be programmed.
For more information regarding zone programming, see
the control panel Installation Manual.
NOTE: The zone types and attributes listed below are for
PC4010/4020 v3.0. For zone programming for previous
software versions, see the corresponding programming
manual.
Installation Instructions
