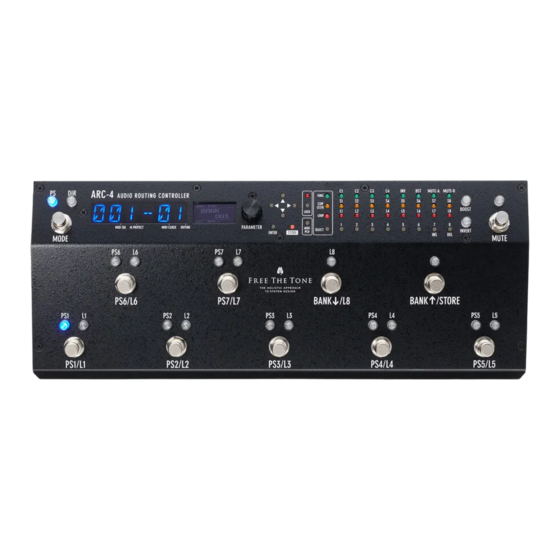
Free The Tone ARC-4 Gebruikershandleiding - Pagina 5
Blader online of download pdf Gebruikershandleiding voor {categorie_naam} Free The Tone ARC-4. Free The Tone ARC-4 16 pagina's. Audio routing controller
Ook voor Free The Tone ARC-4: Procedures voor firmware-updates (18 pagina's)
Terminals in Detail
OPTION-1 (EFS-3) and OPTION-2 (PHA-1) Terminals
Connect the optional product EXTERNAL FOOTSWITCH/EFS-3 or PHASE
ANALYZER/PHA-1 using the optional link cable for the ARC-4. Regarding
the functions of the connected optional device please refer to the owner's
manual of the product. For more detailed information about the dedicated
link cable, contact your local dealer or Free The Tone directly.
NOTE
Setting Function to be Assigned to EFS-3 Connected to OPTION-1 (EFS-3)
Terminal and PS/L Switch on ARC-4 p.21
Using ARC-4 Efficiently p.25
OUT-A Terminal
The mute circuit (MUTE-A) is located just before this output terminal. The
signal at the OUT-A terminal is muted by pressing the MUTE switch or turning
FUNCTION "MUTE-A" on.
Block Diagram p.8
Selecting Mute Circuit to be Activated when MUTE Switch is Turned On p.22
OUT-B Terminal
The mute circuit (MUTE-B) is located just before this output terminal. The
signal at the OUT-B terminal is muted by pressing the MUTE switch or turining
FUNCTION "MUTE-B" on.
Block Diagram p.8
Selecting Mute Circuit to be Activated when MUTE Switch is Turned On p.22
S-6/A·B–S-7/A·B and R-6/A·B–R-7/A·B Terminals (Stereo)
Connect stereo type effects units to these terminals. By using only the A
side, these terminals can also be used as usual monaural effect loops.
NOTE
Turning on/off of the stereo effect loop is done at the return side. Since the stereo
effect loops continue sending the send side signals, you can output delay effects
instantly when for example a delay effect unit is connected to one of them.
Block Diagram
HTS-IN
MUTE-C
HTS-OUT
IN
F.G
L6/A
L7/A
L6/B
L7/B
INSERT
8
IN-8, S-8 (N.C), R-8, & OUT-8 (N.O) Terminals (Separate Loop)
In addition to the usage as an effect loop, the S-8 (N.C) terminal can be used
as a control terminal (normally closed) for amplifier channel switching, etc.
When Loop 8 is turned off, the tip and ground of the jack are electorically
connected. The OUT-8 (N.O) terminal can be used as a control terminal
(normally open): When Loop 8 is turned on, the tip and ground of the jack
are electrically connected.
BOOST-A Knob: This knob adjusts the output level at the OUT-A terminal
when the Boost function is activated.
To set to unity gain, turn it fully counterclockwise. The adjustable range is
up to about +14 dB.
When the STEREO/PARA switch is set to PARA mode, the output signal level
of the OUT-B terminal is adjusted to the same output level as that of the
OUT-A terminal.
BOOST-B Knob: This knob adjusts the output level at the OUT-B terminal
when the Boost function is activated and the STEREO/PARA switch is set to
STEREO mode.
To set to unity gain, turn it fully counterclockwise. The adjustable range is
up to about +14 dB.
When the STEREO/PARA switch is set to PARA mode, signals are output from
the OUT-B terminal at the output level adjusted by the BOOST-A knob.
E4 (EXP) Terminal
The function assigned to this terminal can be activated by the connected
external footswitch. Use an expression pedal with 10k–25kΩ variable
resiststance.
Setting Expression Pedal's Calibration p.23
TUNER-OUT
L1
L2
L3
L4
L5
CONT
TEST SIG.
OPTION 2 (PHA-1)
GUITAR SIG
TO PHASE ANALYZER
OUTPUT SIG
MUTE-A
PARA
OUT-A
BOOST-A
STEREO
MUTE-B
BOOST-B
OUT-B
Signal Flow
STEREO Mode
In this mode, L6 and L7 are used as stereo loops. Signals from the A side loop are fed from the OUT-A terminal and signals from the B side loop are fed from the
OUT-B terminal.
N.B. When the loop of L6 and L7 is turned off, signals same as at the OUT-A terminal are output from the OUT-B terminal, simarly to PARA mode.
PARA Mode
In this mode, L6 and L7 are used as monaural loops. Signals are fed from the OUT-A and OUT-B terminals in parallel.
N.B. When in PARA mode, the send/return terminal of L6 and L7 uses the A side.
How to Store/Recall Effect Loop Combinations or Various Functions (Preset Mode)
Preset mode is a mode in which effect loop combinations, settings for MIDI and control signal transmission, etc. can be stored in the ARC-4 and the contens of
the memory can be recalled by pressing the PS/L switch. In contrast with Preset mode, a mode in which a footswitch can be used to turn on/off each effect loop is
called "Direct mode."
Organization of Presets
What we call a "Preset" is a compilation of effect loop combinations and
various control signals settings, etc. The ARC-4 can handle 10 presets as a
PHASE
collection (Bank) and can store 2,000 presets (10 presets x 200 banks).
INV
Bank
Preset-1
RELAY
Preset-2
CONTROL
Preset-3
Preset-4
Preset-5
Bank Number
Preset-6
Preset-7
Preset-8
NOTE
Preset-9
PS8–PS10 (Preset No.8 to Preset No.10) cannot be recalled from the ARC-4
main unit. By connecting the EXTERNAL FOOTSWITCH/EFS-3 (option) to the
Preset-10
OPTION-1 (EFS-3) terminal, it becomes possible to recall presets externally.
Setting Function to be Assigned to EFS-3 Connected to OPTION-1 (EFS-3)
Terminal and PS/L Switch on ARC-4 p.21
Using ARC-4 Efficiently p.25
Preset Number
9