Bresser Meteo THBM Colour Gebruiksaanwijzing - Pagina 9
Blader online of download pdf Gebruiksaanwijzing voor {categorie_naam} Bresser Meteo THBM Colour. Bresser Meteo THBM Colour 20 pagina's.
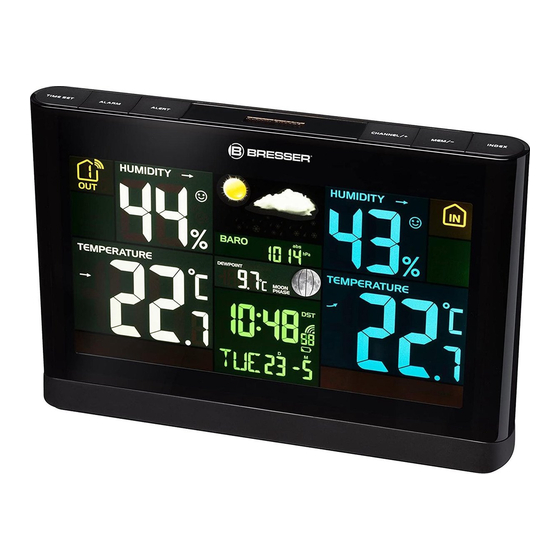
8 Setting up power supply
Base device
1. Insert the DC connector into the connection socket of the base station.
2. Insert the mains plug into the power outlet.
3. The device is energized directly.
4. Wait until the indoor temperature is displayed on the base station.
NOTICE! For permanent operation, mains power supply is recommended. Alternatively a
power supply with batteries is also possible, to keep the time setting in case of power fail-
ure. Proceed as follows:
5. Remove the battery compartment cover.
6. Insert the batteries into the battery compartment. Ensure that the battery polarity (+/-) is correct.
7. Replace the battery compartment cover.
8. Wait until the indoor temperature is displayed on the base station.
NOTICE! When switching from mains power supply to battery power supply or vice versa,
the power supply is being disabled for a short moment for technical reasons. Exception: per-
manent battery operation.
Remote sensor
1. Remove the battery compartment cover.
2. Insert the batteries into the battery compartment. Ensure that the battery polarity (+/-) is correct.
3. Set the channel selector switch to the desired channel.
NOTICE! This weather station can be operated with one or more remote sensors. Each re-
mote sensor being connected must be operated on a different channel. If only one remote
sensor is connected, it should be operated on channel 1.
4. Replace the battery compartment cover.
9 Automatic time setting
After the power supply was established, the clock will automatically search for the radio signal. The
clock will automatically search for the radio signal.
If the radio signal is received correctly, the date and time will be set automatically and the radio control
signal icon turns on.
If the clock fails to receive the time signal, go ahead with the following steps:
1. Press RCC button at the remote sensor for approx. 2 seconds to initialize the radio signal recep-
tion again.
2. If the device is still not receiving the signal, the time must be set manually.
Read the detailed manual for more information about manual time and alarm setting (see download in-
formation on page 2).
10 Manual time setting
1. Press and hold TIME SET button for approx. 3 seconds to change to time setting mode.
2. Digits to be set are flashing.
3. Press +/CHANNEL or -/MEM button to change the value.
4. Press TIME SET button to confirm and continue to the next setting.
5. Settings order: 12/24 hour mode > Hours > Minutes > Seconds > Year > Change day and month >
Month > Day > Time zone > Language > Time signal reception ON/OFF > Daylight saving time
(DST) AUTO/OFF
9 / 20