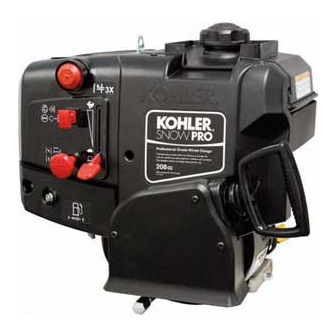
Kohler SNOWPRO WH208 Gebruikershandleiding - Pagina 10
Blader online of download pdf Gebruikershandleiding voor {categorie_naam} Kohler SNOWPRO WH208. Kohler SNOWPRO WH208 17 pagina's. Horizontal crankshaft
Ook voor Kohler SNOWPRO WH208: Servicehandleiding (12 pagina's)
Change the oil while the engine is still warm. The
oil will flow freely and carry away more impurities.
Make sure the engine is level when filling, checking, or
changing the oil.
Change the oil as follows:
1. To keep snow, ice, etc., out of the engine, clean
the area around the oil fill cap/dipstick before
removing it. See Figure 14.
2. Remove the oil drain plug and the oil fill cap/
dipstick. Allow ample time for complete drainage.
See Figures 14 and 16.
Oil Drain Plug
Figure 16. Oil Drain Plug Location.
3. Reinstall the oil drain plug and tighten to
9-13.5 N·m (80-120 in. lb.). See Figure 16.
4. Fill the crankcase, with new oil of the proper type.
Refer to Oil Type. Always check the level before
adding more oil.
5. Reinstall the oil fill cap/dipstick and tighten
securely. See Figure 14.
NOTE: To help protect the environment dispose
of used oil in accordance with local
ordinances.
Ignition System
This engine is equipped with a dependable electronic
magneto ignition system. Other than periodically
checking/replacing the spark plug, no maintenance
or adjustments are necessary or possible with this
system.
In the event starting problems should occur which are
not corrected by replacing the spark plug, see your
Kohler Engine Service Center for trouble analysis.
10
Check Spark Plug
Annually or every 100 hours of operation, remove
the spark plug, check condition, and reset the gap or
replace with a new plug as necessary. The original
spark plug is a Champion
equivalent is a Kohler Part No. 25 132 14-S. Equivalent
alternate brand plugs can also be used.
1. Before removing the spark plug, clean the area
around the base of the plug to keep dirt and ice
out of the engine.
2. Remove the plug and check its condition. Replace
the plug if worn or reuse is questionable.
NOTE: Do not clean the spark plug in a machine
using abrasive grit. Some grit could
remain in the spark plug and enter the
engine causing extensive wear and
damage.
3. Check the gap using a wire feeler gauge. Adjust
the gap to 0.76 mm (0.030 in.) by carefully
bending the ground electrode. See Figure 17.
4. Reinstall the spark plug into the cylinder head.
Torque the spark plug to 24 N·m (18 ft. lb.).
Wire Gauge
Spark Plug
Ground
Electrode
Figure 17. Servicing Spark Plug.
XC12YC, the Kohler
®
0.76 mm
(0.030 in.) Gap