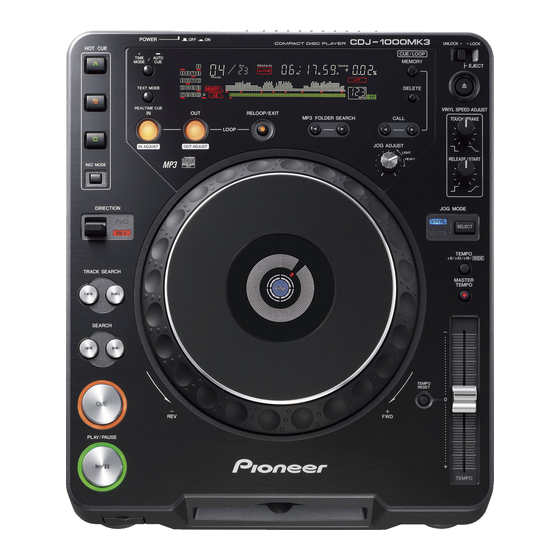
Pioneer CDJ 1000MK3 - Professional CD/MP3 Turntable Gebruiksaanwijzing - Pagina 17
Blader online of download pdf Gebruiksaanwijzing voor {categorie_naam} Pioneer CDJ 1000MK3 - Professional CD/MP3 Turntable. Pioneer CDJ 1000MK3 - Professional CD/MP3 Turntable 24 pagina's. Cd player
Ook voor Pioneer CDJ 1000MK3 - Professional CD/MP3 Turntable: Gebruiksaanwijzing (34 pagina's), Gebruiksaanwijzing (35 pagina's)

Mixing different tracks
(Example: Mix track B with currently playing track A from the main speak-
ers.)
¶ Connect player CD1 to the DJ mixer's CH1, and connect player CD2
to CH2.
¶ Raise the TRIM, CHANNEL FADER, and MASTER LEVEL settings
appropriately so that sound is produced from player CD1.
1. Set the DJ Mixer's CROSS FADER slider at its left side
(CH1).
¶ Track A is heard from speakers.
2. Load a CD on player CD2.
3. Press the TRACK SEARCH buttons (4, ¢) on player
CD2 to find and select track B.
4. Set the DJ Mixer's MONITOR SELECTOR button CH2 to
ON.
5. Rotate the DJ Mixer's MONITOR LEVEL so that track B
can be heard from the headphones.
¶ Only track A is heard from the main speakers.
6. Set cueing for track B on the headphones.
1 With player CD2 in the playback mode, press the PLAY/PAUSE
button (6) to hear the point you wish to cue.
¶ When the jog mode is set to [CDJ], the unit will enter audible
pause mode (sound can be heard); when set to [VINYL], the
unit will enter inaudible pause mode (no sound can be heard).
2 Rotate player CD2's jog dial and search for the track's cue point
(first beat).
3 When you have settled on the cue point, press the CUE button on
player CD2.
¶ The player's sound will be muted and cueing will be completed.
7. Simultaneously press player CD2's PLAY/PAUSE button
(6) when track A is heard from the speakers.
¶ Only track A will be heard from the main speakers.
¶ Track B will be heard from the headphones.
8. Move the tempo adjust slider to match the tempo
(BPM=Beat Per Minutes) of tracks A and B.
Move the tempo adjust slider of player CD2 so that the BPM of track
B matches those of track A.
¶ When the two BPM rates match, the BPM synchronization is com-
plete.
9. Press the CUE button on player CD2.
¶ Player CD2 will enter pause mode at the cue point.
10.As soon as track A is heard from the speakers, press the
PLAY/PAUSE button (6) on player CD2.
¶ Track B begins playing.
11.While checking the sound on the headphones, gradually
move the DJ Mixer's CROSS FADER slider from left to
right side (CH2).
¶ The sound of track A from the speakers will steadily become mixed
with the sound of track B.
¶ When the DJ Mixer's CROSS FADER slider has moved all the way
to the right side, the sound heard from the speaker will have
changed from track A to track B, and the operation is complete.
7 Long mix play
If the BPM rates match, mixing of tracks A and B will sound good even if
the CROSS FADER slider is in the middle position.
7 Fader start play
Using the cross fader start function of a Pioneer DJ mixer, step 10 above
can be eliminated for even simpler mixing. In addition, when the CROSS
FADER slider is returned to its original position, the status returns to that
in step 9 (player CD2 at its cue point), so that you can repeat the same
play as many times as you like.
Before Operating (Names and Functions of Parts)
Before Operating (Names and Functions of Parts)
About the WAVE display
The WAVE display shows the changes in a track's bass beat (bass drum,
etc.), thus allowing the DJ to understand where breaks and end points
come in the track. When the TEXT MODE button is set for WAVE dis-
play, the selected track is shown rescaled to fit within the full range (100
points) of the display.
¶ After a track change, some time is required before the entire track's
WAVE display can be shown. By prerecording desired tracks' WAVE
patterns on a memory card, the next time the track is played its WAVE
pattern can be displayed instantly ( P. 21).
¶ If a track's low-frequency beat changes are too low in volume, the
break points in the track may not be displayed properly.
¶ If a search or pause operation is performed during the time the wave-
form is being read, the waveform will not be displayed properly.
¶ Read-ahead of the WAVE pattern is not possible during MP3 play-
back.
About TEXT display
When the TEXT MODE button is used to select TEXT display, the dis-
play shows CD-TEXT, including the names of tracks, albums, and artists.
During MP3 playback, the display shows ID3 tag track name (if no ID3
tag is recorded, the display shows the file name) /ID3 tag album name/
ID3 tag artist name.
¶ Each item can display up to 48 characters of text; text longer than 16
characters is scrolled.
¶ Text may include alphanumerics and some symbols.
¶ If no text is available, the [NO TEXT] message will be displayed.
When a track name is selected in TEXT display, the [
displayed followed by the track name (with MP3, the ID3 tag's title name
or file name will be displayed).
Also, during MP3 play, the bit rate will be displayed following the track
name.
When an album name is selected in TEXT display, the [ ] icon will be
displayed followed by the album name.
Pioneer
When an artist name is selected in TEXT display, the [
displayed followed by the artist's name.
Pioneer PRO DJ
When folder search is performed with MP3, the folder name is displayed
during the search.
Pioneer DJ
DJ Player Operation
] icon will be
] icon will be
17
