3Doodler Create+ Gebruikershandleiding - Pagina 3
Blader online of download pdf Gebruikershandleiding voor {categorie_naam} 3Doodler Create+. 3Doodler Create+ 16 pagina's.
Ook voor 3Doodler Create+: Gebruikershandleiding (11 pagina's)
SECTION 2: GETTING STARTED
WITH 3DOODLER CREATE+
We created this User Manual as a step-by-step guide to
get you comfortable with your 3Doodler Create+ and
its features. Once you are familiar with these steps, you
will be able to Doodle with confidence. Skipping steps
may result in a less enjoyable time with your
3Doodler Create+.
SPEED BUTTON
LEGEND:
• Click once to start
• Click once to stop
• Double click to reverse
LIGHT LEGEND:
Solid RED:
Heating up
(Please wait)
BLUE: ABS/FLEXY
GREEN: PLA
Flashing Light:
Reversing Plastic
How it Works:
se do
The 3Doodler Create+ melts Plastic and uses a motor and gears
ste. In
(Drive Gear) to push it through the Pen's hot end (Nozzle) in a
ment
thin line. This process is called extruding or extrusion, and we
osal,
will refer to it throughout this User Manual. Once extruded, Plastic
ately
cools and hardens instantly, allowing you to draw on surfaces and
For
in the air. This User Manual will show you how!
stems
please
also
your
rvice, or
can use.
3Doodler_Bob_User_Manual_MAIN_Inner_20180511.indd 2
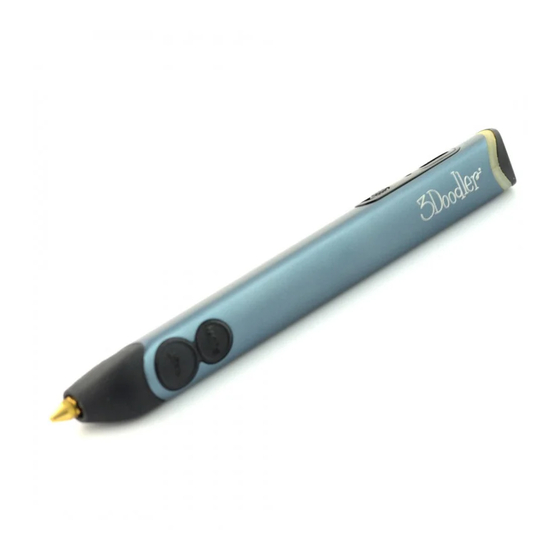
Nozzle
1
Hot end where Plastic is
extruded for Doodling
2
FAST Speed Button
3
SLOW Speed Button
Light
4
Tells you when your
3Doodler Create+ is ready
for Doodling
5
Power Adapter
Maintenance Cover
6
Allows you to look inside your
Pen to see what's going on
1
2
FAST
3
SLOW
4
5
Drive Gear
7
This pushes the Plastic
through the Pen
Control Switch
8
For turning the 3Doodler
Create+ ON and OFF, and
selecting ABS / FLX or PLA
extrusion temperature
Plastic Loading Port
9
Hole for inserting Plastic
in the back of the
3Doodler Create+
10
Plastic
11
Temperature Adjuster
(See the3doodler.com/
temperature)
12
Control Port
2
6
7
10
8
11
12
9
11/5/2018 11:37 AM