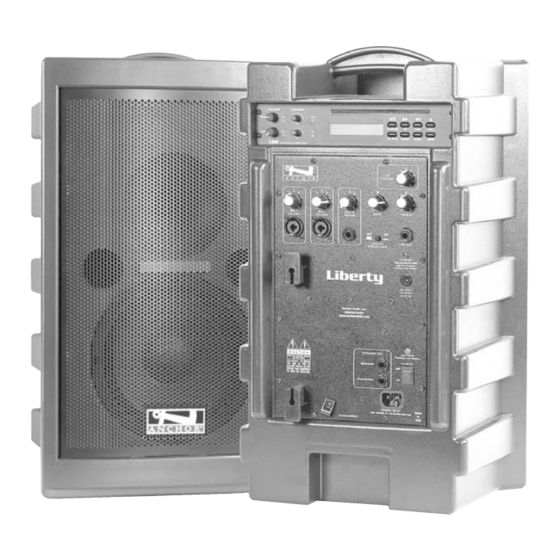
Anchor LIB-BP4 Instrukcja obsługi - Strona 4
Przeglądaj online lub pobierz pdf Instrukcja obsługi dla Głośniki Anchor LIB-BP4. Anchor LIB-BP4 4 stron. Anchor lib-6000hcu2

BASIC SYSTEM OPERATION
NOTE: Fully Charge Batteries Before First Use!
1. Set all Input Level Controls to minimum & Tones Controls to flat
or the middle setting before turning your system on
2. Plug a wired microphone into the MIC 1 or MIC 2 jacks and/or
plug an audio source into the LINE-IN jack
3. Switch POWER to ON, the red BATTERY LED will light
4. Slowly increase the Level Control for the input jacks used to the
desired volume
5. Set SPEECH PROJECTION to ON for speech applications or
OFF for standard applications (music & indoor use)
6. Adjust BASS & TREBLE controls to desired sound quality
CARING FOR YOUR BUILT-IN BATTERIES
It is very important that you fully charge the batteries in your new sound system
before the first time its used. To preserve battery life it is also recommended
that batteries be fully charged as soon as possible after every use regardless of
the length of operation.
UNDERSTANDING THE BATTERY LEVEL INDICATOR
LED Flashing Red:
Battery charge is very low, in 15-30 minutes the Battery
Protection Circuit will turn the system off.
LED Off:
Battery is completely drained and must be charged.
NOTE: System Can Be Used While Batteries Charge!
OPERATING IN AC MODE
Plug your sound system into an AC outlet. Operate as normal while charg-
ing the built-in batteries at the same time. The Charger LED will light during
charging and flash when the battery is fully charged.
BATTERY SERVICE TIME
With the batteries fully charged you can expect approx.:
6-8 hrs @ Medium Volume
2-4 hrs @ Full Volume
Of continuous music input (longer for speech) . Service time will vary depend-
ing on control settings and use of accessories (built-in CD player, wireless
receivers and/or a companion speaker).
IMPORTANT: Always Store Your System w/
Batteries Fully Charged!
SYSTEM STORAGE & BATTERIES
Always store your sound system with the batteries fully charged. For extended
periods of storage leave the system plugged into an AC outlet. If this is not pos-
sible, charge the system at least once each month for a minimum of 24 hours.
4
WIRELESS RECEIVER CONTROLS
(see page 6)
INPUT LEVEL CONTROLS
UNIVERSAL MIC - INPUT JACKS
Balanced XLR - low impedance, for bal-
anced mic, powers condenser-type mics
Unbalanced 1/4" - high impedance, for
unbalanced mics, no phantom power
LINE IN - INPUT JACK
Unbalanced 1/4" - high impedance, for
any line-level signal source: cassette/
VCR/CD/DVD players, musical instru-
ments, 2nd sound system or . . .
SPEECH/PROJECTION SWITCH
SPEAKER OUTPUT
When using Switched Speaker Output
LIBERTY SOUND SYSTEM
the Liberty's internal speakers are
disconnected
CONTROL PANEL
Model Shown: LIB-6000HCU2
CHARGING YOUR BUILT-IN BATTERIES
An automatic charging system is built-in to your Liberty Sound System. It is designed to properly charge and
maintain the systems built-in batteries. To charge batteries:
1. Plug the power cord into your sound system
2. Plug the other end of the cord into AC outlet
Charger LED will stay on during charging
When in AC mode the system automatically transfers power from the battery charger to the power amplifier at
high volume output, causing the Charger LED to flicker.
3. Batteries will fully charge in approx. 6-8 hrs
Charger LED will flash
CD PLAYER CONTROLS
(see page 6)
CD PLAYER VOLUME CONTROL
TONE LEVEL CONTROLS
LINE OUT - OUTPUT JACK
Unbalanced 1/4" - provides a combined
output of all active system inputs
Record your presentation or connect to
another powered sound system
(Output is post source level; any volume
fluctuations for a specific input will affect
this output signal level)
BATTERY CHARGER INDICATOR
12 VOLT DC - OUTPUT JACK
Power for auxiliary equipment:
outboard wireless receiver or Anchor
Audio's Mini-Mix
BATTERY LEVEL INDICATOR
POWER SWITCH
SPEECH PROJECTION SWITCH SETTINGS
Allows you to customize the sound output of your Liberty
system for specific applications:
Speech Projection Off (button out): A flat, full range
frequency response for music or indoor voice applications.
Speech Projection On (button in): Frequencies in the
vocal range are boosted for added clarity and efficient sound
projection. Use this setting for outdoor functions, large
crowds and speech applications.
