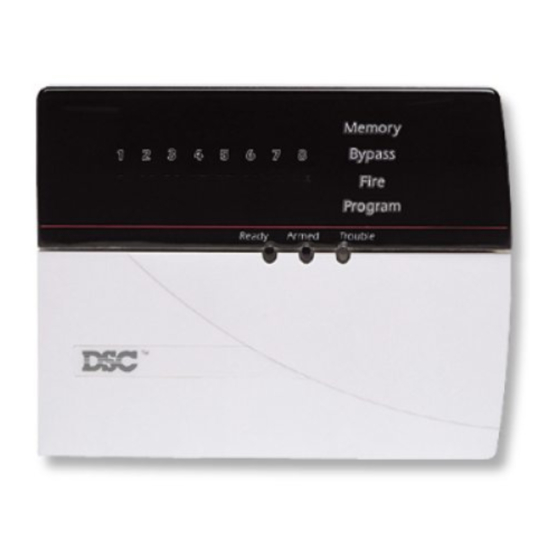
PC5508, PC5516 and PC5532 Keypads:
Press the keys on the numb er p a d to view alarms or troubles, to
Arm/Disarm the system or to byp ass zones.
To exit, press [#]; to sele ct a function, press [
✱
PC5508 LED Keypad
PC5516 LED Keypad
PC5516 LED Keypad
The PC5508 and PC5516
K eyp a ds are availa ble for
a p plic ations with fewer than
32 zones. The functions
explaine d in this manual are
the same for all thre e LE D
keyp a d typ es.
Display Lights
Ready Light
(All keypads)
:
Armed Light
If the Arme d light is O N, the system has
If the Re a dy light is O N, the system is
re a dy for arming.
b e en arme d suc c essfully.
If the Re a dy light is O F F, che ck to se e
Trouble Light
that all doors and windows are close d
If the Trouble light is O N, che ck to se e
and that all movement is stop p e d in
what the trouble condition is and c all
are as covere d by motion d ete ctors. The
for servic e (Se e "Viewing Trouble
system c annot b e arme d unless the
C onditions" on p a g e 12).
Re a dy light is O N indic ating that all
zones are close d and the system is in
the Re a dy state.
8
PC5532 LED Keypad
].
(All keypads)
:
Memory Light
U pon disarming, if an alarm has
oc curre d while the system was arme d,
the Memory light will turn O N (Se e
:
(All keypads)
"Disarming the System" on p a g e 6).
Bypass Light
If the Byp ass light is O N, ensure that
zones are intentionally byp asse d b efore
arming the system (Se e "Zone
Byp assing" on p a g e 11).
All Keypads:
Function Keys
(Stay, Away, Chime, Reset, Exit):
If activated by your installer, these
keys allow e asy single button
a ctivation of the most commonly use d
fe atures. For more information, talk to
your alarm installer.
Press both
K eys for two se conds
to send a FIRE transmission.
Press both
K eys for two se conds
to send an A UXILIARY transmission.
Press both
K eys for two se conds
to send a PA NIC transmission.
NOTE
(All Keypads)
Auxiliary and Panic keys will NOT
function unless programmed by
the installer. If these keys are in
service and the installer has enabled
audible feedback, holding down the
key for two seconds will cause the
keypad sounder to beep indicating
that the input has been accepted and
transmission is underway.
(LED keypads only)
:
Fire Light
(LED keypads only)
If the Fire light is O N, a fire alarm has
oc curre d (Se e "Fire Alarm O p eration"
on p a g e 14).
Program Light
(LED keypads only)
The Program light will flash you are
(LED keypads only)
:
programming a c c ess cod es, setting the
system time or p erforming other
programming functions. If someone is
programming at another keyp a d, the
Program light will turn O N to indic ate
that the system is busy.
LCD5500 Keypad
: The Fire,
LCD5500 Keypad:
The Liquid Crystal Display (L C D) displays prompts and
system information on two 16 chara cter lines.
If " < > " a p p e ars, more information c an b e a c c esse d by
using the arrow (< >) keys. Press [<] to se e the previous
function or item of information. Press [>] to a dvanc e the
display to next function or item of information.
:
Press the keys on the numb er p a d as prompte d by the
L C D display to view alarms or troubles, to arm and
disarm the system and to byp ass zones.
To exit a function and return to the Re a dy state, press [#];
:
to sele ct a function press [
NOTE: All functions can be performed from any LCD
keypad by using the LED keypad commands, as well
as by scrolling through the message display.
Important Note: Test system we ekly and have any system
trouble conditions corre cte d by your alarm installer.
].
✱
9

