CENTURION SYSTEMS D 10 Instrukcja instalacji - Strona 7
Przeglądaj online lub pobierz pdf Instrukcja instalacji dla Otwieracz drzwi garażowych CENTURION SYSTEMS D 10. CENTURION SYSTEMS D 10 8 stron.
Również dla CENTURION SYSTEMS D 10: Podręcznik konfiguracji (2 strony)

SECTION 4
Always unlock the Discus
Padlock before placing the
Front Bar Assembly into
position.
Align the two holes in the Overstrap
with the two holes in the front of the
Gearbox, and insert the Front Bar
Assembly through the holes of the
Overstrap and Gearbox.
Push the Front Bar Assembly
completely through the Gearbox
and Overstrap, ensuring that the
bar extends out the back of the
Overstrap.
Wiggling the Overstrap from
front to back can assist the
Front Bar to slide all the
way through the Overstrap.
Take care when pushing
the Front Bar Assembly
through the Gearbox
Trim.
Forcing it may cause
damage to the Gearbox
Trim.
Lock the Front Bar Assembly into
position, remove the Key and store it
in a safe place.
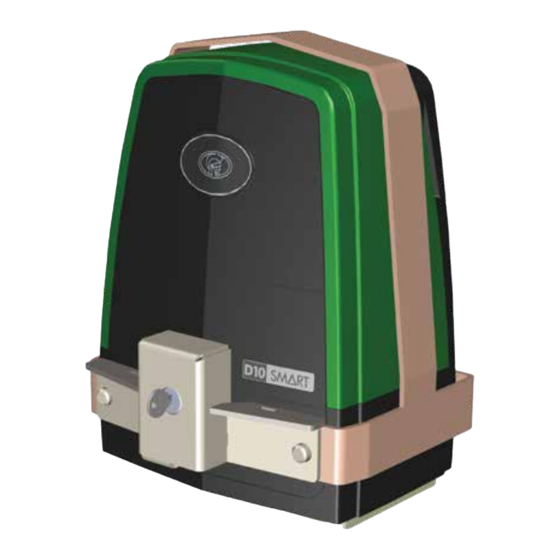
The finished installation should look
as shown in Figure 7
5. Installation Handover
Once the Theft-deterrent Cage has been successfully installed and its operation tested,
it is important for the operation and safety considerations to be explained to the end-user
of the system.
D10 SMART THEFT-DETERRENT CAGE INSTALLATION
D10 SMART/
D10 TURBO SMART/
D20 SMART
Overstrap
Front Bar
Assembly
Front Bar
Assembly
page 7
Gearbox Trim
FIGURE 5
Overstrap
Gearbox
Trim
FIGURE 6
FIGURE 7
www.centsys.com
