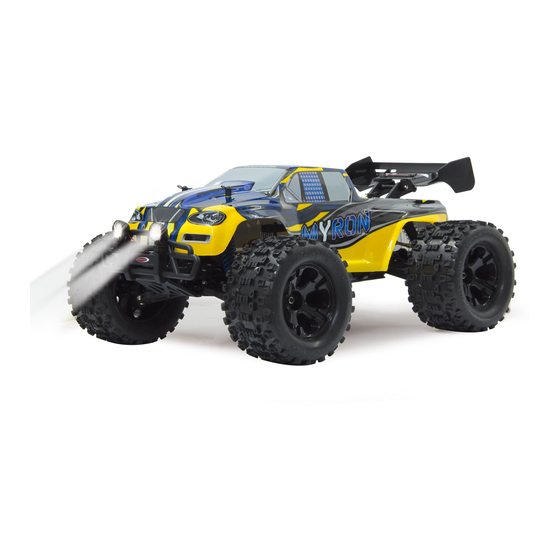
Jamara 05 3365 Instrukcja - Strona 4
Przeglądaj online lub pobierz pdf Instrukcja dla Zmotoryzowany samochód zabawka Jamara 05 3365. Jamara 05 3365 20 stron. Monstertruck bl
Również dla Jamara 05 3365: Instrukcja (20 strony), Instrukcja (20 strony), Instrukcja (20 strony), Podręcznik (20 strony), Podręcznik (20 strony), Instrukcja obsługi (20 strony)

DE - Fernsteuerung 2,4 GHz 2CH
2
1
3
4
DE - Bedienelemente
1.
Programmierbox
2.
Lenkrad
3.
Gashebel
4.
Akku-/Batteriefach
5.
Ladebuchse
6.
Anschluss für Simulatorkabel
Sollten Sie über die Ladebuchse laden bitte
Batteriefachdeckel öffnen. Dies dient der Küh-
lung.
Programmierfeld
A.
Lenkung Reverse (umkehren)
B.
Power LED
C. Lenkungs-Trimmung
D. Ein-/Ausschalter
E.
Gas Reverse (umkehren)
F.
Power Check
G. Binde Taste
H. Dual-Rate (maximaler Lenkausschlag)
I.
Gas Trimmung
Minus pole
schwarzes Kabel
black cable
Kanal 1
Servo
Empfänger
Receiver
ON/OFF
#A
#B
Schalter
Motor
#C
Switch
4
5
6
Trimmung
Sollten die Räder nicht gerade aus nach vorne
zeigen obwohl das Lenkrad am Sender in Neu-
tralstellung ist, können Sie diese mit Hilfe der
Trimmregler am Sender in die korrekte Position
bringen. Trimm L/R = Lenkung
Sollten sich die Räder nach vorne bzw. hinten
drehen, ob wohl kein entsprechender Befehl
über den Gashebel am Sender gegeben wurde,
versuchen Sie den Speedregler durch das aus-
trimmen des Gastrimmreglers am Sender in die
Neutralstellung zu trimmen.
Trimm V/R = Vorwärts/Rückwärts
Einlegen der Batterien
•
Nehmen Sie den Batteriefachdeckel ab.
•
Legen Sie 4 x AA Batterien ein,
achten Sie auf die richtige Polung.
•
Setzen Sie den Batteriefachdeckel
wieder auf.
Regler (eingebaut) Version BL
Technische Daten:
Max. Belastung
Kurzzeit Belastung
Innenwiderstand
Einsatzbereich
Akkus
BEC-Spannung
BEC-Belastung
Motor-Typen
Schutzeinrichtung
Größe
Gewicht
Programmierbar
Einbau und Anschluss
Plus pole
Schließen Sie den Empfänger, den Motor, den Regler, den Akku
rotes Kabel
und das Servo nach dem folgenden Diagramm an.
red cable
Achten Sie unbedingt auf die richtige Polung des Antriebsakkus.
Verbinden Sie das rote Kabel mit dem '+'Pol und das schwarze
mit dem '-'Pol des Akkus. Die Anschlüsse '#A', '#B' und '#C' müs-
sen mit den Motoranschlüssen verbunden werden.
Verbinden Sie den Empfängerausgang „Kanal 2" über das An-
schlusskabel mit dem Regler. Beachten Sie die Belegung der
Kanäle Ihrer Fernsteuerung.
Verbinden Sie die Ausgänge des Reglers mit den Motoran-
schlüssen (#A', '#B' und '#C'). Eine vorgegebene Zuordnung
gibt es dabei nicht. Nachdem alles angeschlossen ist, führen Sie
einen Probelauf durch. Sollte der Motor die falsche Drehrichtung
haben, stecken Sie zwei beliebige Motoranschlusskabel um.
Regler
Hinweis:
ESC
Sie können über die Reverse-Funktion am Sender, die Drehrich-
Kanal 2
tung des Motors ändern. Beachten Sie aber unbedingt, dass der
Regler danach neu kalibriert werden muss.
GB - Transmitter 2,4 GHz 2CH
A
B
C
D
GB - Controls
1.
Programming Box
2.
Steering Wheel
3.
Throttle Lever
4.
Battery Hatch
5.
Charge Socket
6.
Simulator Cable Socket
If charging the batteries via the charging socket,
the battery hatch cover should be removed to
ensure sufficient cooling.
Programming Panel
A.
Steering Reverse (changed)
B.
Power LED
C. Steering Trim
D. ON/OFF Switch
E.
Throttle Reverse (changed)
F.
Power Check
G. Binding Button
H. Dual-Rate (maximum steering deflection)
I. Throttle Trim
60 A
390 A
0,0012 Ohm
RC-Cars
max. 2 LiPo-Zellen
6,0 V
3A
sensorlose BL-Motoren
Übertemperaturschutz/Unterspannungs-
abschaltung
~ 48,5 x 38 x 32 mm (mit Lüfter)
~ 90 g (ohne Anschlusskabel)
5 Programmierschritte (Bremse,
Unterspannung, Startmodus etc.)
E
F
G
H
I
Trim
If the wheels do not point straight forward even
though the steering wheel on the transmitter is
in neutral, you can adjust it with the trim button
on the transmitter.
Trim L/R = steering
Should the wheels rotate forward or backward,
even though no command was given through
the transmitter, then also the throttle needs to
be trimmed on the transmitter.
Trim V/R = forward/backward
Insert the batteries
•
Remove the battery compartment cover.
•
Fit the 4 x AA batteries, observe the correct
polarity.
•
Replace the battery hatch
GB - Controller (installed) Version BL
Technical data:
Max. Current
60 A
Burst Current
390 A
Internal Resistance
0,0012 Ohm
For Use With
Cars or Trucks scale
Battery packs
max. 2 LiPo cells
BEC Voltage
6,0 V
BEC Current
3A
Motor Types
Sensorless Brushless motors
Protective Circuits
Temperature cut-off
Size
~ 48,5 x 38 x 32 mm (with fan)
Weight
90 g (without cable)
Programmable
5 Programming steps (Break,
Low Voltage, Start Mode etc.)
Using Your ESC
Connecting the Receiver, Battery Pack and Motor
Connect the ESC, motor, receiver, battery and servo according
to the diagram.
Ensure that you observe the correct polarity of the battery pack.
The red cable should be connected to the '+' Plus Pole and the
black cable to the '-' Minus Pole. The '#A', '#B' and '#C' plugs
are connected to the motor. The 'SET' button initiate the pro-
gramming mode.
The ESC should be plugged into the throttle channel of your re-
ceiver which is normally channel 2. If in doubt, check your Radio-
Control System's instructions. The 3 Motor wires (#A', '#B' und
'#C') can now be connected, these connectors can be plugged in
any order, and if the motor rotates in the wrong direction any 2 of
the wires should be swapped.
Note:
You can use the servo reverse function of your transmitter to
reverse the motor direction but the ESC will have to be re-ca-
librated afterwards.
