Olympus ARROW POINTER Instrukcja obsługi - Strona 13
Przeglądaj online lub pobierz pdf Instrukcja obsługi dla Sprzęt laboratoryjny Olympus ARROW POINTER. Olympus ARROW POINTER 20 stron. Arrow pointer
ASSEMBLY
²
@
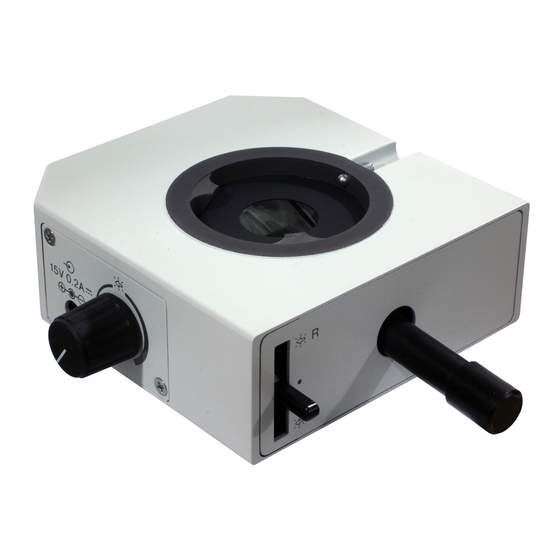
Fig. 5
²
|
@
³
Fig. 6
1
Mounting the Arrow Pointer
1. Remove the observation tube from the microscope frame in use @, and
attach the arrow pointer ² so that the pointer control lever is located on
the front.
2. Attach the observation tune removed before above the arrow pointer.
2
Connecting the AC Adapter
Before connecting the AC adapter, turn the pointer brightness con-
trol fully counterclockwise to the OFF position.
The power cord is vulnerable when bent or twisted. Never subject it
to excessive force.
ƒ
Always use the power cord and AC adapter provided by Olympus. IF
no power cord is provided with the microscope, please select the
proper power cord by referring to section "PROPER SELECTION OF
THE POWER SUPPLY CORD" at the end of this instruction manual.
1. Firmly connect the AC adapter's output plug @ to the AC adapter input
connector ² on the left side panel of the arrow pointer.
2. Connect the power cord's connector | into the AC adapter's input con-
nector ³, then connect the power cord's plug ƒ to the wall power outlet.
The power cord should be connected to a grounded, 3-conductor
power outlet. If the power outlet is not grounded properly, Olympus
can no longer warrant the electrical safety performance of the equip-
ment.
U-APT
(Fig. 5)
(Fig. 6)
10