Clippasafe 108 Instrukcja obsługi - Strona 2
Przeglądaj online lub pobierz pdf Instrukcja obsługi dla Wyposażenie wnętrz Clippasafe 108. Clippasafe 108 12 stron. Wooden playpen with base mat
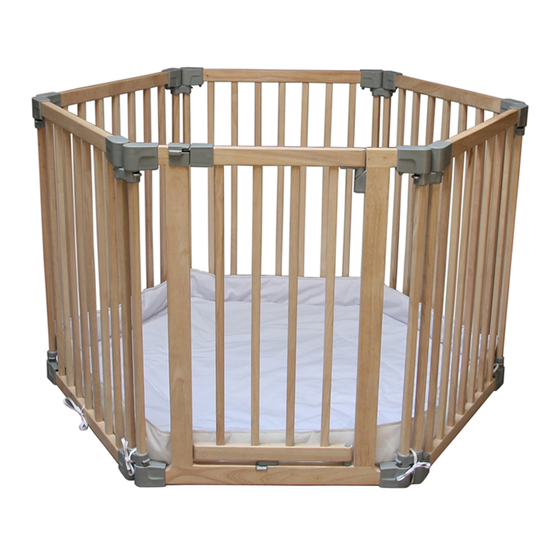
INSTALLATION - AS A PLAYPEN
1.
The playpen should be erected by two people, to avoid
overstressing the hinges and slats during assembly.
Place the playpen vertically upright on a stable surface.
Each panel has a hinge at each end and the hinges are
secured together, top and bottom by a connector ( Part A ) .
To unfold each slatted panel, you need to unlock each hinge.
To do this, slide the catch underneath each top corner
hinge ( 1 ) outwards and gently lift the panel ( 2 ) whilst
holding down the adjacent panel. This will allow you to
rotate the panel around the outer slat ( 3 ) .
To secure each panel again, push down on it firmly ( 4 )
until it locks. You can check that each panel is securely
locked, by gently trying to rotate it. If it will not rotate,
it is securely locked.
To set up the playpen as a hexagon adjust the six panels,
starting with the door panel and finish by securing the last
element to the door panel to complete the shape.
For more detailed instructions follow Step 2 below.
2.
Hexagonal Configuration
To set up the playpen as a hexagon, unlock the hinge of the door panel ( C ) and rotate the panel
60° until the hexagon symbol ( 1 ) on the hinge lines up with the square symbol ( 2 ) on the
adjacent hinge as shown in ( b ) . Secure the hinge in this position by pushing down on the hinge.
Unlock the adjacent hinge of the next panel and rotate the hinge with the door a further 60°
until the hexagons on both hinges align as shown in ( c ) . Again, secure the hinge in this position
by pushing down on it.
To unfold the next panel, unlock the hinge at the other end
of the panel and rotate all of the remaining panels around
until the hexagon symbol ( 1 ) on the hinge lines up with the
square ( 1 ) on the hinge of the next element ( d ).