ambiq micro Apollo4 Blue Plus Skrócona instrukcja obsługi - Strona 9
Przeglądaj online lub pobierz pdf Skrócona instrukcja obsługi dla Płyta główna ambiq micro Apollo4 Blue Plus. ambiq micro Apollo4 Blue Plus 19 stron.

Apollo4 Plus Display Kit Quick Start Guide
4.
Quick Start
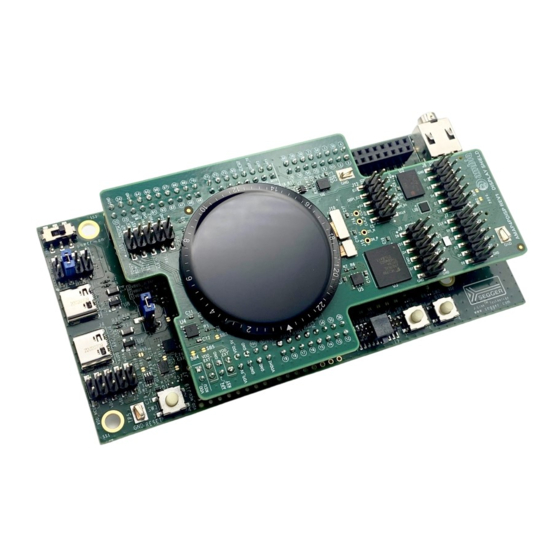
The Apollo4 Plus Display Kit comes with the following items:
▪ Apollo4 Plus Evaluation Board (EVB), revision 2
▪ Apollo4 Plus Display Shield, revision 1
▪ USB Type C cable
▪ Four adhesive-backed rubber feet
▪ Extra jumpers
Caution: The EVB has components loaded on the back of the board. Care should be taken to not damage
these components. The included rubber feet should be applied to the bottom of the board to prevent direct
contact between the components and a desk surface.
The EVB in the Apollo4 Plus Display Kit comes with jumpers pre-configured for default operation. Also, it
has been pre-programmed with the Binary Counter example program. To begin EVB program execution,
first carefully attach the Apollo4 Plus Display Shield to the Apollo4 Plus EVB if not already attached. To do
this, press the two boards together as evenly as possible until the display shield is fully seated on the
connectors of the EVB. Then connect the USB-C cable from a USB port on a PC to the J-Link USB
connector (J6) on the EVB, and make sure the power switch (SW4) has been turned on. The LEDs on the
bottom of the EVB should begin to count up in binary, from 0 to 7.
The AmbiqSuite SDK provides many example programs that may be run on the Display Kit. To run these
examples, download the SDK via the link provided above and select any of the pre-built examples in the
SDK at /boards/apollo4p_evb_disp_shield_rev2/examples.
QS-A4PDK-1p0
Page 9
2022 Ambiq Micro, Inc.
All rights reserved.
